Editing Expense Reports (V2)
The following functionality is for Expenses V2. If you are unable to complete the steps below you may be set up with Expense V1. See Expenses (V1) for V1 documentation.
To enable Expenses V2 contact your Account Manager.
Your agency may require you to submit on the job expenses through a Web Time Entry (WTE) Expense Report. Expense Reports can be created, edited, and tracked through the WTE Expense Dashboard.
Saved or Submitted Expense Reports can be edited at any time until they are approved.
-
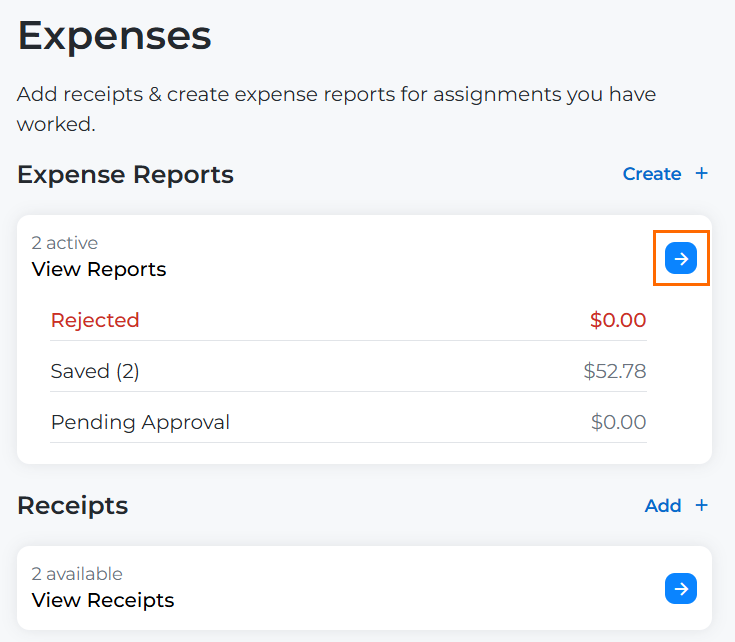
From your Web Time Entry Dashboard, select the Expenses tab.
-
Select the blue arrow next to View Reports.
-
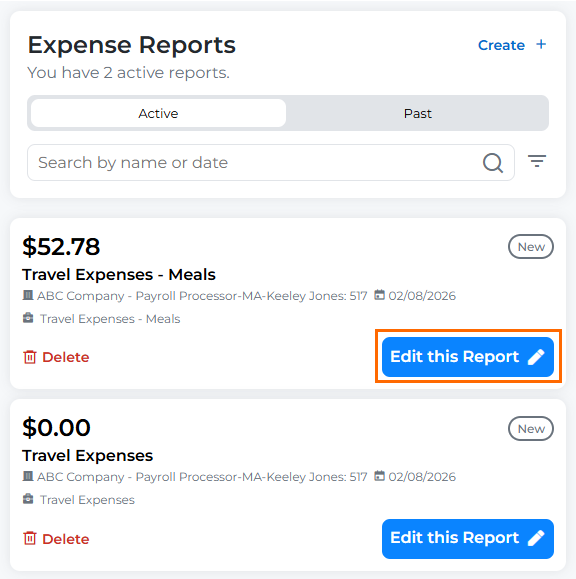
Locate the Expense Report you need to edit. You can do this by filtering by Active or Past Reports, searching for the Name or Date of the report, or using the scroll bar to look through all your reports.
-
Click the Edit this Report button on the report you want to edit.
-
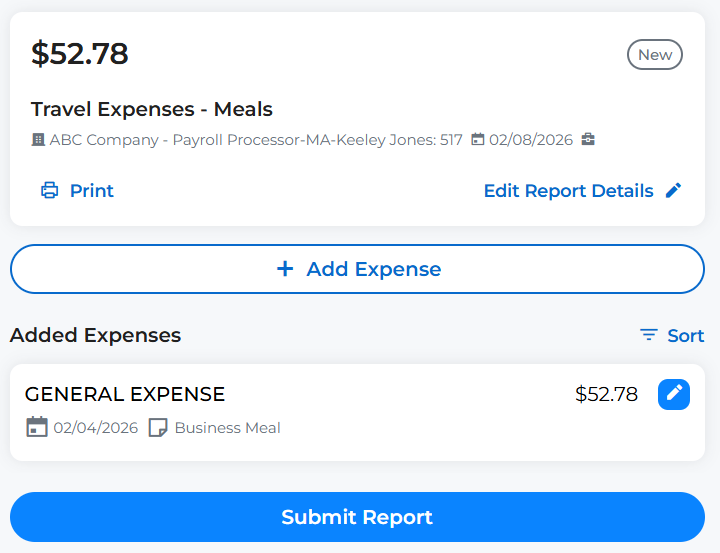
From the edit screen, you can take the following actions:
-
Edit Report Details: The only Report Detail you can edit once a report is saved is the Report Name.
-
Add Expense: Add a new or existing receipt to your report. Select Add Receipt if you haven't uploaded your receipt yet. Select Browse Available Receipts if you already uploaded your receipt using the instructions in Uploading Receipts to your Expense Dashboard (V2).
All receipt files must adhere to the following guidelines:
- Acceptable file types: .jpg, .jpeg, .png, .gif, .tif, .pdf
- Maximum Image size: 4MB
If you choose not to attach a receipt to your expense report, a Missing Receipt Declaration may be automatically attached to your report. A Missing Receipt Declaration ensures expenses can still be submitted when documentation is unavailable while maintaining accountability and compliance. Whether or not a declaration is attached to your report depends on your agency's configuration.
-
Edit Existing Expenses: Click the blue pencil icon next to an expense to edit it. From the slide out, all Expense Detail fields are editable.
-
Delete Expense: Click the blue pencil icon next to an expense to edit it, then click Delete Expense.
-
Delete Report: You may want to delete a report if you entered it under the wrong Week Ending Date or Client Assignment. Click Delete Report in the upper right corner.
-
Submit Report: Use the Submit Report button to submit your expense report for approval. This button is available if your report was Saved, but not Submitted.
-