Uploading Receipts to your Expense Dashboard (V2)
The following functionality is for Expenses V2. If you are unable to complete the steps below you may be set up with Expense V1. See Expenses (V1) for V1 documentation.
To enable Expenses V2 contact your Account Manager.
Your agency may require you to submit on the job expenses through a Web Time Entry (WTE) Expense Report. Expense Reports can be created, edited, and tracked through the WTE Expense Dashboard.
Receipts are uploaded to your Expense Dashboard and attached to individual Expense Reports. The most common way to upload receipt images is directly through the Expense Dashboard. Follow the steps below to learn how to upload receipts.
-
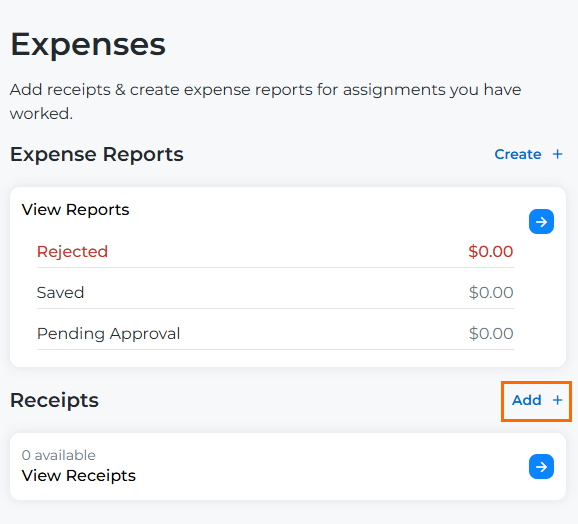
From your Web Time Entry Dashboard, select the Expenses tab.
-
Next to the Receipts heading, select Add.
-
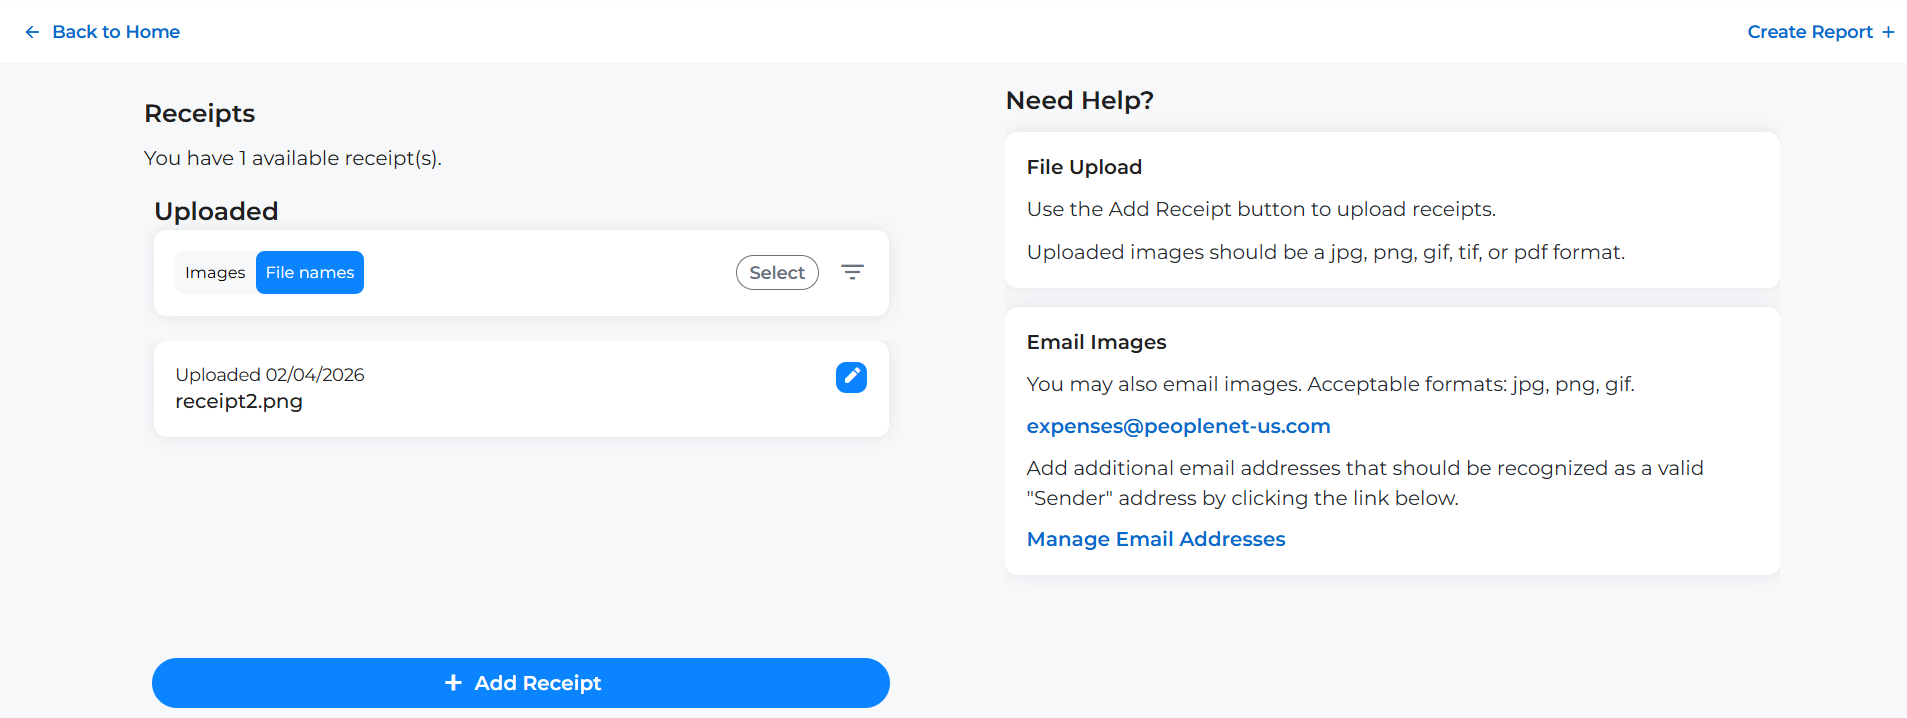
You will be prompted to upload a file from your device. Select the correct file and click Open.
All receipt files must adhere to the following guidelines:
- Acceptable file types: .jpg, .jpeg, .png, .gif, .tif, .pdf
- Maximum Image size: 4MB
-
Your receipt now appears under the Uploaded heading. You can now perform the following actions.
-
Add additional Receipts: Click the + Add Receipt button.
-
Return to the Expense Dashboard: Click Back to home.
-
Create an Expense Report: Click Create Report +. See Creating an Expense Report (V2) for next steps.
-
For information on uploading receipts via email, see Emailing Expense Receipts to BTE (V2).