Match Assignments
Overview
This is the second step in processing files. Match suggestions are created based on matching criteria: Assignment ID, Employee ID, Full Name Match, and Fuzzy Name Match.
Steps
To begin assignment matching:
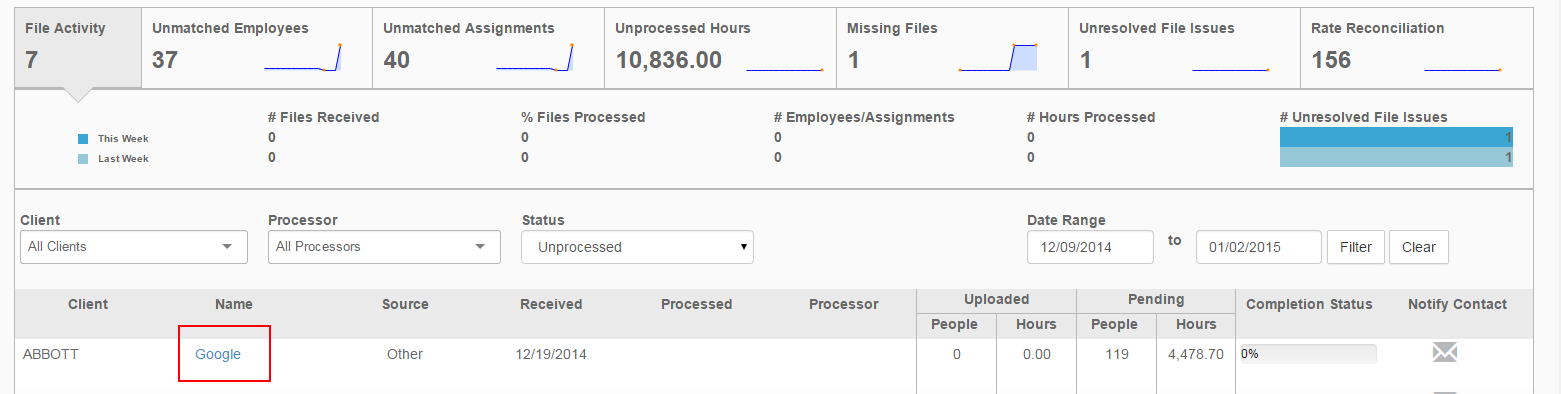
- Locate and select the file you want to process by clicking on the file name.
- Select Match Assignments on the left of the screen.
- This will match assignments found in the data file with assignments found in .
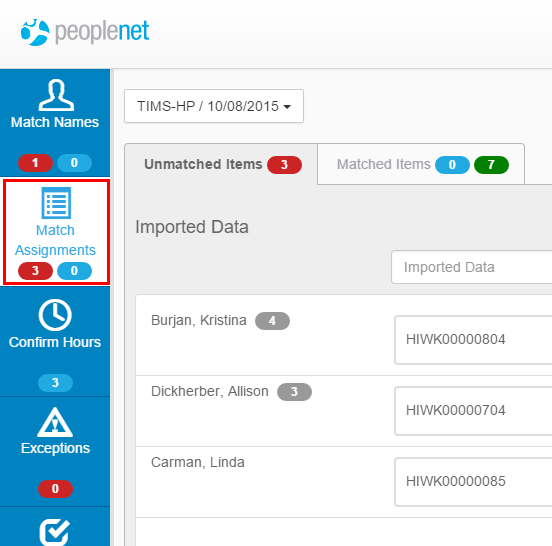
Matched and Unmatched items will display in separate tabs:
Unmatched Items
All unmatched assignments will appear in the Unmatched Items tab.
- If there are system suggested matches, they will appear in the unmatched items section.
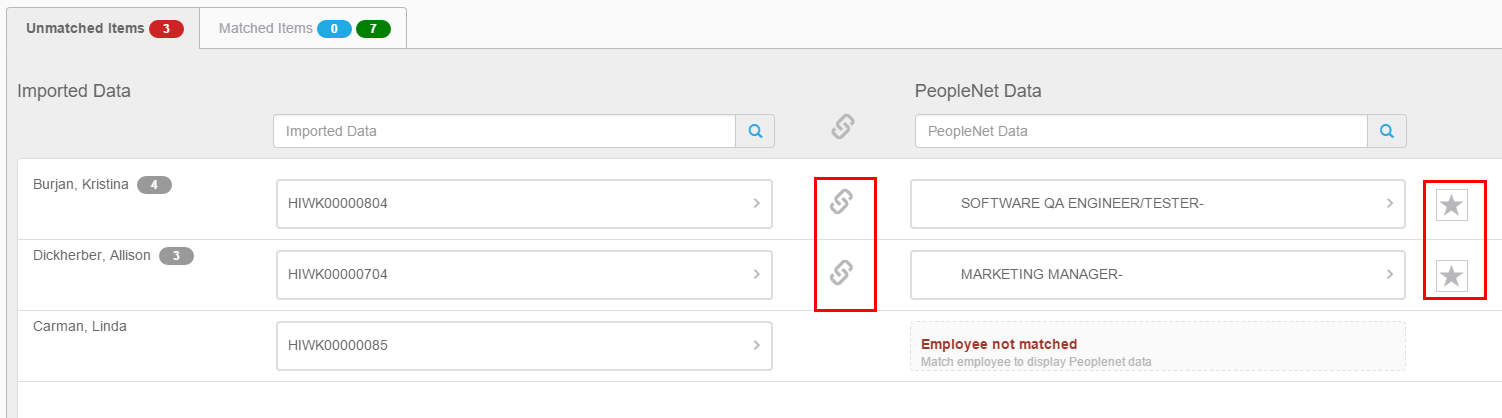
- If a match is suggested, both items will appear on the same row:
- Imported Data items will appear on the left.
- Data items will appear on the right.
Only confirm a match if you are certain that the records are for the same.
- To match a record in the file with a suggested record in , select the gray Link icon
 after confirming that your items are on the same row.
 - After creating a match, that match will automatically move to the lower part of the screen.
- To automatically match all imported data to a specific assignment going forward, select the Star icon
 .
. 
- Assignments marked with
 are ended in .
- Please update the assignment details in your front office system.
- Employee not matched indicates that the employee in the Imported Data column is not yet matched to any records in Data.
- To correct this, please create a match.
- See Match Names for more information.
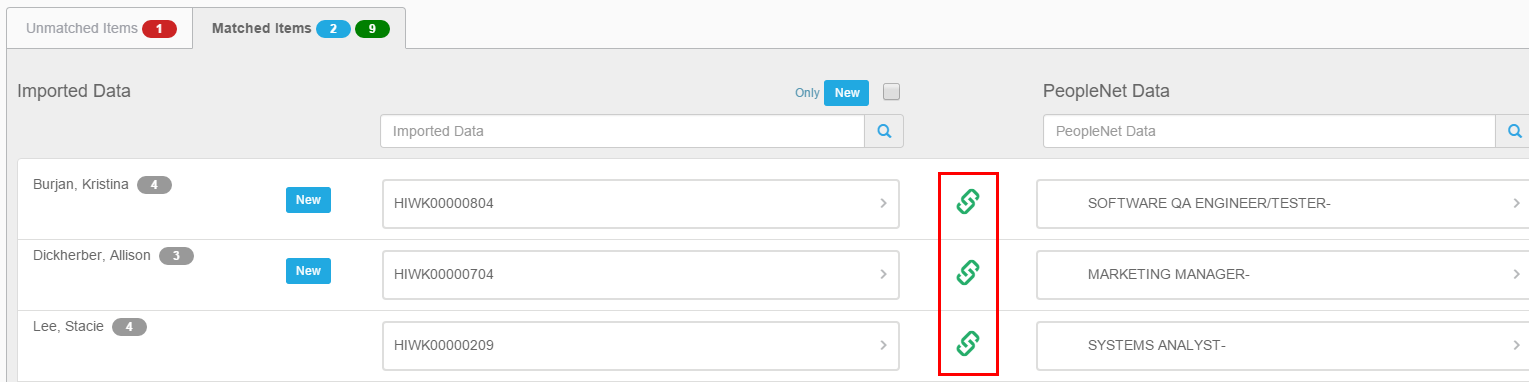
Matched Items
Items that have been matched will appear in the Matched Items tab.
- Newly matched items appear in blue.
- Total number of matches appears in green.
If you need to remove a match, select the green Link icon  and the items will move back to the Unmatched Items section in the upper part of your screen.
Other Options
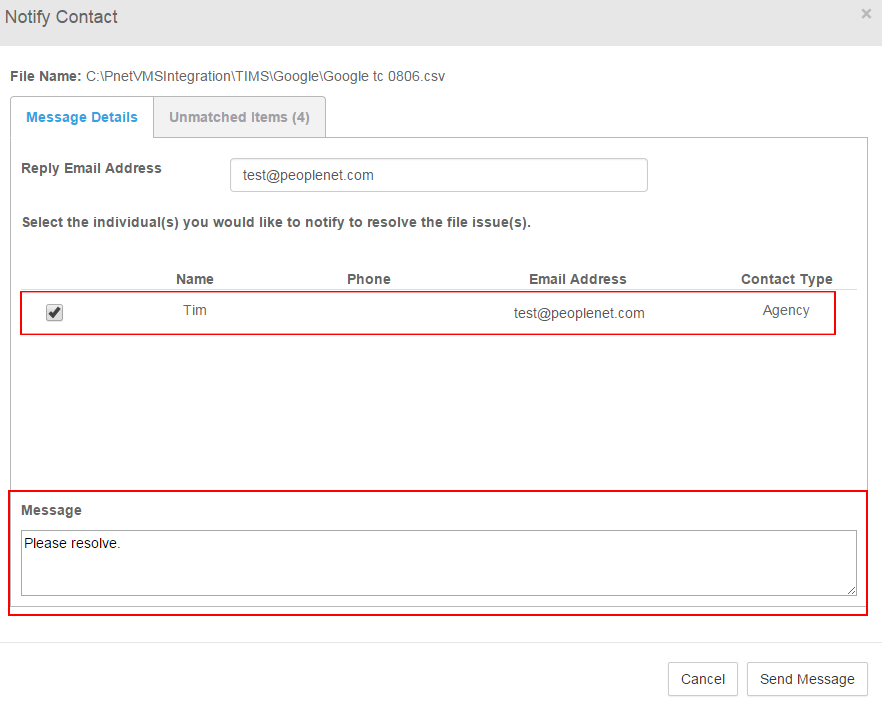
Notify Contact
Follow these steps if you want to send a reminder to a contact to resolve file issues:
- Select the Message icon
 .
. - Select the recipient from the list.
- If necessary, edit the text that appears in the Message field.
- Open the Unmatched Items tab to review any details related to file issues.
- When you are ready to send the notification, select Send Message.
Save & Finish Later
Select Save & Finish Later to save all changes made and return to the dashboard.
Match Names
Select Previous to return to the previous step on Match Names.
Confirming Hours
Select Next when you have matched all known assignments are ready to move on to Confirm Hours.
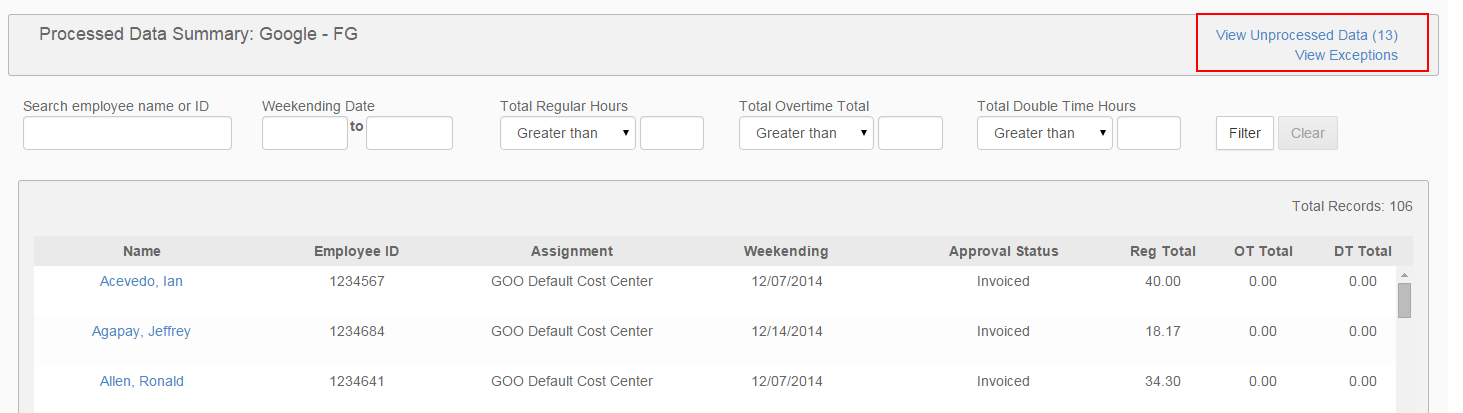
View Processed Data
Select View Processed Data in the upper right to view processed data on a file.
This view provides a summary of the time that is already processed per file. You can use the options at the top of the screen to filter and research specific data details.
- Select View Unprocessed Data to return to the previous screen.
- Select View Exceptions to view any pending exceptions for the file.
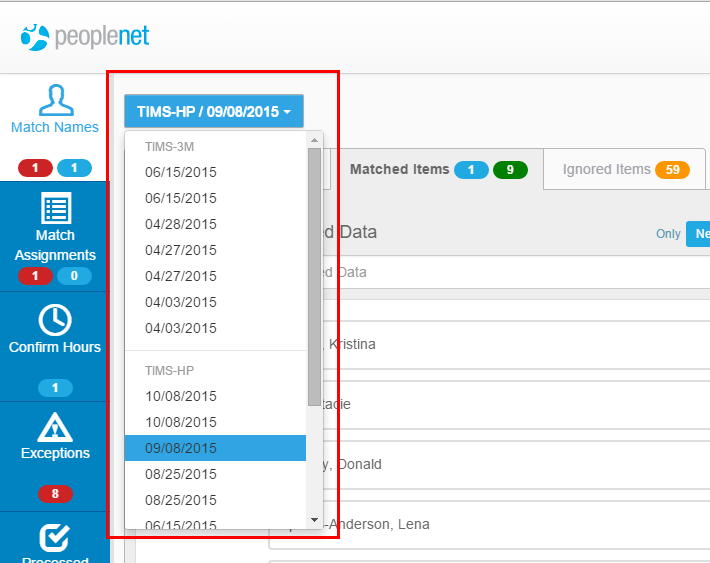
Review a Different File
To review a different file, open the file drop down menu in the upper left and make a selection.