Amplify Present Pro Templates
You need Bullhorn Amplify Edition to use this feature.
Pro templates in Amplify Present let you get started quickly with a polished document structure already in place. They contain all the essential building blocks for a polished document, so you can focus on tailoring the layout and content to suit your needs. In this guide, you’ll learn how to customize a prebuilt template to deliver professional materials in seconds.
If you want more control and flexibility over your template design, you can also build an Amplify Present Template From Scratch.
Add a New Template
-
In Bullhorn ATS, go to Admin > Amplify Admin.
-
Click the Amplify Present tab.
-
Click Add Template.

-
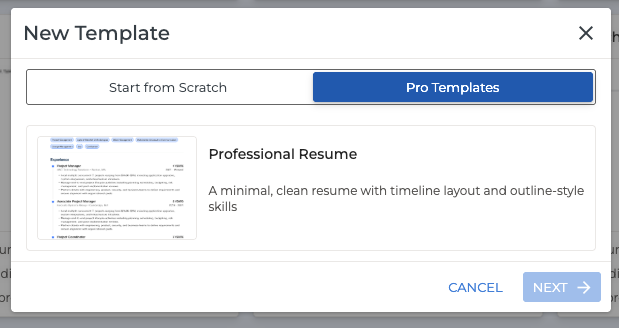
Select Pro Templates and choose the Professional Resume option.
-
(Optional) Edit the following details:
-
Name: What you want to call your template.
-
Preview Text: A short description to help users understand what this template is for.
-
-
Click Create Template to open the build area.
Build Area Overview
Inside the build area you’ll see:
-
Document Preview on the left.
-
Content Blocks, Styling, and Settings on the right.
To help you visualize your layout, Amplify loads a sample candidate (“John Smith”). Click Select Candidate to Preview at the top of the preview to test your template using another candidate’s data.

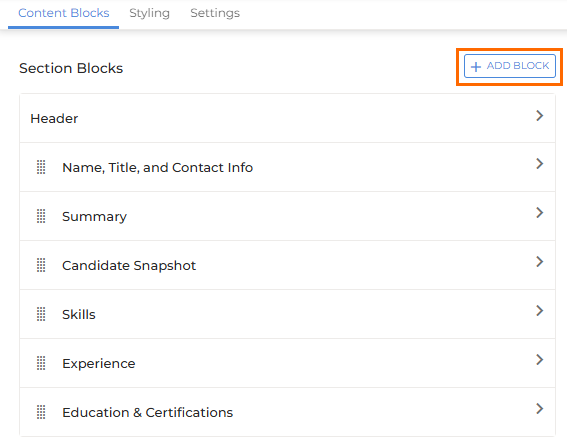
Content Blocks
Content blocks are the building pieces of your document. Prebuilt templates come with a set of blocks already arranged for you, and you can add additional blocks by clicking Add Block. You can also click Add Block > Amplify Block to generate AI-powered content.
Within each block you can:
-
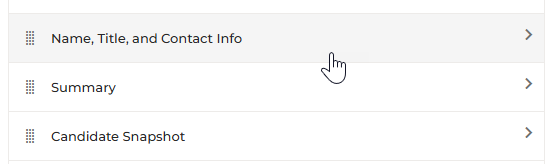
Click on a block to expand the section and configure its options.
-
Drag blocks using the grid icon (
 ) to reorder content.
 -
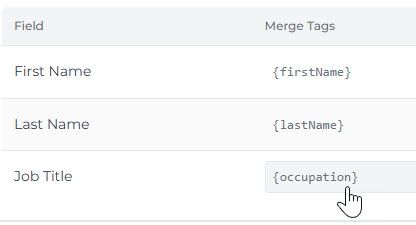
Edit merge tags to control which candidate fields populate the block.
-
Remove unwanted fields within a block.

If a merge tag is empty for a candidate, that field simply won’t appear in the final document.
Available Content Blocks
Name, Title, and Contact Info
Displays the candidate’s name, job title, availability, phone number and email address. You can choose which fields this information is pulled from and optionally delete some fields (availability, phone, and email).
Summary
Displays a short candidate summary. This pulls from the Summary field by default, but you can select another field by clicking the merge tag.
You can also remove this section and generate a summary using an AI Block if you prefer.
Candidate Snapshot
Displays the candidate’s industry, working experience and location. You can click the merge tags to change which candidate fields this info pulls from.
Skills / Experience / Education & Certifications
These blocks showcase a candidate’s skills, employment, and education history.
Within these blocks you can configure:
-
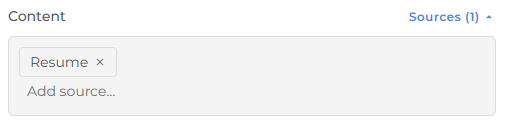
Sources: Click Add source… and begin typing a field name. If you select resume, the system will use the candidate’s resume file as the source and will automatically attempt to parse the relevant information.
-
Maximum Amount: Set how many items or entries to display.
Footer
Build a footer using merge tags. This appears at the bottom of each page. The default footer includes recruiter name, email, and phone.
Amplify Block
Use an Amplify Block to generate AI-powered content by entering a prompt.

To choose which candidate data is passed to the LLM![]() An AI language model (or LLM) is a system trained on large amounts of text that can read, interpret, and generate human-sounding language. Amplify uses one to read your Bullhorn records and produce output based on the prompts you configure. It does not search the internet or access outside data on is own. It only works with what you give it. when generating text, click Sources and then select the data you’d like to include in the Content area.
An AI language model (or LLM) is a system trained on large amounts of text that can read, interpret, and generate human-sounding language. Amplify uses one to read your Bullhorn records and produce output based on the prompts you configure. It does not search the internet or access outside data on is own. It only works with what you give it. when generating text, click Sources and then select the data you’d like to include in the Content area.
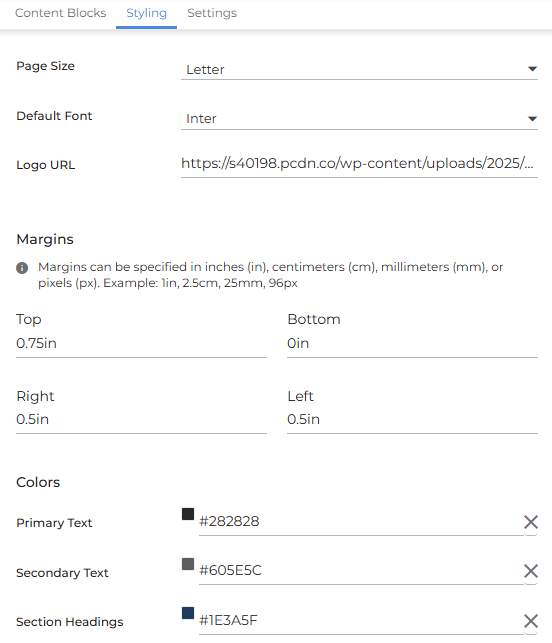
Styling
Use the Styling panel to control the overall document appearance, including fonts, colors, and page setup.
-
Page Size: Choose your document size.
-
Default Font: Set the font for your document.
-
Logo URL: Add a logo to display in the header.
-
Margins: Set your preferred page margins.
-
Colors: Customize the colors for headers, section titles, text, and divider lines.
Settings
Use the Settings panel to update high level template details at any time, including:
-
Template Name
-
Description
-
Primary Entity
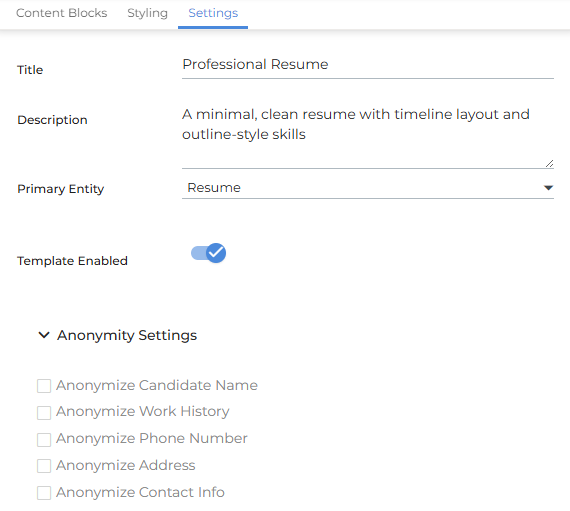
Anonymity Settings
Choose which candidate details should be automatically hidden in generated documents. Check the boxes for any fields you want anonymized.
Preview and Save Your Template
When you’ve finished designing your template, click Preview in the top-right to generate a sample of your document.
Click Back (top left) to return to the build area.
When you’re satisfied, click Save in the build area to finalize your template.
Generate a Document
Once your template is saved, any ATS user can generate documents directly from a candidate record. See Generating an Amplify Present Document for detailed steps.