Contextual Data Viewer for ATS
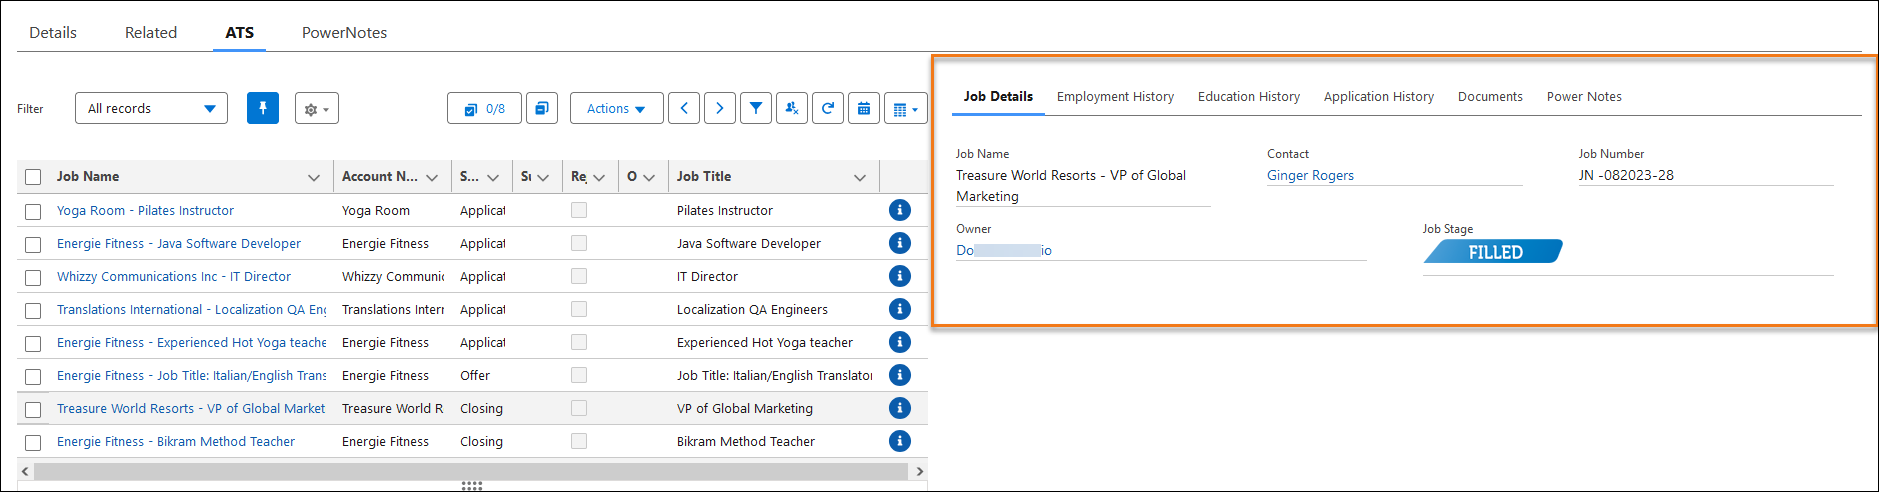
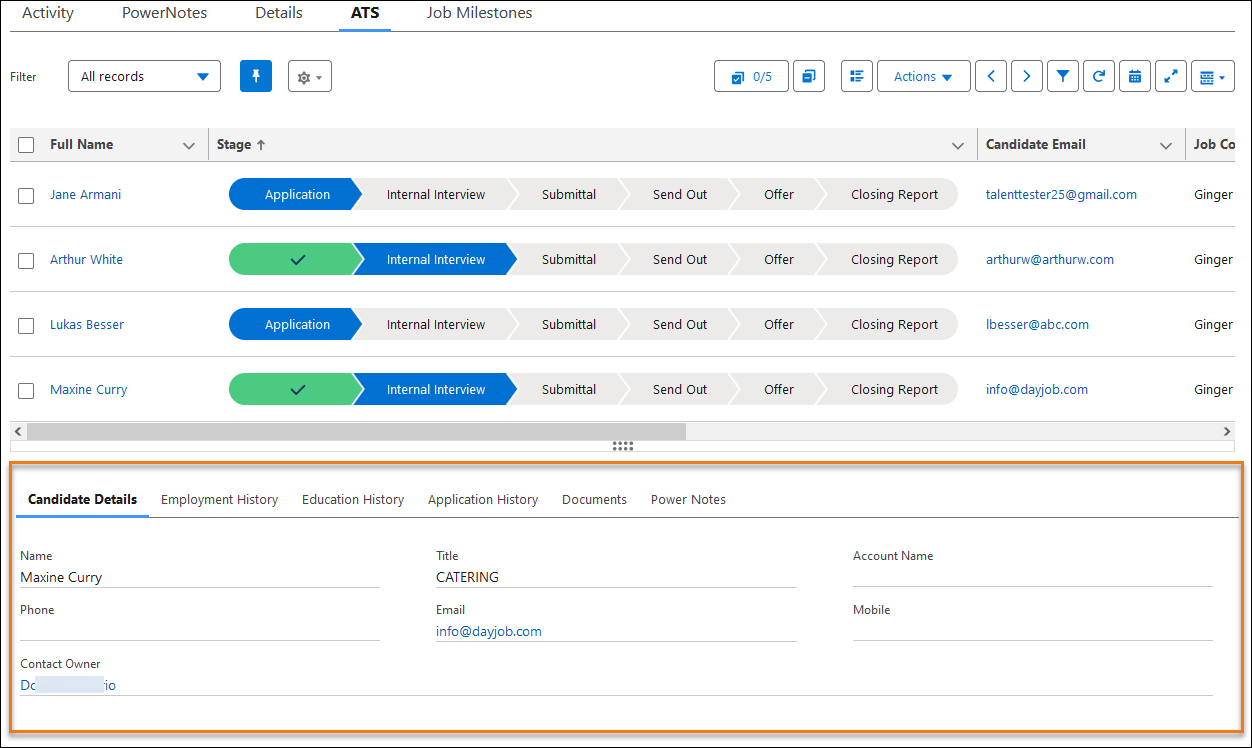
The Contextual Data Viewer lets you quickly see important application details right on the ATSv2 Table or Chevron View. You no longer have to open and close multiple windows or navigate away from the page. Once you click on a row, and the information will appear next to (for ATS Candidate records) below the ATS (for Job records).
Why Does It Matter?
Reviewing candidate applications can take up a lot of time, especially when there are hundreds of applicants. This new feature saves time by giving you quick access to key details, so you can find the right candidate faster.
Before You Start
Contextual Data Viewer for ATS is a Bullhorn Recruitment Cloud functionality available from package version 2025.02 onward.
Navigation
Once the Data Viewer is added to the page, users can open it by clicking on an empty portion of the row where the Candidate or the Job name is displayed.
To see data related to a different Candidate/Job, users can simply click on the relevant row, and the data in the Data Viewer will be updated dynamically. The Data Viewer will stay open throughout.
To close the Data Viewer, simply click on the row displaying the Candidate/Job currently shown in Data Viewer.
Data Viewer Flows
Data Viewer has been developed using Salesforce Flows. The following four Flows are now part of the managed package:
- ATS Contact Contextual Data Viewer (Below ATS): Shows Data Viewer below ATS on Candidate records
- ATS Contact Contextual Data Viewer (Right of ATS): Shows Data Viewer to the right of ATS on Candidate records
- ATS Job Contextual Data Viewer (Below ATS): Shows Data Viewer below ATS on Job records
- ATS Job Contextual Data Viewer (Right of ATS): Shows Data Viewer to the right of ATS on Job records
Data Viewer Header
We leverage standard Flow headers for Contextual Data Viewer and out of the box we show Candidate/Job Name + icon in the header section.
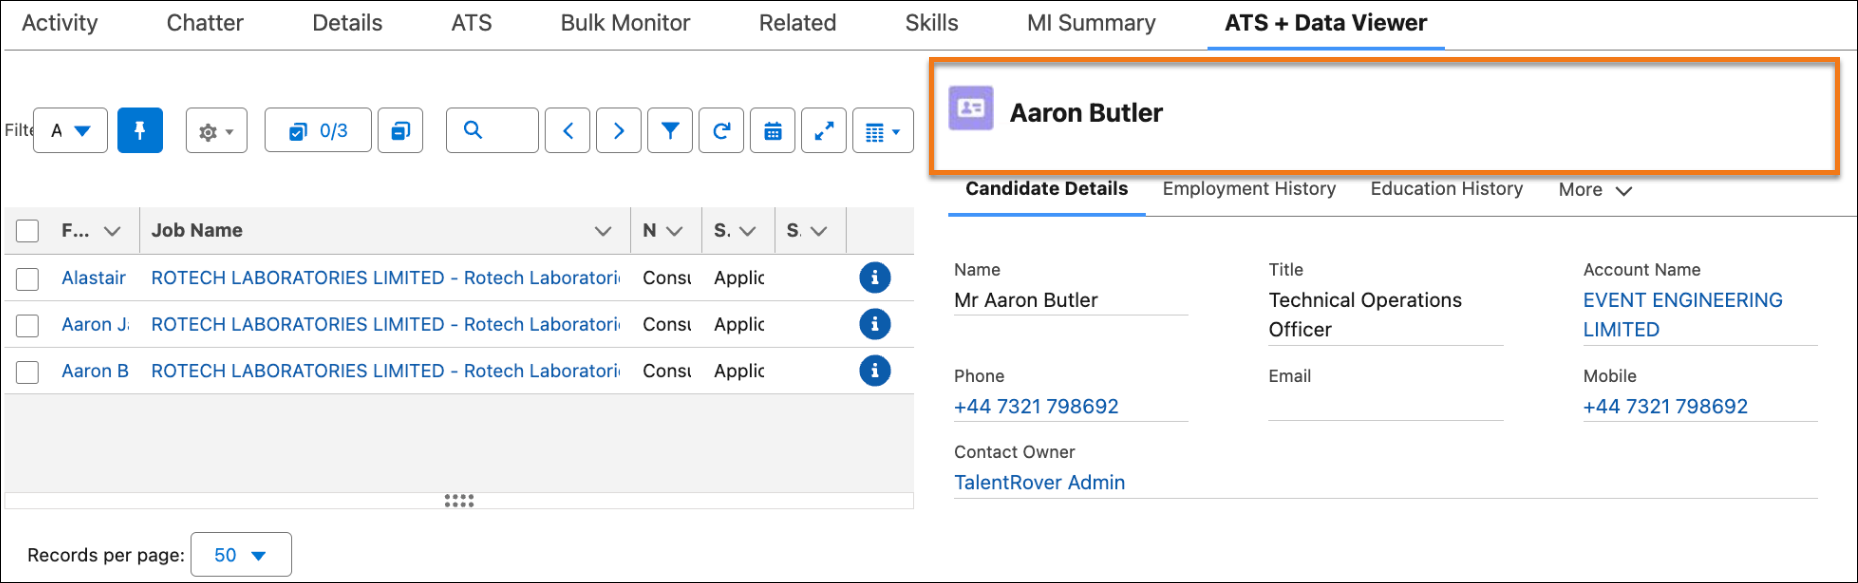
It’s possible to customize the header by leveraging the standard Flow header capabilities, for more details see Contextual Data View Flow Header
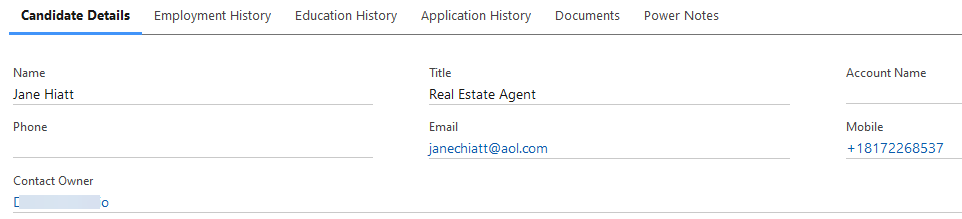
Data Viewer Tabs
Regardless if Data Viewer displays below or to the right, in the out of the box configuration it has six tabs:
- Candidate Details/Job Details: Compact page layout from the Contact/ Job object
- This details tab will depending on the record the Data Viewer is on.
- This details tab will depending on the record the Data Viewer is on.
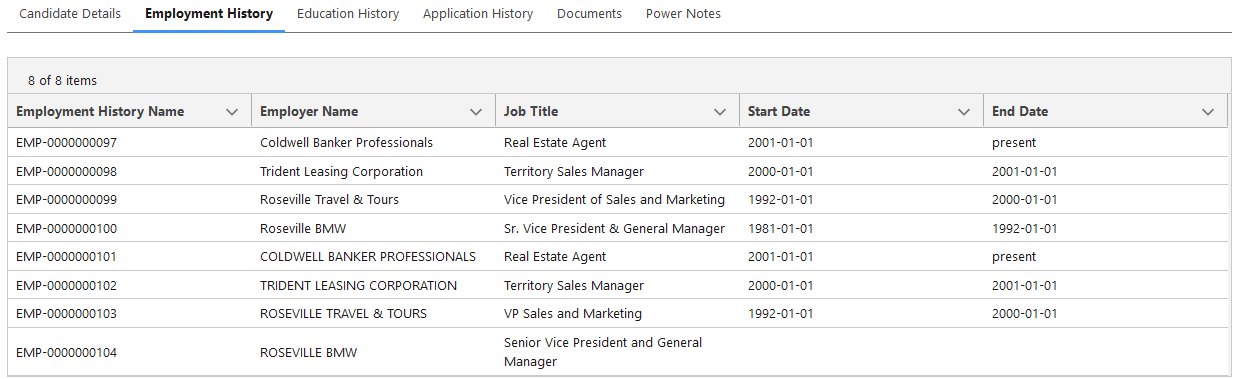
- Employment History: Selection of fields from the Employment History object
- Education History: Selection of fields from the Education History object

- Application History: Selection of fields from the Applicationv2 object

- Documents: Selection of fields from the Contact Document object and Resume file preview

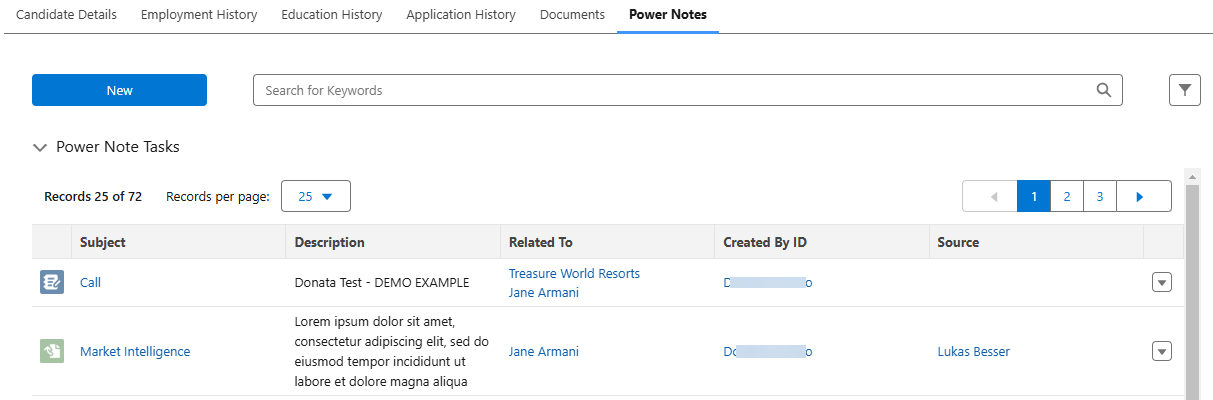
- PowerNotes: PowerNotes component
For more information on configuring these tabs, see Contextual Data Viewer for ATS Customization
Configuration Steps
The configuration steps in this section enable Admin users to add the out-of-the-box version of Contextual Data Viewer to ATS.
To add Data Viewer to the ATS Component, follow these steps:
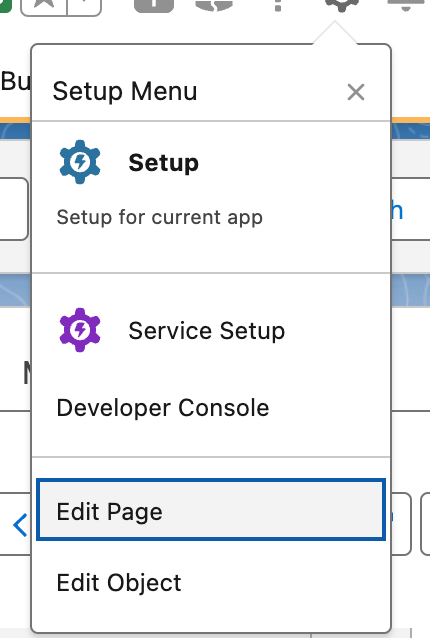
- Go to a Contact page and open the record Page in App Builder.
- Start from a Job page, if you would like to add the Data Viewer to Job Records.
- Start from a Job page, if you would like to add the Data Viewer to Job Records.
- Remove the ATS component from the layout and replace with a standard Flow component.
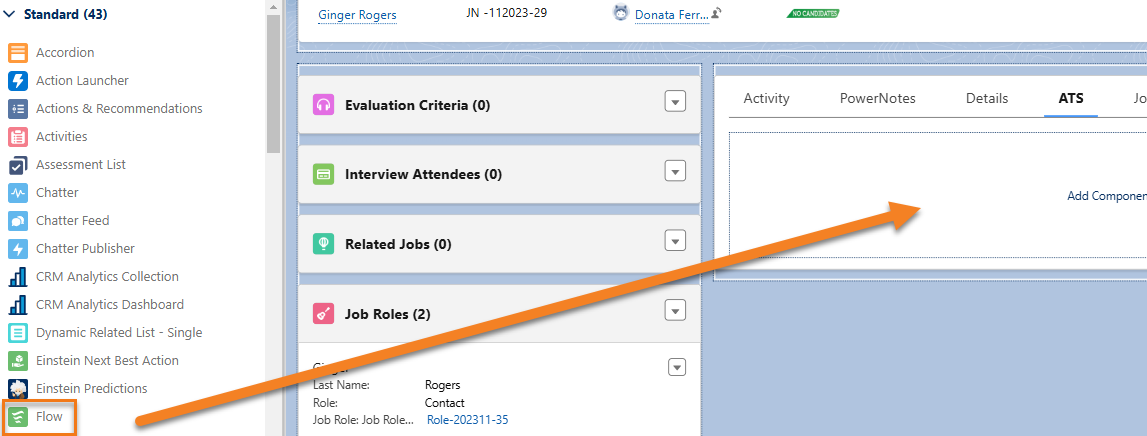
- After placing the Flow component on the page, a Flow dropdown appears on the right. Select the relevant Data Viewer Flow (ATS Contact Contextual Data Viewer (Below ATS) or ATS Contact Contextual Data Viewer (Right of ATS)).
- If you would like to add the Data Viewer to Job Records, choose either ATS Job Contextual Data Viewer (Below ATS) or ATS Job Contextual Data Viewer (Right of ATS).
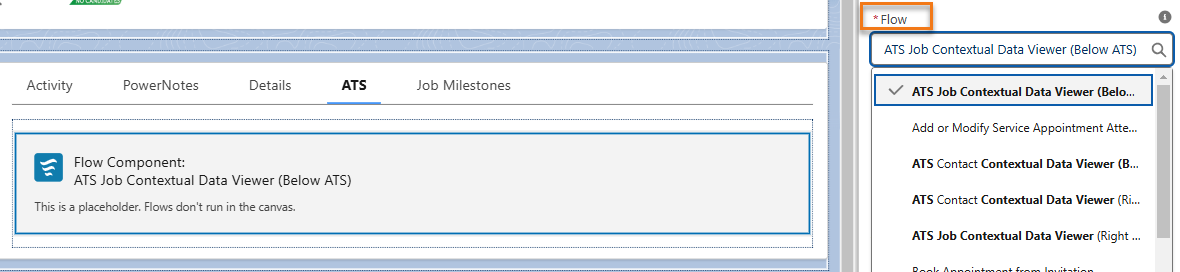
- If you would like to add the Data Viewer to Job Records, choose either ATS Job Contextual Data Viewer (Below ATS) or ATS Job Contextual Data Viewer (Right of ATS).
- Tick the Pass Record ID into this Variable checkbox.
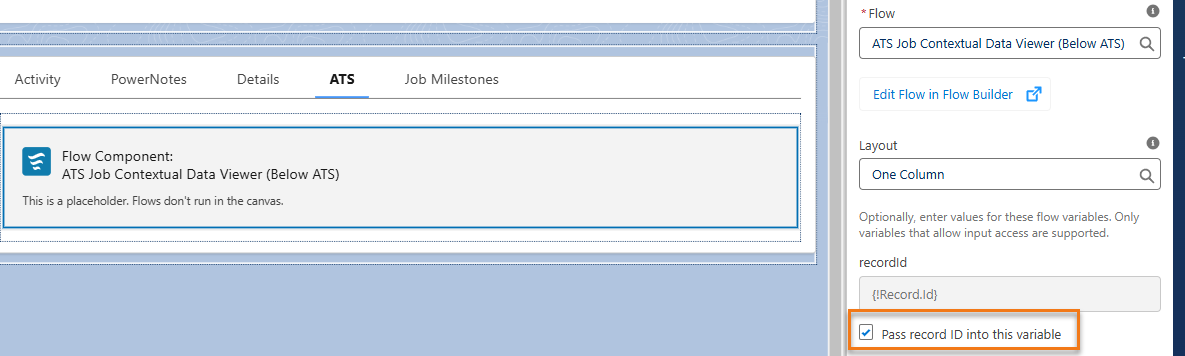
- Click Save.