Contextual Data View Flow Header
We leverage standard Flow headers for Contextual Data Viewer and out of the box we show Candidate/Job Name + icon in the header section.
Here are some examples of what can be changed:
-
Change Icon
-
Add fields
-
Add links to related records
-
Open page from icon
Change Icon
In this example we will walk through an example for how to change the icon.
-
Go to the Display Text section for {!fetchContact.firstRetrievedRecord.Name} (on Candidate ATS Flow, it will be{!fetchJob.firstRetrievedRecord.Name}).
-
Go to the text editor you see in the configuration area of the Display Text component on the right.
-
Delete the existing icon to remove the out of the box icon.
-
Click on the Image button in the text editor and upload the new icon you want to show in the Data Viewer header.
Here are things of note:
-
There is no option to use links to pictures. The icon can only be uploaded from your computer.
-
The Display component does not have a size control. Use the icon in the size you want to see on the screen. (32x32 px was used for the out-of-the-box-configuration).
-
A small hack exists to control the space between Icon and the following text. Add “_“ (underscore) or any other charset between them and set the same font color as your background (the color white was used for the out-of-the-box-configuration).
Add More Fields
In this example we want to add some more fields from the Contact object to display along with the Candidate Name.
-
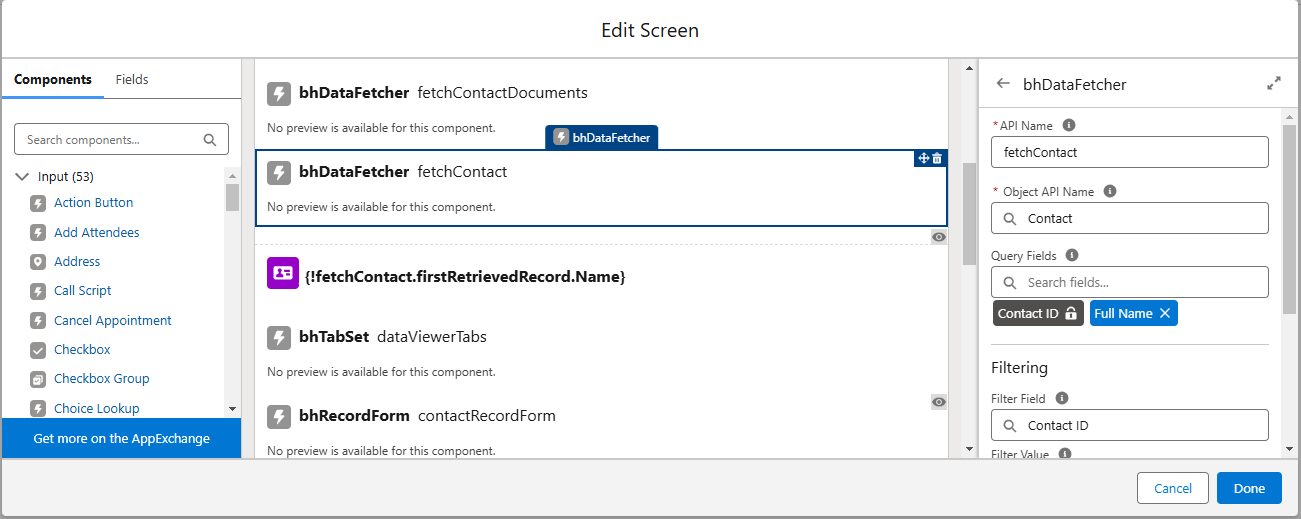
Select the bhDataFetcher fetchContact component in the middle section of the Edit Screen page.
-
Go to the right hand column and add the field/s you want to display in the Header in the Query Fields lookup.
-
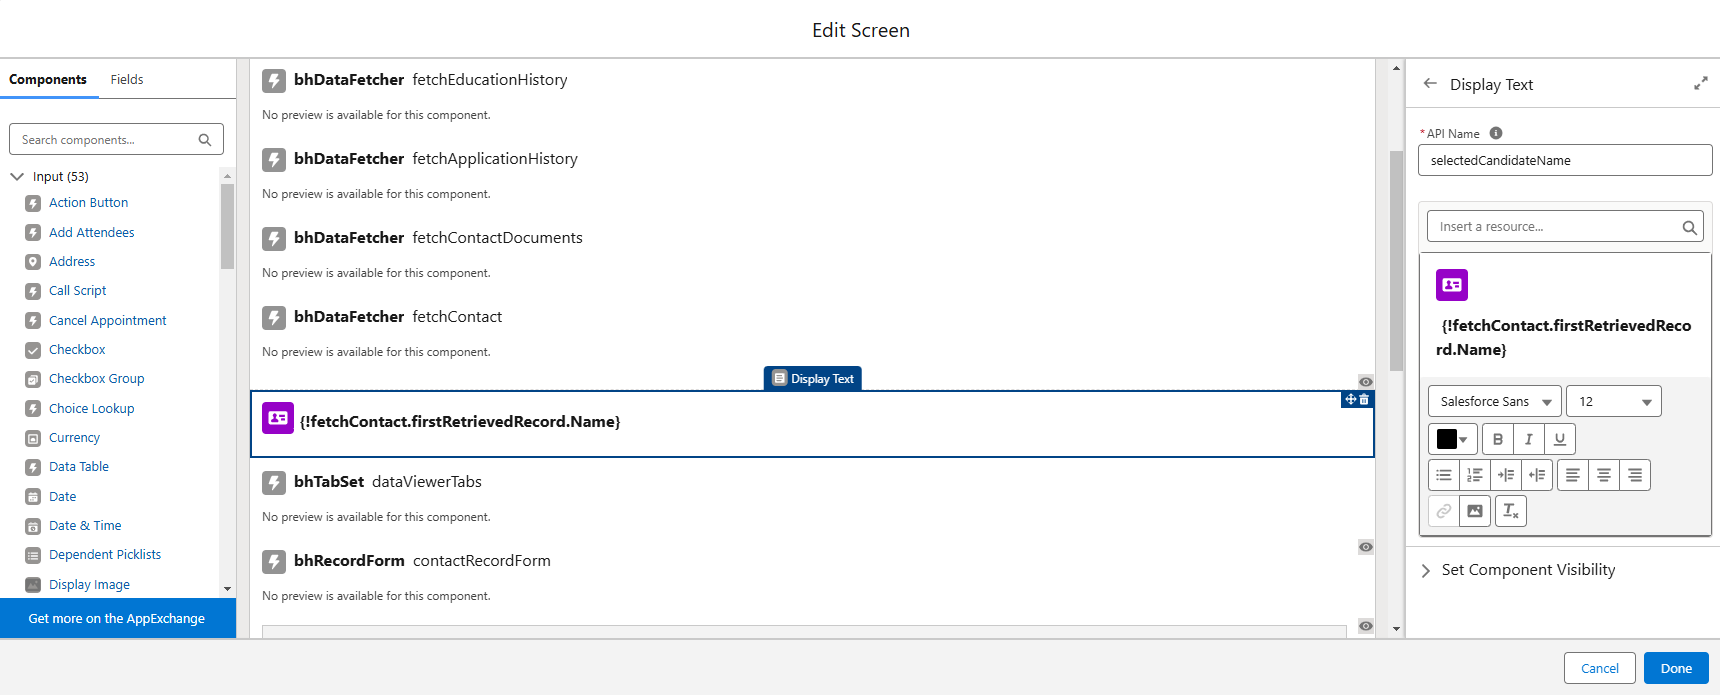
Go to the Display Text component where the header is configured ({!fetchContact.firstRetrievedRecord.Name} , see above).
-
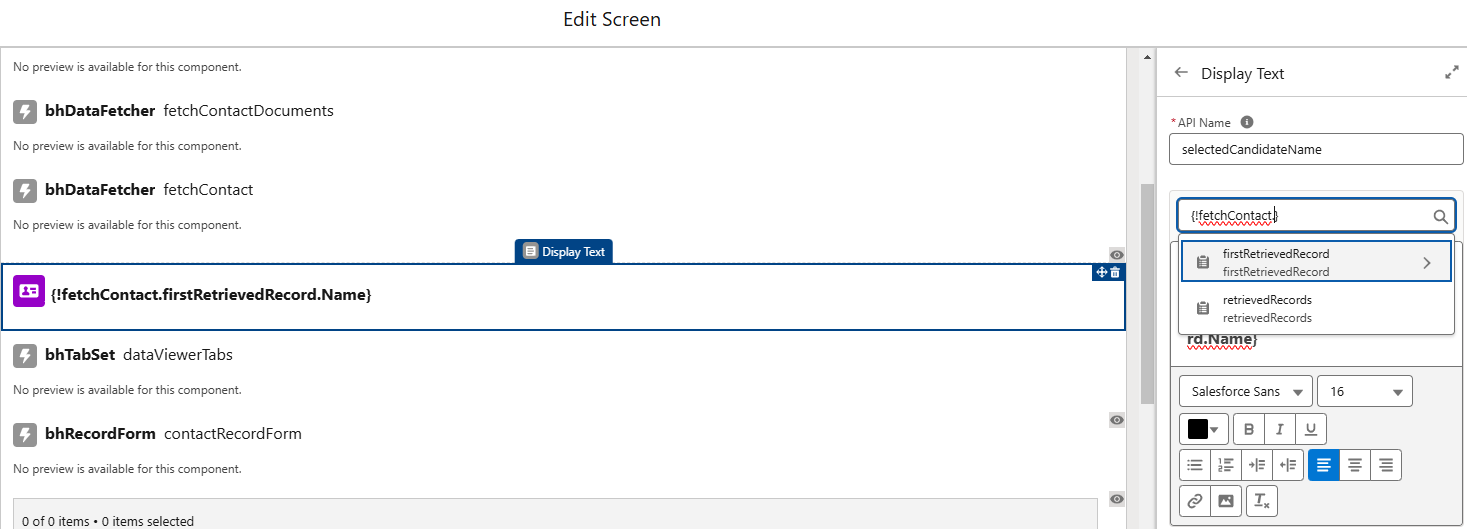
Click in the Insert a resource lookup on the right and select fetchContact, then firstRetrievedRecord.
-
From here you get a list of Contact fields, pick the one/s you want to display in the header.
You can style the text added to the header using the text editor in this section
Add Links to Related Records/Open Page from Icon
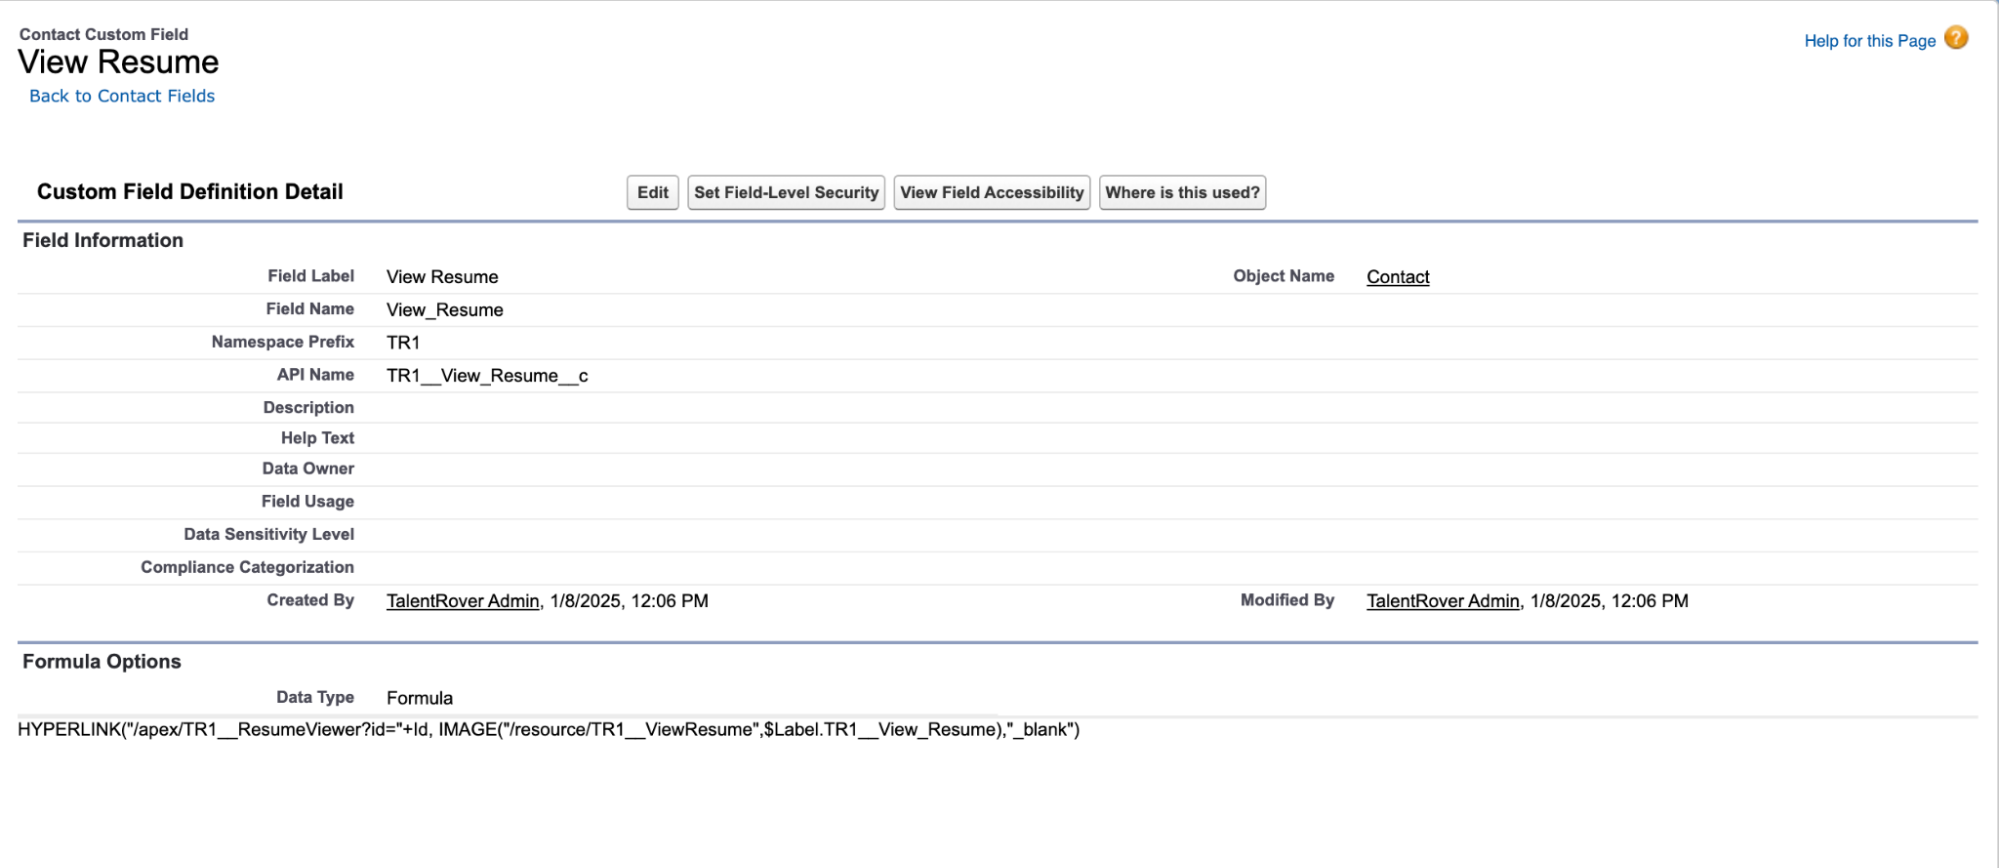
It’s possible to add a link to a related record from the header by leveraging formula fields (existing or new). The formula needs to be created in the Subscriber’s Org as an unmanaged field.
In the following example we will add a link to the Candidate’s Account record.
-
Go to and create a new Formula field.
-
Make sure the Type is Text.
-
-
Enter the following formula: HYPERLINK('/' + Account.Id, Account.Name).
-
Click Save.
-
Then simply follow the steps described in the Add More Fields section above to have the hyperlinked Account field show up in the Data Viewer header.
In a similar way, Admins can use formulas to enable users to click on an icon and open a new page.