Resume Parsing with : Basic Information
Overview
This article covers parsing resumes into using the integration with . An Org that utilizes for parsing will also utilize for .
How the Integration Works
sends a Candidate's resume to to be parsed and the corresponding Contact fields to be synced to . then creates a Candidate Profile using this data, and indexes the data with a unique External ID for each candidate. The Candidate Profile is then searchable in . clients that wish to use services are assigned a database on a server.
Admin Note:
A middleware instance called Heroku is used between and the parsing machine/databases (Heroku is a cloud platform used to build, deliver, monitor and scale apps). The resume files parsed into are temporarily stored as attachments and then moved to a "bucket" on (Amazon Cloud storage facility), where they are stored. The creation of a bucket on for the individual is part of the initial deployment of the integration for any customer. Currently there is no encryption of the stored resume files.
Parsing Resumes into
Resumes can be parsed via the following methods:
- Uploading a local document
- Pasting resume content into the parser
- Sending an attachment to a dedicated email address
- Job Board applications
Admin Note:
It is not recommended to create Validation Rules against the Contact object that will trigger if fields are not populated. There are multiple calls happening during the parsing process in which the record is edited/saved a few times. If a validation rule triggers while a Contact record is being created (through resume parsing), that will generate an error and block the parsing.
For these scenarios, instead of using a Validation Rule make fields required on the page layout.
Uploading a Document
- Begin by selecting the Global Actions + icon in the upper-right, and choose Resume Parser.
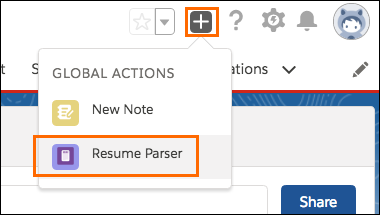
- The Resume Parser popup window displays with options to upload a document or paste the resume text.
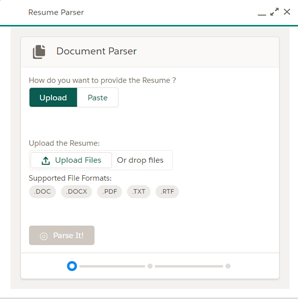
- Select Upload Files and locate the file on your computer.
- Click the Parse It! button.
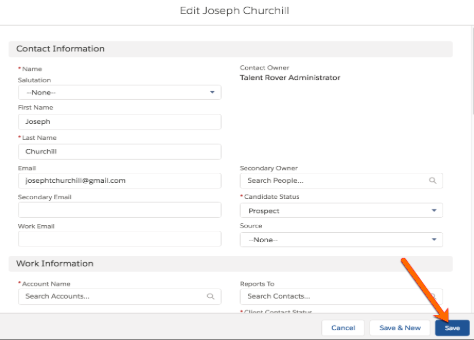
When parsing has completed, a preview of the parsed candidate data will display for review & correction. You can review the information, and click the Cancel button to close the popup and view the Contact.
Since the Contact record has already been created at this point, selecting Cancel does not cause any loss of the resume data. You are simply closing the popup.
If you’d like to continue editing the new Contact by populating other fields, you can do so on the Contact Edit page. Keep in mind that you will need to enter all required fields before clicking Save.
Pasting a Resume
- Begin by selecting the Global Actions + icon in the upper-right, and then choose Resume Parser.

- The Resume Parser popup window displays and gives you the option to upload a document or paste a body of text.
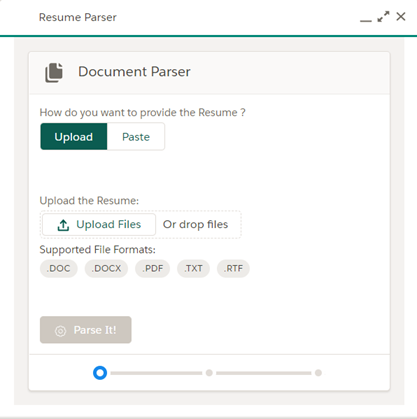
- Select the Paste option button, copy the text from the source, and paste the text into the field.
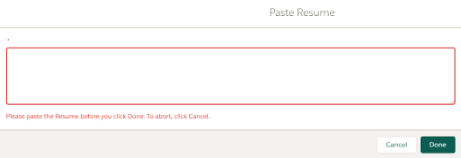
- Click the Done button.
Parsing Resumes Sent Through Email
can be configured to parse resumes that are sent to an email address.
- Create a new email message in any email program.
- Enter the parsing email address provided by your .
- Attach the resume document to the email message.
- Send the email. The message subject and body can remain blank, only the content of the resume attachment will be used.
Admin Note:
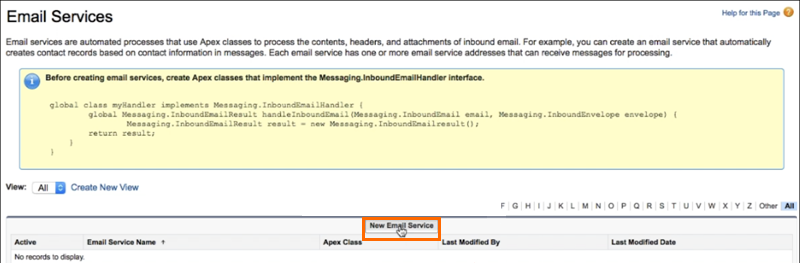
s can set up a new email service by following these steps:
- Navigate to Setup > Develop > Email Services > New Email Service.
- Complete the form and click Save.
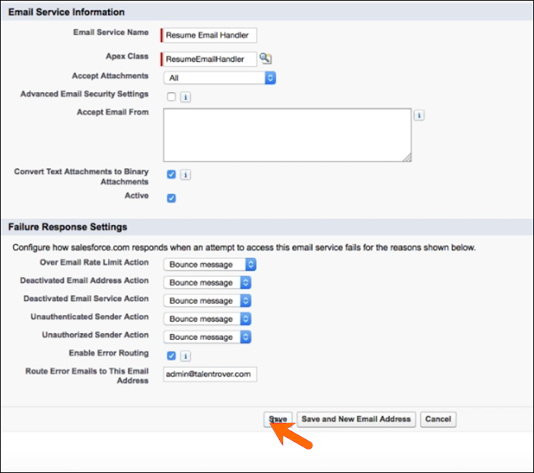
- Select New Email Address.

- On the Email Service Address page, remove the default email address from the Accept Email From field. The figure below contains an example default email address, admin@talentrover.com. Remove any email address that appears in this field, then click Save.
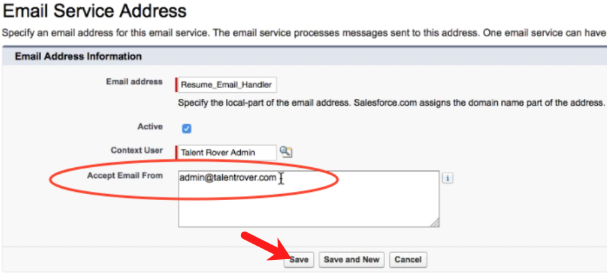
- The new Email Address link will be automatically supplied.

This email should be used exclusively for internal resume parsing and not be shared externally.
Parsing Resumes from External Sources
Resumes from external sources will be parsed in the same way, using the same processes and rules explained in the sections above.
This includes the following sources:
- Third-party Job Boards
- Community
- LinkedIn Integrations
Upload an Additional Resume to an Existing Contact
You may need to upload another resume for a contact, such as when the contact has added new experience in a new resume.
Upload the resume using the Resume Parser as shown in the section above. A background process will check for a duplicate and if a duplicate is found, then process will add the new resume to same Contact record.
This new resume will appear in the as shown below:
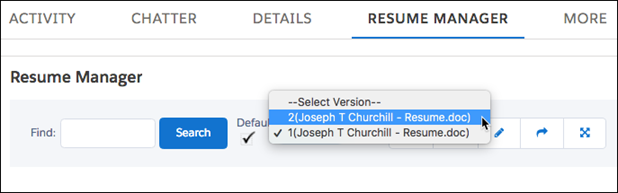
A new resume can also be added from the on the Contact record by clicking the upload button. This will bypass the duplicate check and automatically associated the resume with that Contact record.
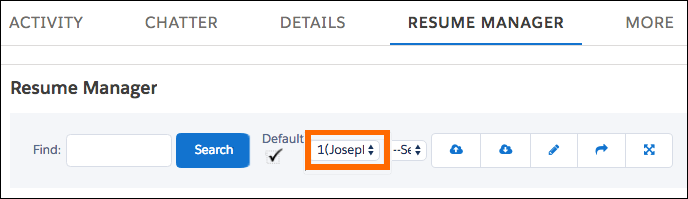
Default Resume
Only one resume per candidate is searchable. Any number of parsed resumes can be sent to the database, however only the one marked as default on the Contact record will be searchable. The default flag is enabled automatically for the most recently parsed resume. You can manually designate a different resume as Default.
To choose a resume as the default, pick it from the list and check the Default box. Ensure that the SMWS Status Code field is blank.
Admin Note:
If the SMWS Status Code field is not blank then the resume will not be searchable in . If your org regularly manually sets a default resume you can edit the Workflow Rule that triggers the sync (trcm_syncContactDocument_rule) to remove the TR1__SMWS_Status_Code__c !='100' line.
Resume Duplicate Check and Customization Options
A background process will check for existing duplicate contact records for every new resume that is parsed into . Two options are available depending if you want the duplicate check to be driven by via a Custom Label or ’s native Duplicate Management.
To make the selection, navigate to Setup > Custom Metadata Types > Search & Match Configuration > click Manage Records > SM Config, click Edit and use Deduplication Engine picklist in the Deduplication Configuration section.
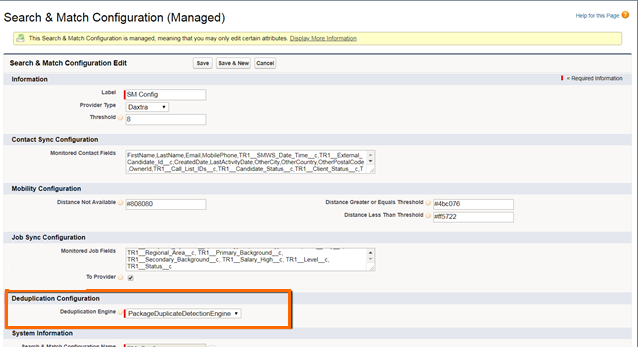
PackageDuplicationDetectionEngine (Default)
When this is selected, the duplicate check is driven by a Custom Label called ResumeParserDuplicateCheckFor, which allows you to choose either FirstName+Email Address OR EmailOnly as criteria for the duplicate check.
This examines the First Name and Email Address (or Email Only), and then searches for a matching Contact that has the same First Name and Email Address (or just same Email). If there is a match, then the Contact will be considered a duplicate and the new resume is added to the existing Contact as an additional resume.
To have the process only compare the Email value:
- Navigate to Setup > Build > Create > Custom Label > ResumeParserDuplicateCheckFor.
- Go to New local translation/Overrides.
- Set the Language to English.
- In Translation Text, enter EmailOnly.
StandardDuplicationDetectionEngine
When this is selected, the duplicate check is driven by ‘s Duplicate Management. You are expected to set up Active Duplicate Rules and Matching Rules. These active Duplication Rules will be taken into consideration to determine if the Contact is a potential duplicate or not each time a resume is parsed.