Configuring a New Group Timesheet
Group Timesheets (GTS) allow clients the ability to enter time in bulk for a group of employees. Follow the steps below to configure a Group Timesheet and schedule delivery to a client.
-
In the BTE TMC, select the group you are creating a new GTS for.
-
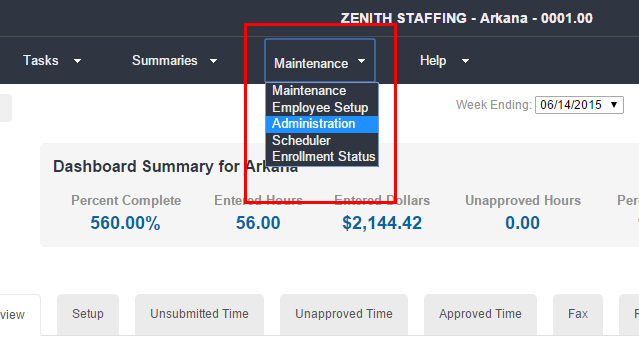
Open Maintenance > Administration.
-
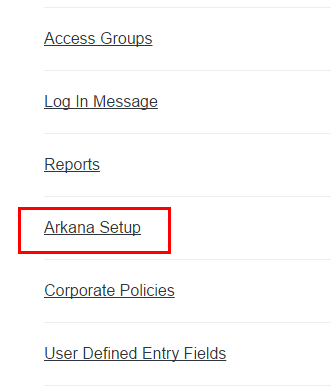
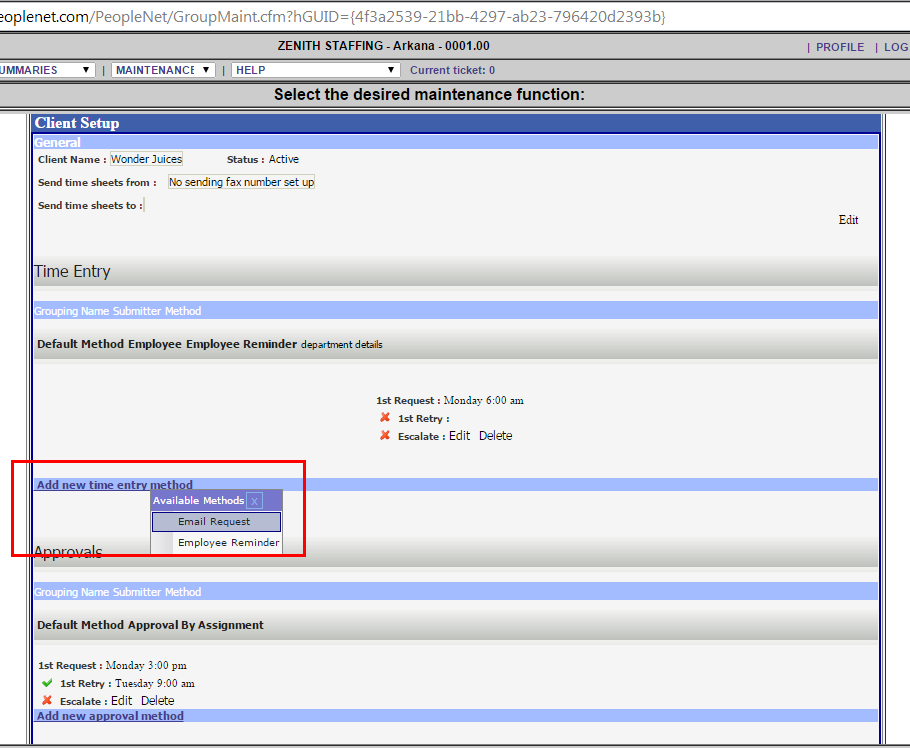
Click the group setup option. The group name will appear first and is followed by Setup.
-
GTS setup may be configured by branch or client.
-
Select branch by clicking the Branch Name in the upper left corner.
-
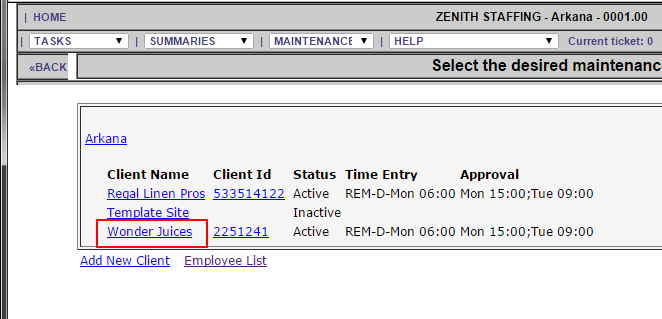
Select the client by clicking the name of the client.
-
-
Click Add new time entry method to create a new GTS.
-
Select Email Request option.
-
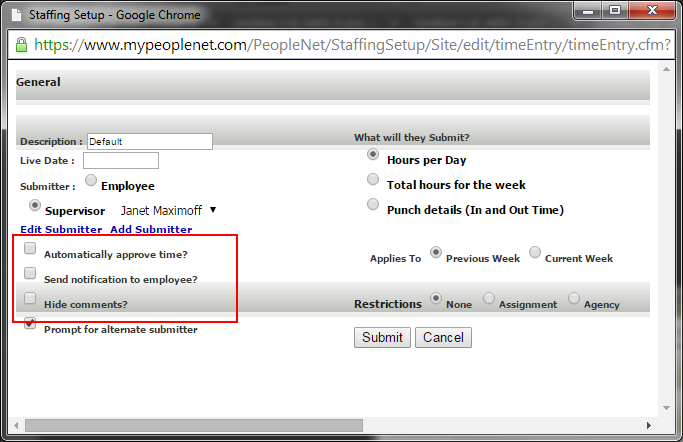
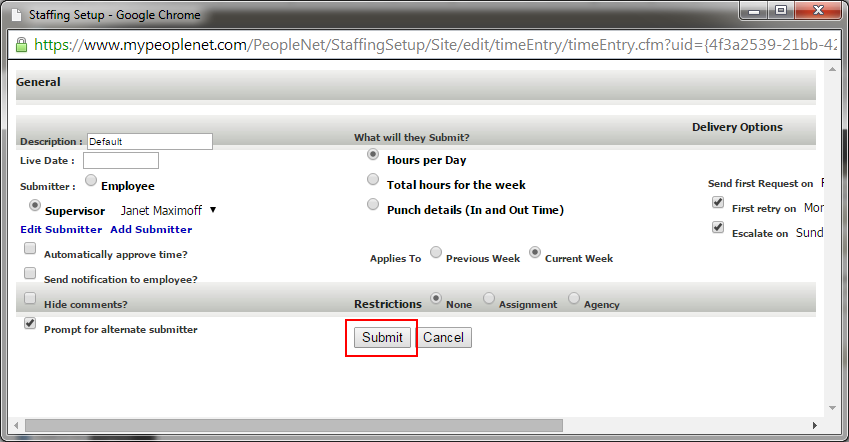
Change Submitter to the Supervisor option and choose a submitter from the drop down menu that appears.
-
If you don't see the name of the Submitter, follow the steps below to add a new submitter.

-
-
Choose the options that you find applicable:
-
Automatically approve time? - If this option is selected, time entered by the submitter will be approved immediately after submitting. Time will move from Submitted to Approved and bypass the Pending Approval status. This also means that the submitter will not be able to make changes to the GTS once the time has been submitted.
-
Send notification to employee? - This option will notify the employee that time has been entered on their behalf for the period. Most GTS setups do not include this option.
-
Hide Comments? - This will allow the GTS submitter to enter optional comments for each assignment present.
-
-
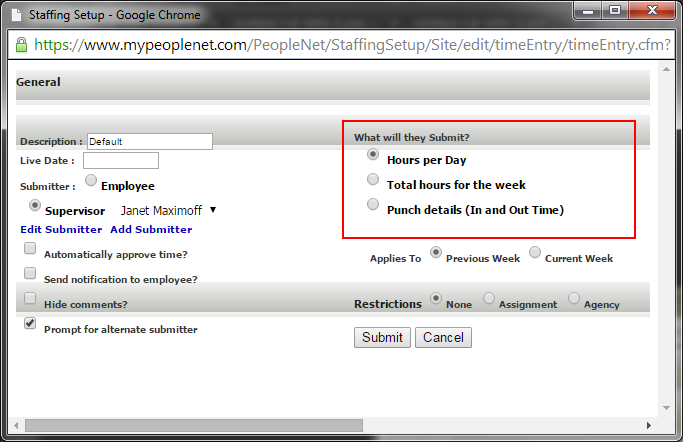
Indicate the time entry format for the submitter from these three options:
-
Hours per Day - Requires the submitter to enter the total hours worked per individual day by assignment. Example: 8 hours worked on Tuesday, 7 hours worked on Thursday, 8 hours worked on Friday.
-
Total hours for the week - Requires the submitter to enter only the total hours worked per week by assignment. No daily time entry details are allowed. Example: 41 total hours worked for the week.
-
Punch details (In and Out Time) - Requires the submitter to enter work start and end times for each day by assignment . The most detailed of the three options. Example: Monday 8 am Start and 5 pm End; Tuesday 8 am Start and 5:30 pm End.
-
-
Select the period the GTS Applies To.
This option refers to the time that the first GTS request is delivered. If the GTS is set to send the first request on Friday at 1 pm and the intent is for the GTS to collect time for the current period, you should select Current Week.
If the GTS is set to send the first request on Monday at 8 am and the intent is for the GTS to collect time for the previous week, you should select Previous Week.
This setting must match the option in the schedule or the GTS may not be delivered as expected.
-
Set the delivery option for the GTS.
-
You may need to expand the window to see this.
-
This is where you can set the First request, First retry (second attempt), and Escalate on (third attempt) dates.
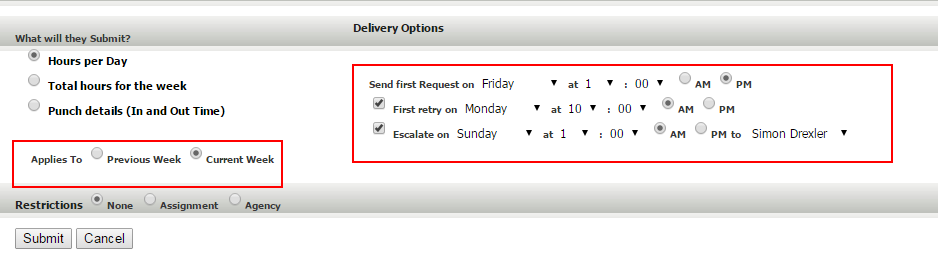
You may set the escalation attempt so that it is sent to a secondary submitter by filling in the Escalate On option and selecting a submitter from the drop down menu.
For best results, we recommend spacing out the time between delivery attempts by at least one full hour. In other words, do not schedule two attempts to take place in the same hour.
-
-
ClickSubmit to save and create the new GTS.
A summary of the new GTS details will appear in after the window closes. You can see the submitter name and email, delivery details, and the format for time entry.
Editing or Deleting the GTS
- To make changes to this GTS, select Edit.
- To delete this GTS, select Delete.

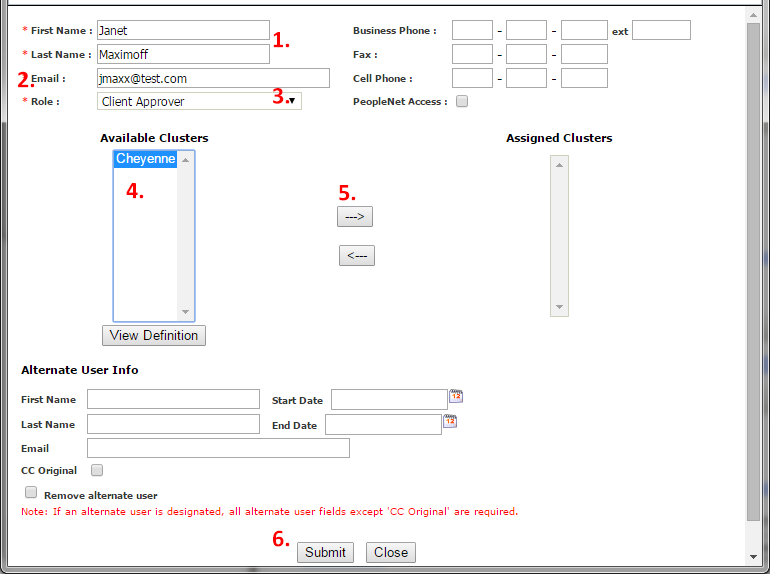
Adding a New Submitter
Click Add Submitter.
- Add the First and Last Name of the new submitter in the fields provided.
- Enter the Email Address for the submitter. This is where will send future time entry requests.
- Select a Role. If possible, choose a client level role like Client Approver.
- Select a cluster from the Available Clusters list by highlighting it.
- Click the right-facing arrow to move the cluster to the Assigned Clusters list.
- Click Submit to save the new submitter's information.