Billing
Overview
This article contains information about billing. Invenias enables you to record the billing events for an Assignment, for example the retainer, shortlist and placement. Billing Events are types of Milestones, however, you do not need to use the Milestone functionality in order to make use of Billing Events. As you are likely to have the same Billing Events for each Assignment, you can setup templates to speed up the creation of Billing Events for each Assignment.
The Billing Events for each Assignment can also be found within the corresponding Company Record, and a global Billing Events List View allows you to see the all Billing Events in your database, showing all previous and upcoming Billing Events.
You can also use the Invoicing functionality within Invenias to attach your Billing Events to Invoices and send them directly to your customers.
This article covers:
- Creating a Billing Event
- Populating a Billing Event with information
- Weighting Billing Events
- Billing Information Panel
- Viewing Billing in a Company Record
- Global Billing Events List
- Enabling Billing
- Configuring Billing Event Templates
- Using Templates to create Billing Events
Creating a Billing Event
Permission Required: Please note, to see the Billing tab the "Viewing Billing Information" permission is required and to create Billing Events the "Create Billing Events & Mark as Billed" permission is also required.
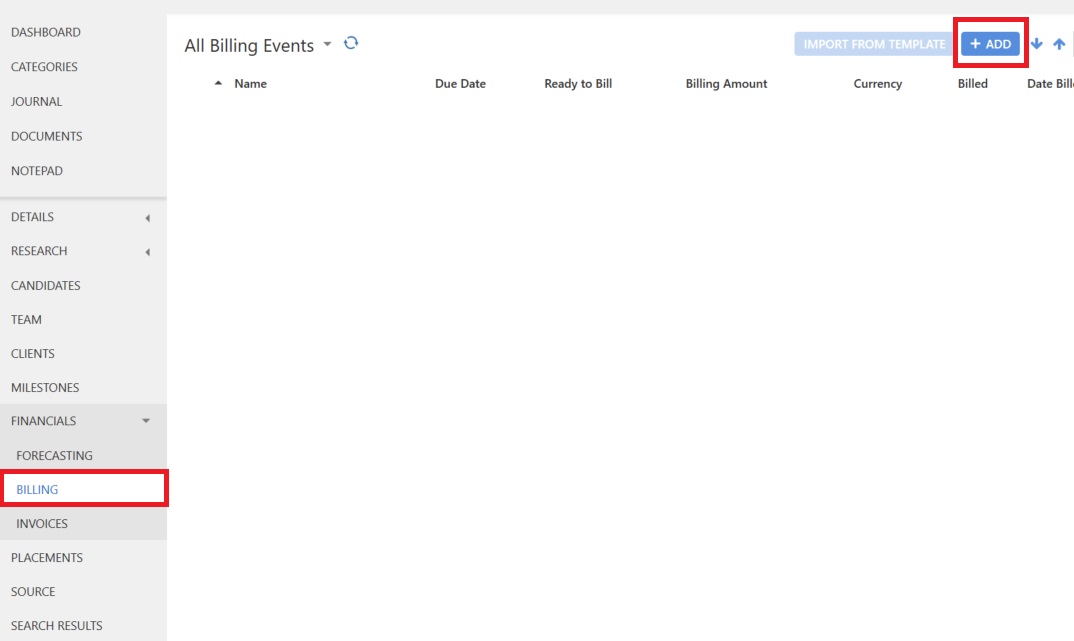
To create a Billing Event, navigate to the Billing tab within an Assignment and click on the Add Billing Event button:
This will add a new Billing Event to your list as below:

To save time, you can always create a template to add multiple Billing Events in one go, as you're likely to be creating the same Billing Events for multiple Assignments.
Populating a Billing Event with information
Permission Required: Please note, to create and modify a Billing Event, the "Create Billing Events & Mark as Billed" permission is required.
You can populate a Billing Event with the following information:
| Field | Description |
| Name | The name of the billing event |
| Billing Amount | The numerical value of the billing event |
| Currency | The billing currency, driven from the Billing Information Panel |
| Due Date | The expected date you can bill the client, used for your forecasting |
| Notes | Any additional information you'd like to add |
| Owner | Automatically set as you, but can be changed if you've created it on someone's behalf |
After you have setup your Billing Events for an Assignment, you can then progress them through a workflow of Ready To Bill, Billed and finally Paid.
If you are using Milestones, and one of your Billing Events is being used as a Milestone, when you mark the Milestone as Completed, it will automatically mark the Billing Event as Ready to Bill.
When you bill your client, you should then mark the Billing Event as Billed, which will automatically populate the Date Billed column with today's date.
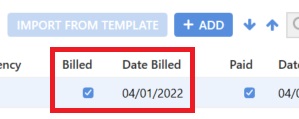
Permission Required: Please note, to see mark a Billing Event as Billed, the "Create Billing Events & Mark as Billed" permission is required.
Finally, after you client has paid, you should mark the Billing Event as Paid, which will automatically populate the Date Paid column with today's date.
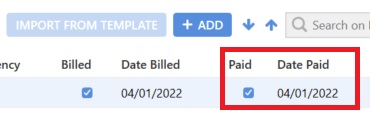
Permission Required: Please note, to see mark a Billing Event as Paid, the "Modify Locked Billing Events and Mark as Paid" permission is required.
Please note, if you're using Invoicing, you cannot manually check a Billing Event as either Billed or Paid as these columns will be driven by the Invoice workflow.
After a Billing Event has been paid, you can manage your Consultants fees from the Team tab, as discussed in the Fee Allocation article.
Weighting Billing Events
Permission Required: Please note, to see create and modify Billing Events, the "Create Billing Events & Mark as Billed" permission is required.
You can also weight your Billing Events using the Weighting column (as described in the Forecasting & Weighting article), which will automatically calculate the value in the column called Weighted Billing Amount.
Billing Information Panel
Permission Required: Please note, to see the all Billing Events, the "View Billing Information" permission is required.
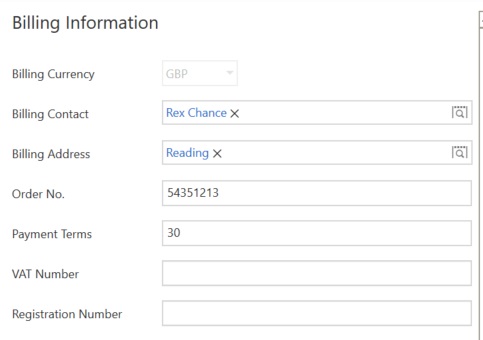
The Billing Information panel within the Billing tab of an Assignment Record, has fields for key billing information and also displays a billing summary for the current Assignment.
The billing information is shown at the top of the panel and on creation of the Assignment the following information is inherited from the Company Record, some of which is can be modified whilst some is read-only:
• Billing Currency (can be modified)
• Billing Contact (can be modified)
• Billing Address (can be modified)
• Payment Terms (can be modified)
• VAT Number (read-only)
• Registration Number (read-only)
You can also specify the purchase order number for the Assignment by filling in the Order No. field:
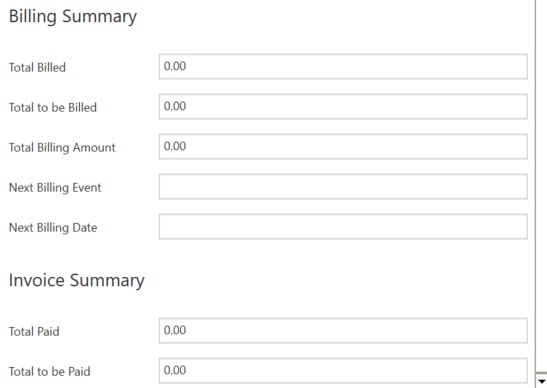
A Billing Summary is also displayed underneath the Billing Information to highlight the following:
| Field | Description |
| Total Billed | The total Billing Amount of all Billing Events checked as Billed |
| Total to be Billed | The total Billing Amount of all Billing Events not checked as Billed |
| Total Billing Amount | The total Billing Amount of all Billing Events |
| Next Billing Event | The name of the next Billing Event which has not been Billed |
| Next Billing Date | The Due Date of the next Billing Event |
| Total Paid | The total Billing Amount of all Billing Events checked as Paid |
| Total to be Paid | The total Billing Amount of all Billing Events not checked as Paid |
The image below shows the Billing Summary fields:
A similar Billing Information panel can be found in the Company Record, which is described next.
Viewing Billing in a Company Record
The Billing Tab in a Company record (shown below), lists all Billing Events for Assignments for this Company and a Billing Information panel.
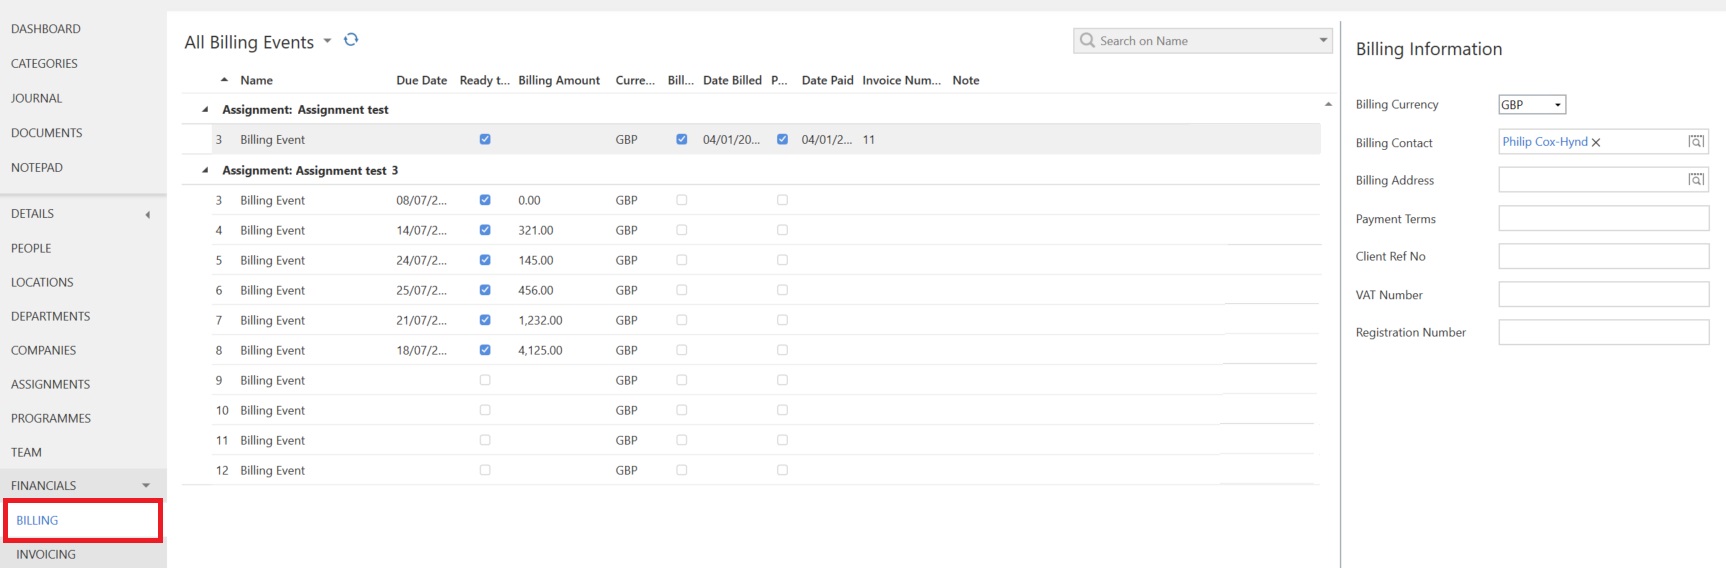
The information added in this panel is inherited by Assignments as described at the beginning of the previous section of this article.
Global Billing Events List
Permission Required: Please note, to see the all Billing Events, the "View Billing Information" permission is required.
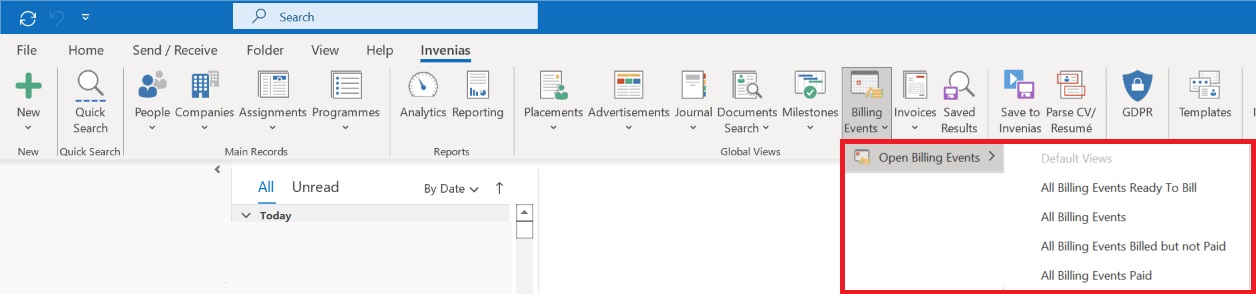
All Billing Events can be found in one list, accessed Outlook Ribbon Toolbar by navigating to Invenias > Billing Events

You can then select from the list of views available:
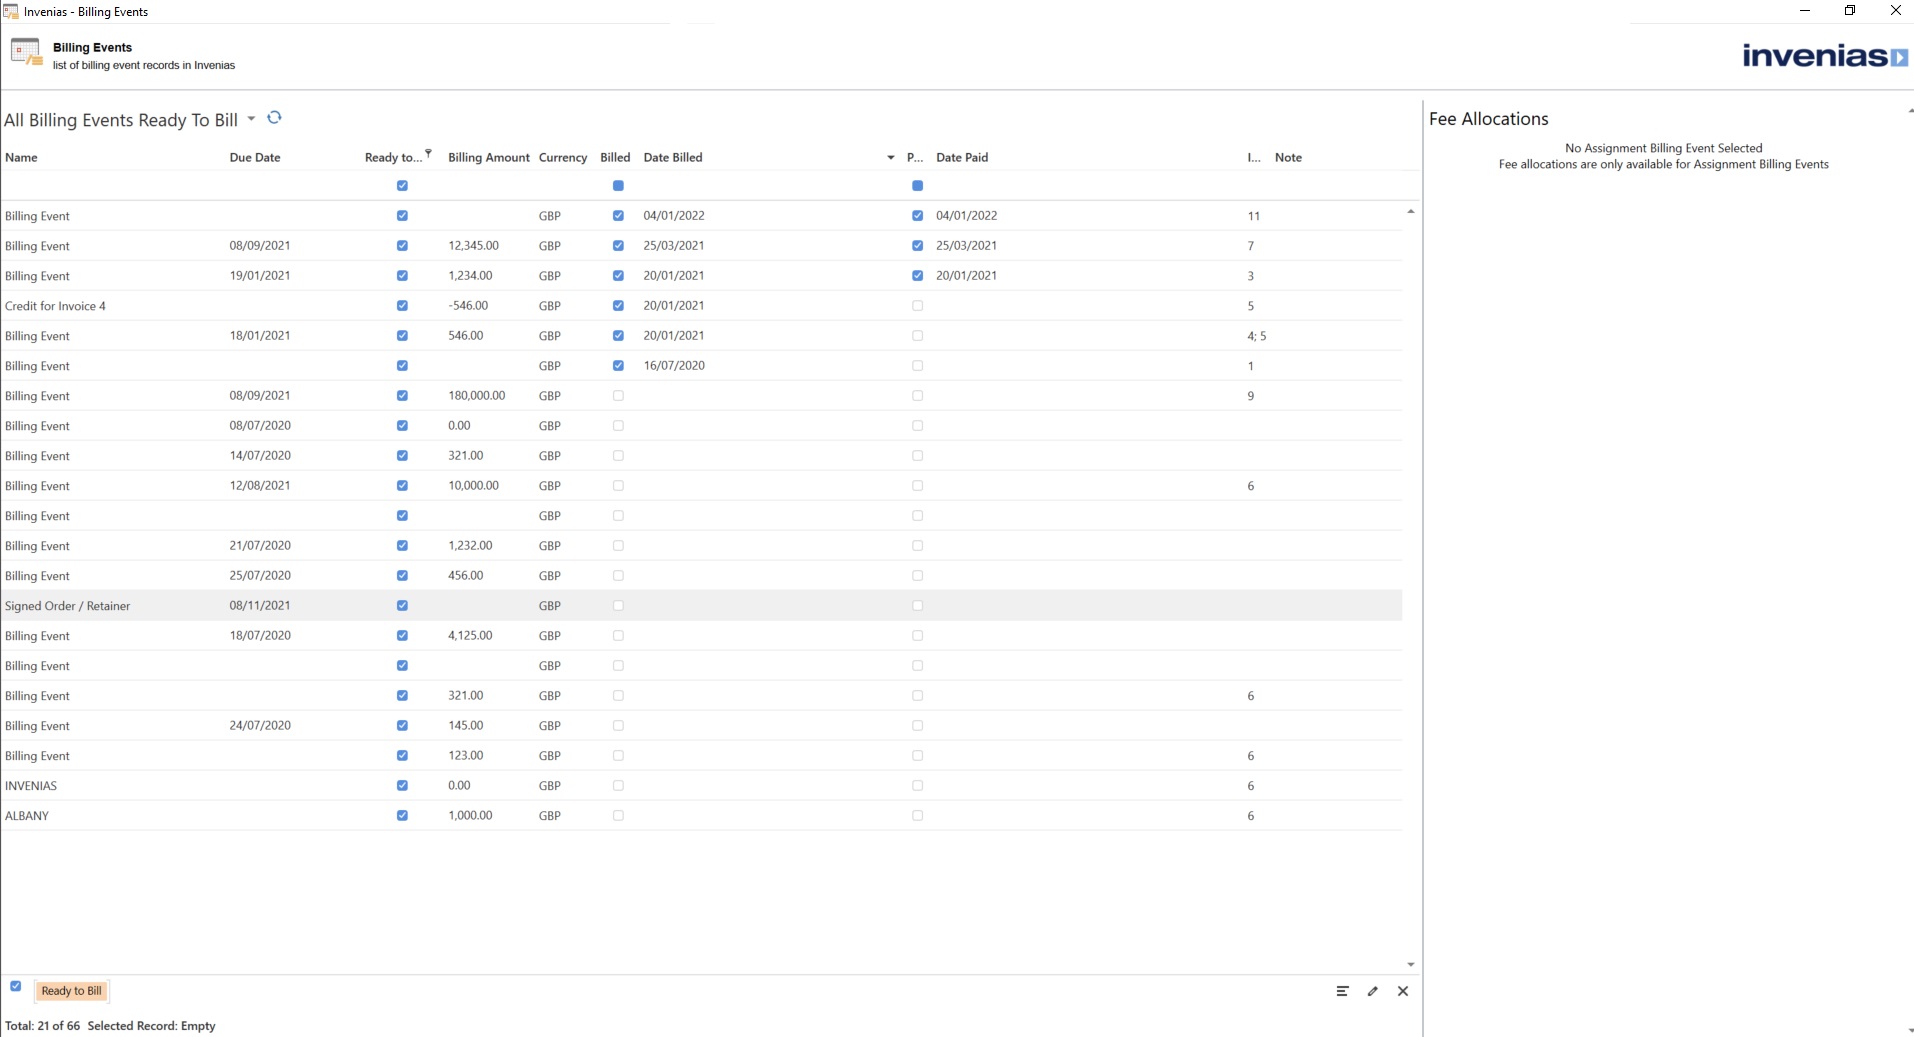
Selecting the All Billing Events Ready To Bill view will look like the following:
Enabling Billing
Permission Required: Please note, to access System Preferences you need the "Access System Preferences" permission.
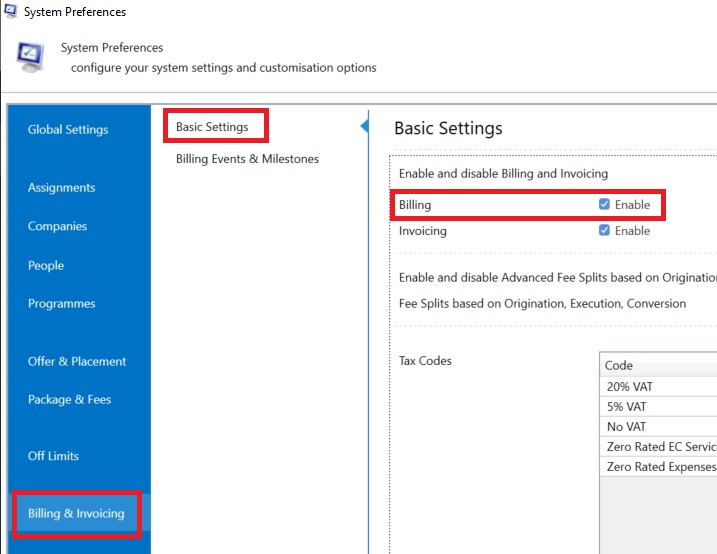
Billing can be enabled within System Preferences, by navigating to Billing & Invoicing > Basic Settings and checking the Billing option:
Configuring Billing Event Templates
Permission Required: Please note, to access System Preferences you need the "Access System Preferences" permission.
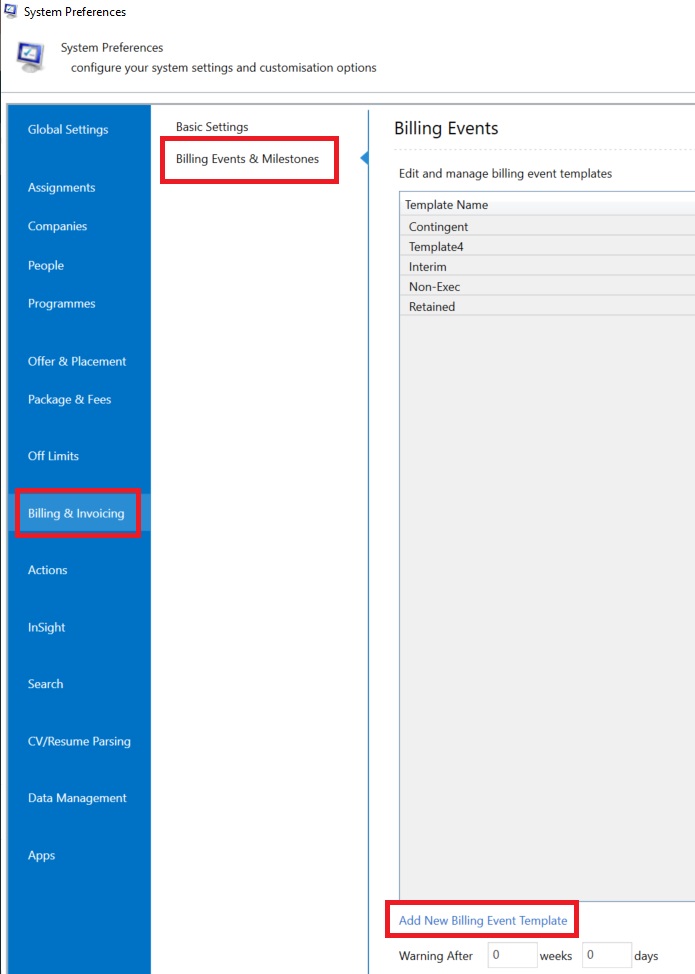
Billing Events and Milestones share the same templates and be configured in System Preferences by navigating to either Assignments > Milestones & Billing Events or Billing & Invoicing > Billing Events & Milestones. These templates are shared between both areas of System Preferences and to create a template, click on the Add New Billing Event Template link under the list of available templates:
A new template will be added to the bottom of the list. Double clicking on a template will open it as follows:
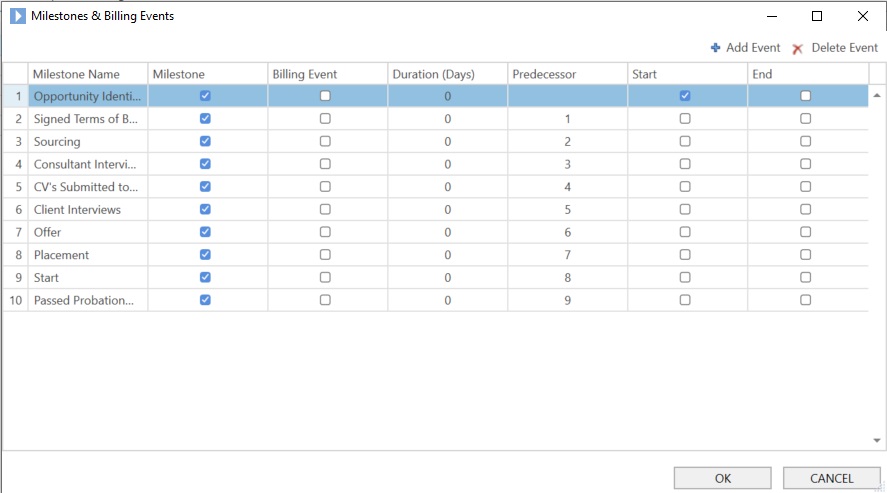
A description of these columns can be found within the Milestones article.
Using Templates to create Billing Events
As mentioned above in the Creating a Billing Event section, you can add multiple Billing Events to an Assignment from an existing template. To do this, navigate to the Billing tab within an Assignment and click on the Add From Templates button:
