Milestones
Overview
Invenias allows you to create your project milestones for Assignments and Programmes to represent all stages throughout the lifespan of the project from creation to completion. Each milestone can be assigned a due date and an owner so work can be planned and delegated ahead of time.
This article covers:
- Creating a Milestone
- Populating a Milestone with information
- Global Milestones List
- Enabling Milestones
- Configuring Milestone Templates
- Using Templates to create Milestones
Creating a Milestone
To create a Milestone, navigate to the Milestones tab within an Assignment (or Programme) and click on the Add Milestone button:
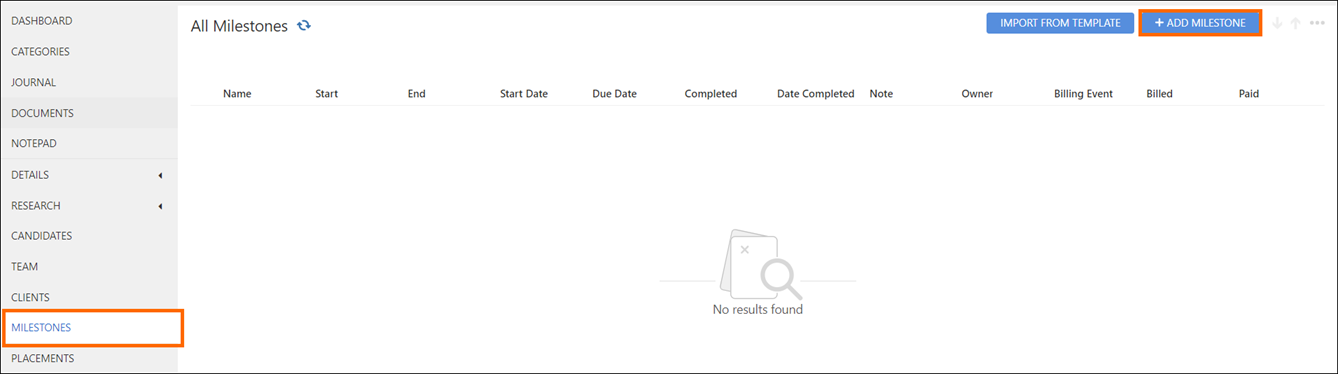
This will add a new Milestone to your list.

To save time, you can always create a template to add multiple Milestones in one go, as you're likely to be creating the same Milestones for multiple Assignments/Programmes.
Populating a Milestone with Information
You can populate a Milestone with the following information:
| Field | Description |
| Name | To change the name from the default value |
| Due Date | For planning the dates ahead of time |
| Start | To indicate if this Milestone is considered the beginning of the project (your first milestone may be some business development or research, but you may only want to consider signing of the retainer as the start) |
| End | To indicate if this is the final Milestone of the project (again, your last milestone may be related to completing a probation period, but you may only want to could the placement as the end) |
| Start Date | To indicate the date you started working on the Milestone, as you may start before the Due Date to ensure you complete it by then |
| Completed | To indicate if you have completed the Milestone |
| Completed Date | This is automatically set when you complete the Milestone, but can be changed if you've forgotten to complete your milestone on time |
| Billing Event | For flagging this Milestone as a Billing Event (this requires Billing to be enabled) |
| Notes | For any additional information you'd like to add |
| Owner | This is automatically set as you, but can be changed if you've created it on someone's behalf |
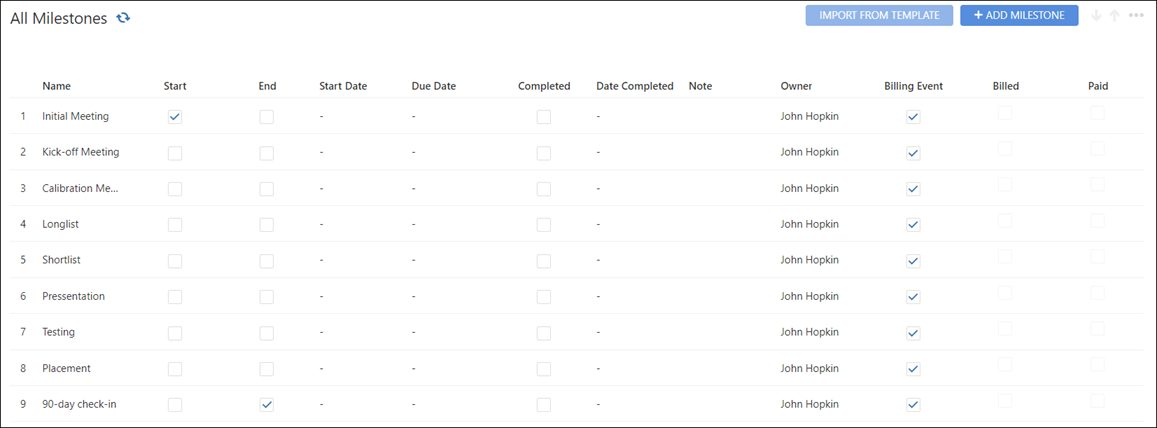
Global Milestones List
All Milestones across all Assignments and Programmes can be found in one list, accessed Outlook Ribbon Toolbar by navigating to Invenias > Milestones.

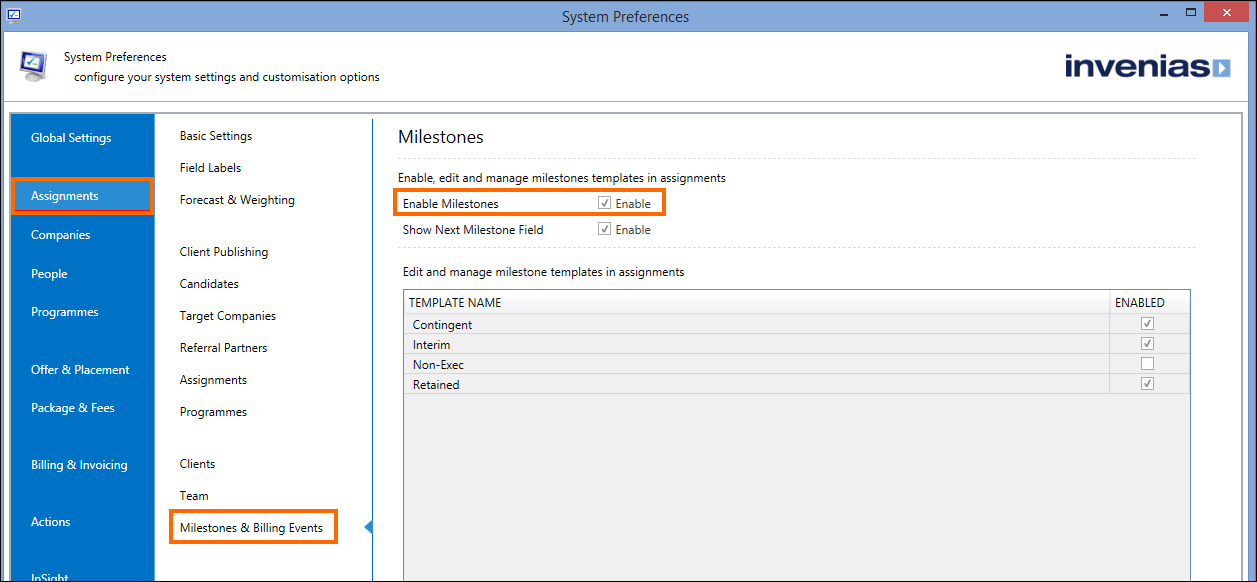
Enabling Milestones
Permission Required: Please note, to access System Preferences you need the "Access System Preferences" permission
Milestones can be enabled within System Preferences, by navigating to either Assignments > Milestones & Billing Events or Programmes > Programme Milestones and checking the Enable Milestones option:
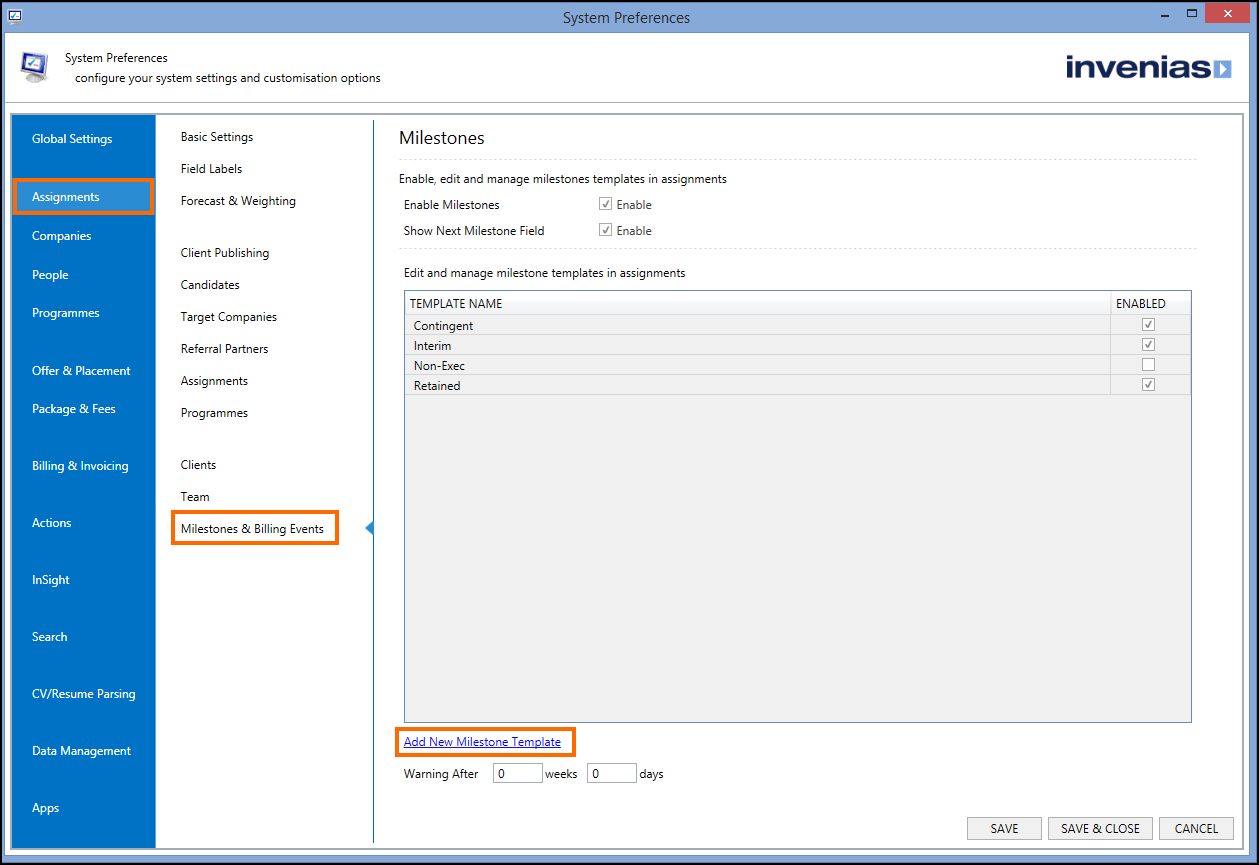
Configuring Milestone Templates
Permission Required: Please note, to access System Preferences you need the "Access System Preferences" permission
Milestone Templates can be created to save you time re-creating the same set of Milestones for each project. To create a new template, click on the Add New Milestone Template link under the list of available templates:
A new template will be added to the bottom of the list. Double clicking on a template will open it as follows:
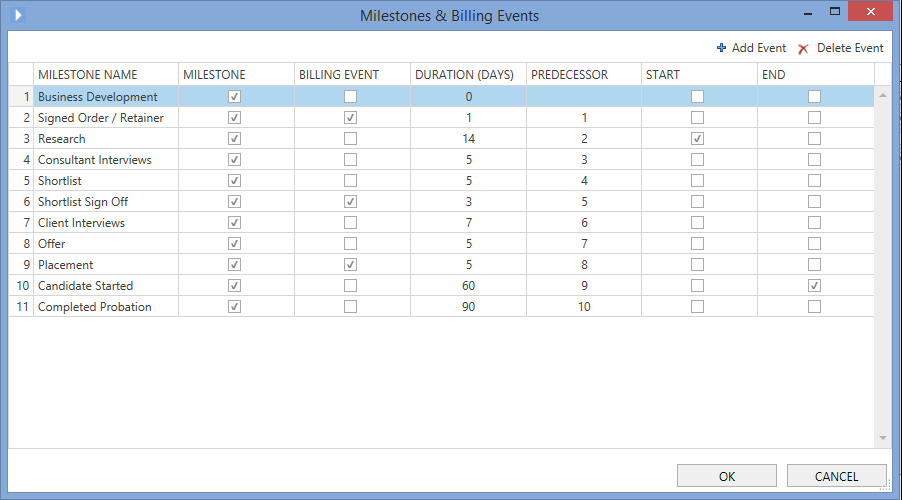
You should recognise some of these columns from the Populating a Milestone section above, however, you will notice two new columns when creating a template.
| Field | Description |
| Predecessor | If the Milestones in your template follow a sequential order, put the id of the previous Milestone in this column (as shown in the image above) so that Invenias can automatically populate the Due Date for all the Milestones after specifying the Due Date for any of the Milestones. |
| Duration | The expected length in time, specified in days, it should take to complete the Milestone. By entering this information, the Start Date will be automatically populated by Invenias after the Due Date has been specified |
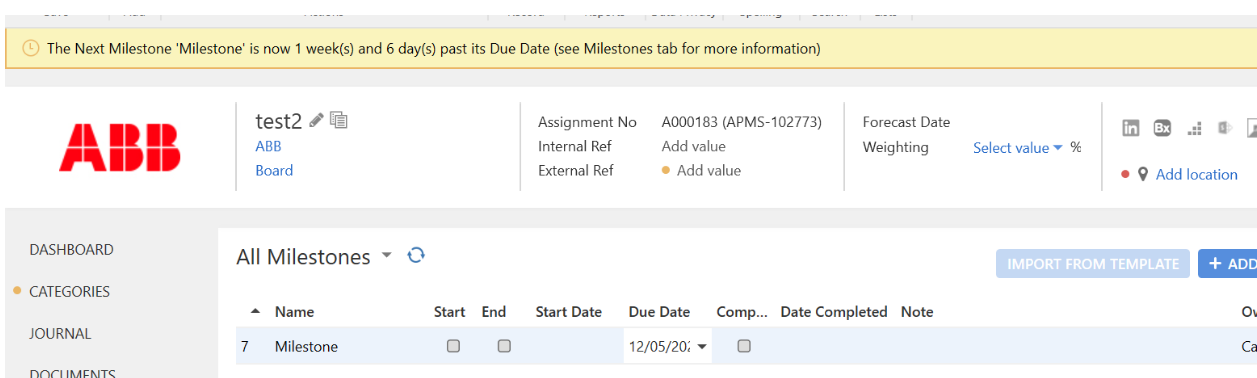
The "Warning" time setting impacts the banner shown in the Assignment record header, when milestones become overdue.
If the next incomplete milestone has a due date in the past, Invenias will display a banner in the header. If it's overdue, but within the Warning period configured here, Invenias will display an Amber banner - shown in the example below:
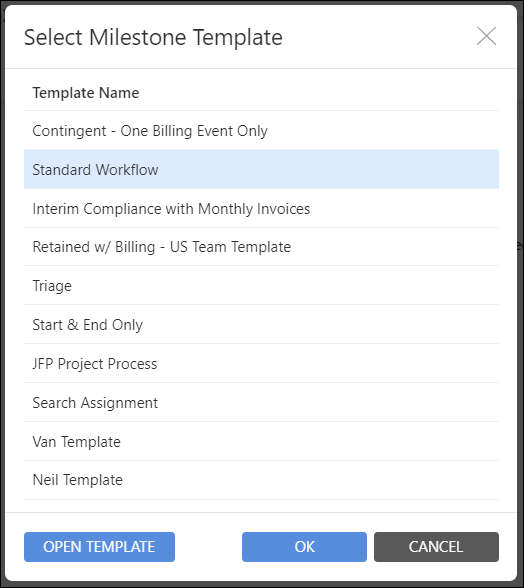
Using Templates to create Milestones
As mentioned above in the Creating a Milestone section, you can add multiple Milestones to an Assignment or Programme from an existing template. To do this, navigate to the Milestones tab and click on the Add From Templates button:

Invenias will display a list of all templates, allowing you to preview them before making a selection.
Invenias will populate the milestones list using the selected template.