| Edition: Enterprise | Audience: Tags Admin |
Bulk Tag Updates
The Bulk Update - Tags feature gives Tags Admin users the ability to make multiple changes to Users and/or Groups Tags using a file upload. By uploading a CSV file, you can easily and quickly create, delete, and update Tag history.
This article covers the steps to download your Tags History CSV file, modify it, and upload the modified file. Ensure you follow the steps below in order.
Updating the Tags History File
- Go to Admin > Tags.
- Click the Bulk Update tab.
- Click on your company's Tags History (or the Example Tags History if your company does not yet have any Tags assigned) to download the CSV file.
- Open the file and add a new row for a new User or Group you want to assign a Tag to. Add the User ID and User Name or the Group ID and Group Hierarchy trail in the required format.
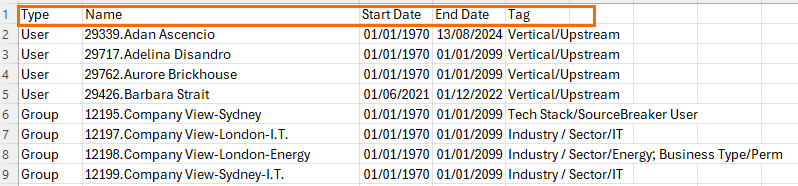
- Set the effective Start Date and End Date of the Tag assignment. Note: The End Date is optional.
- Add the Tag in the required format to the Tag column alongside the User or Group.
- Repeat the process for every User and/or Group who needs to be assigned a Tag.
- If you are updating an existing Tag history, navigate to the User or Group you want to change and make your updates.
- Upload your new CSV file by selecting the file in the upload section. If the upload completes successfully your Tag history records will update automatically.
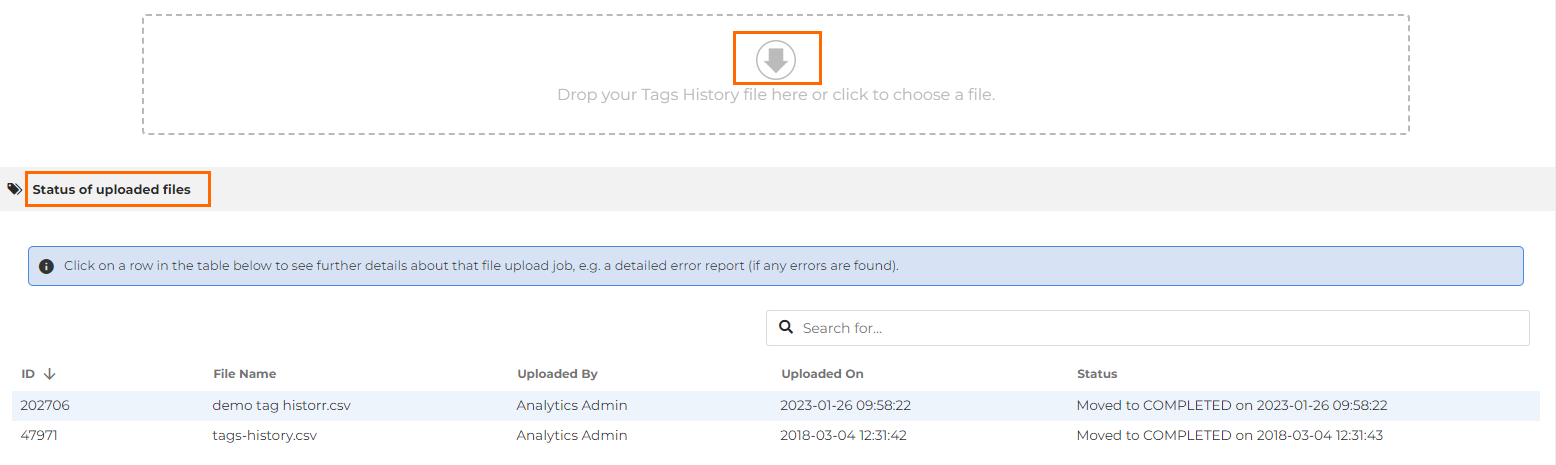
When adding a new Tag, please ensure there are no duplicate Tag assignments for a User or Group. If a User ID or Group ID does not match the proceeding User Name or Group Hierarchy Trail, it will be reported as an error. Any errors will be listed in the Recalculation Jobs section. These will need to be corrected before the Tags History is updated.
Was this helpful?