Adding Images, PDFs, or Documents with the File Manager
Images, PDFs, and documents can bring your emails to life, making your messages more engaging and informative. Whether you’re showcasing a job description, adding branded visuals, or attaching important resources, this guide walks you through seamlessly adding and managing media to elevate your email content.
The maximum allowed file size is 20MB. Valid file types are images, PDF, MS Excel, MS Word, and other common text documents.
Using the File Manager
The email editor includes a built-in File Manager that allows you to:
- Browse, search, and sort existing files.
- Import new images or files.
- Create folders.
- Preview and insert images into your message.
Accessing the File Manager
The File Manager allows you to easily upload, organize, and insert media into your Bullhorn Automation emails. There are 2 ways to access it:
-
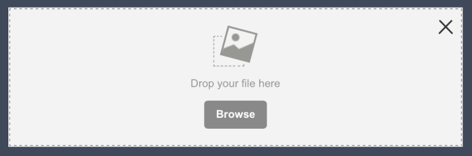
From an Image Placeholder:
-
To open the File Manager, start by dragging and dropping an Image Content Block into your message. Once the placeholder appears, click the Browse button to open the File Manager and select your file.
-
-
From the Image Properties Panel:
-
If you’re working with an existing image, click the Change Image button in the Image Properties panel to launch the File Manager and swap out the current image.

-
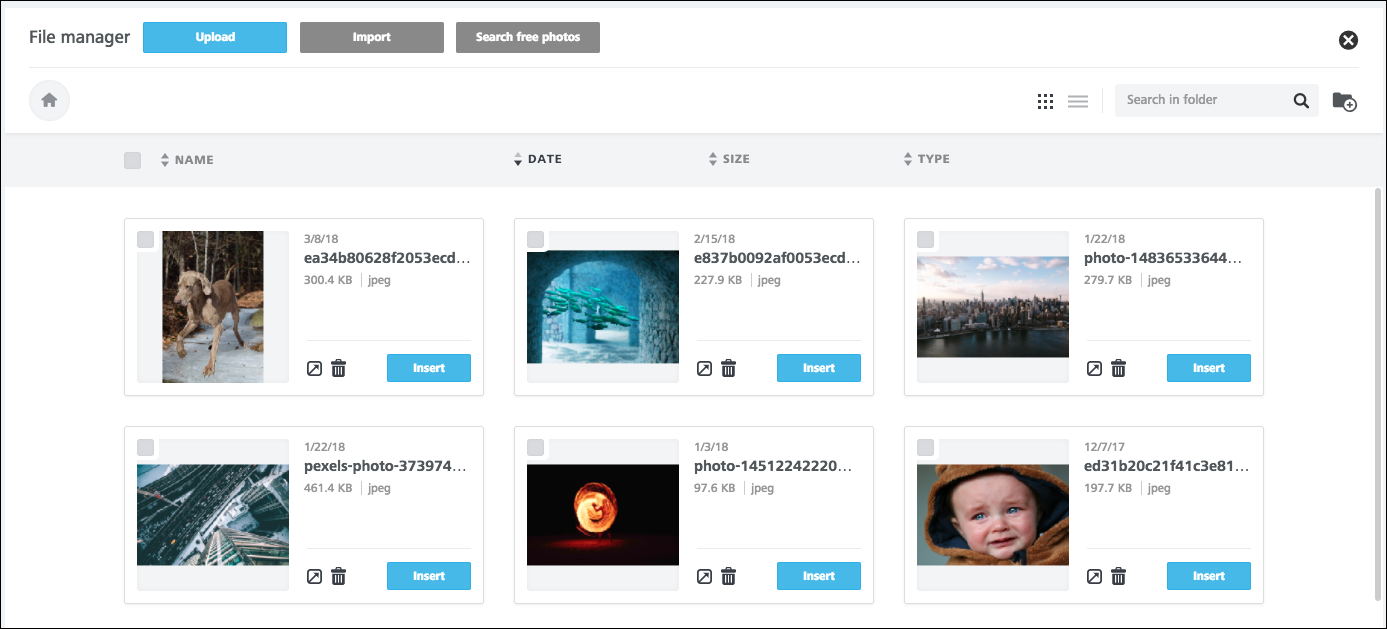
Exploring the File Manager
The File Manager is designed for convenience, opening directly over the email editor to give you full control over your media without worrying about screen size or resolution. Here's how it's organized:
Top Navigation Bar
The top navigation bar provides tools and options to help you manage your files efficiently:
- Upload: Quickly upload new files from your computer into the File Manager.
- Import: Import files from external apps like Google Drive, Facebook, Google Photos and other applications.
- Search Free Photos: Browse a library of stock photos to find the perfect image for your email.
- Search Bar: Locate specific files by name or keyword.
- Grid View / List View Toggle: Switch between a thumbnail grid view or a detailed list view for easier browsing.
- Add Folder Icon: Organize your files by creating folders to keep everything tidy and easy to find.
File List and Details
Below the navigation bar, you'll see your uploaded files displayed in either grid or list view, depending on your preference. Each file includes key details like:
- File name.
- File size.
- Upload date.
Managing Files in the File Manager
Uploading Files
- Click the Upload button in the top navigation of the File Manager. This will open your computer's file browser.
- Navigate to your desired file and click Open to upload the file into your File Manager.
- The maximum allowed file size is 20MB.
- If you're adding a multiple page PDF, we recommend uploading a file that is 4MB or lower to ensure the entire file is visible.
Importing Files from Other Applications
The File Manager integrates with popular external apps, making it easy to import your media files.
-
Click the Import button in the top navigation.
-
Select the application you’d like to connect (e.g., Google Drive, Dropbox, or Instagram).
-
Browse your files in the connected app and choose the one you’d like to import.
-
Once imported, the file will appear in your File Manager, ready to use in your emails.

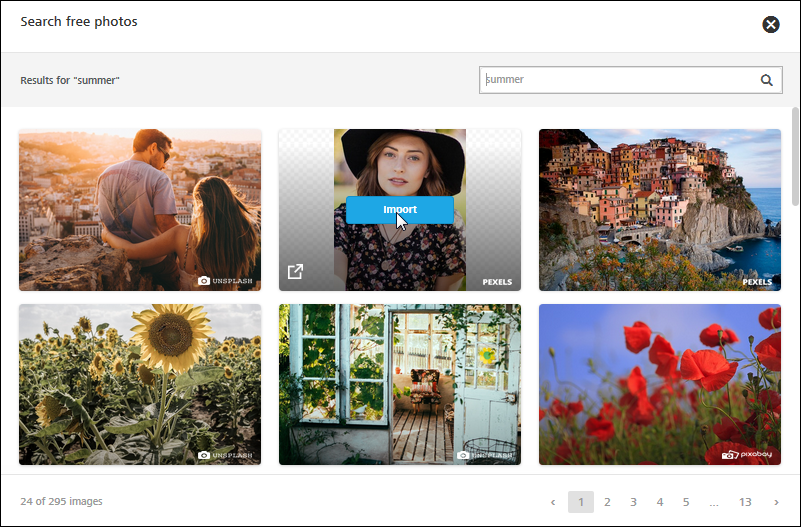
Searching for Stock Photos
Need a cool photo for your email message? Click the Search free photos button to search for free, high quality stock photos.
We’ve partnered with two popular stock photo services to offer users the ability to search through a large repository of images that are free to use under the Creative Common Zero (CC0) license:

-
Click Search free photos in the File Manager’s top navigation.
-
Enter your search terms (e.g., “teamwork” or “office”).
-
Browse the results, which display image previews, the source (Pexels or Pixabay), and a link to the original image.
-
Click Import to add the selected photo to your File Manager. Once imported, it will appear in your file list.
-
To use the image in your email, select it in the File Manager and click Insert.
Browsing and Searching Files
The File Manager offers tools to help you quickly locate the files you need.
-
Browsing Folders: Navigate through your folder structure to find your files.
-
Sorting Files: Click the column headers (e.g., Name, Date, Size, Type) to reorder files. Use the arrow icon to toggle between ascending and descending order.
-
Searching Files: Use the Search Bar (lens icon) to find files within the current folder.
Note that searches are folder-specific and won’t return results from other folders.
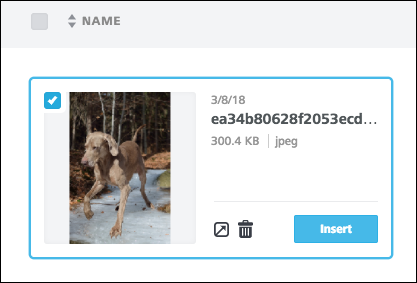
Using Files
When working with files in the File Manager, hover over a file or folder to reveal available actions on the right-hand side:
-
Insert: Add the file to your email.
-
Preview: View the file to confirm it’s correct.
-
Delete: Remove files or empty folders.
Tips for Deleting Files
- Only empty folders can be deleted. If a folder contains files, delete the files first or move them elsewhere.
- To delete multiple files at once, select their checkboxes and click the Delete icon at the top of the file list.
Organizing Folders
Keep your File Manager tidy by creating and managing folders:
- Click the Add Folder icon in the top navigation.
- Name your folder using a combination of letters, numbers, spaces, periods (.), hyphens (-), and underscores (_).
- To navigate to the parent folder, use the breadcrumb trail at the top of the File Manager. Clicking the Home icon will return you to the root folder.
Once a file is uploaded, it cannot be moved to another folder. To move a file, re-upload it to the correct folder and delete the original. For better organization, always create folders before uploading files.
Adding PDFs or Documents
You can add files like PDFs, Word documents, or Excel spreadsheets to your email and link them to specific content.
Supported File Types:
- Images (JPG, PNG, GIF)
- PDFs
- Microsoft Office documents (Excel, Word)
- Common text files
Adding Files via the Attachments Area
If you want to attach files directly to an email in your automation, you’ll need to do this through the Send Email Automation Step settings, not the File Manager.
Steps:
- Navigate to the Send Email Automation Step in your workflow.
- Locate the Attachments Area within the step settings.
- Use this option to upload supported files that are 4MB or smaller, such as PDFs or other documents.
For larger files or advanced file management options, we recommend using the File Manager to link files instead of attaching them directly. This ensures better performance and a smoother user experience.

Via the File Manager (Recommended)
You can link PDFs or other files to images, buttons, or text directly from the File Manager:
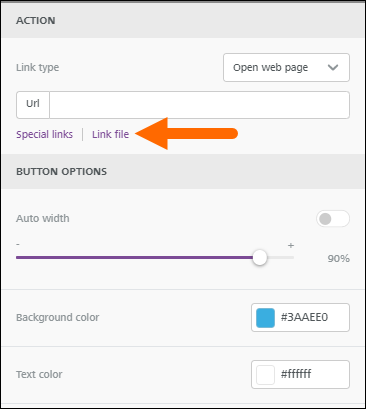
-
Linking Files to an Image or Button:
-
Select an image or button in your email.
-
Click Link File below the URL field.
-
The File Manager will open. Upload a new file or select an existing one.
-
Once selected, the link will be created.
-
-
Linking Files in Text:
-
Highlight the text you want to link.
-
Open the Insert/Edit Link dialog in the text editor.
-
From the Link Type dropdown, select File Manager.
-
Upload or choose your file, and the link will be added.

-
In both cases, the File Manager will open showing all the available files. You can either upload a new file or select an existing one. When you select a file, the link will be created.