Email Settings
Configuring email settings in Bullhorn Automation allows you to personalize and optimize your automated communications. Within the email settings, you can customize key details to ensure your messages reach the right recipients with the right information at the right time.
With the available settings, you can:
- Create a Subject Line with Merge Tags
 Merge tags enable the use of Bullhorn ATS or Bullhorn Automation imported data to populate content. They are utilized in emails, notifications, and text messages where applicable.: Personalize your subject lines by dynamically inserting data from your ATS to capture attention and improve engagement.
 - Set To/From Options: Choose who the email is sent from and specify recipients, including owners, managers, or custom email addresses for tailored communication.
- Attach Files: Easily include important documents, images, or PDFs to provide candidates and clients with the information they need.
- Copy Person: This is a check-box that when selected will show CC and BCC fields.
- This will send a unique email for each candidate that matches your list criteria to the person on the CC and/or BCC field.
- If you do not see this option create a support ticket to have it enabled.
To find out how to stay compliant for state regulations that require agencies to retain records of email communications to Candidates see our article Capturing Email Copies for Audit Purposes.
- This will send a unique email for each candidate that matches your list criteria to the person on the CC and/or BCC field.
These flexible options help streamline your workflows and improve communication efficiency, ensuring your automated emails are both professional and effective.
Navigating to Email Settings
You can configure these settings when adding an email to the Send Email step within an automation workflow.
- Add the Send Email step to an automation workflow.
- Select the template that will be used in the step.
- Click Settings on the top right.

Subject
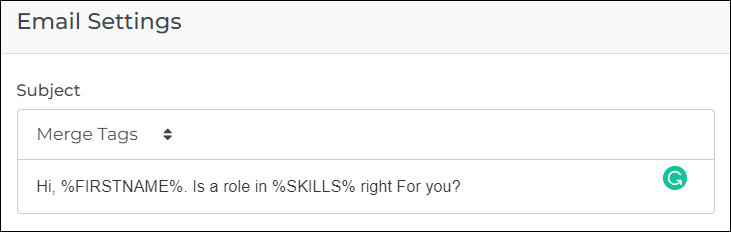
In this section, you can customize the subject line of your email to display exactly what you want recipients to see. By using dynamically populated merge tags, you can personalize your emails with relevant, targeted content—helping to increase engagement and open rates.
For example, you can:
- Automatically notify each candidate about vacancies specific to their industry.
- Inform a sales contact about newly available candidates with the specialist skills they recruit for.
For more complex groupings that aren’t directly linked by a field, you can also take advantage of Smart Tokens to further tailor your messaging.
Keep in mind that the available merge tags in the drop-down menu are specific to the automation’s entity type. This means you won’t see Placement merge tags in a Candidate-based automation, and vice versa.
From
Depending on the entity, you’ll have several record-associated options for the From field:
- Candidate Owner for a candidate automation.
- Placement/Job/Candidate Owner for a Placement or Candidate-based automation.
- Candidate Owner Reports To for all automations.
Using a Custom Email Address
If you'd prefer to use a custom email address instead of an owner-associated sender, you can specify:
- The sender's name
- The sender’s email address
You can enter multiple email addresses by typing each address and pressing the Tab key to add additional entries.
Attachments
The Attachments section in Bullhorn Automation email settings allows you to include images, PDFs, and other documents in your emails. When you select the Attachments option, the File Manager will open, providing an easy way to upload, organize, and insert files into your messages.
With the File Manager, you can:
- Upload and organize files for easy access.
- Insert images and documents directly into emails.
- Attach resources such as job descriptions, company brochures, or compliance documents.
To learn more about using the File Manager to manage attachments and enhance your emails, visit Adding Images, PDFs, or Documents to a Bullhorn Automation Email.