Amplify Admin Access
Amplify Admin is the control center for managing how Amplify behaves in Bullhorn. Here, admin users can configure the Amplify Assistant and Note Enrichment on Job, Candidate, and Contact records, set up and manage custom prompts, and manage other Amplify skills such as Screen and Present.
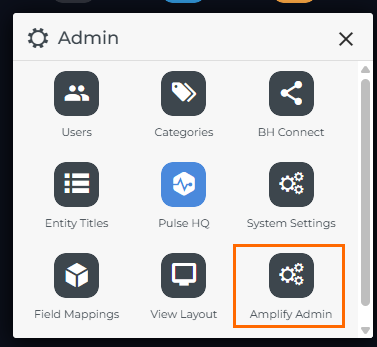
How to Access Amplify Admin
-
Open the ATS menu.
-
Select Admin > Amplify Admin.
Amplify Admin is organized into tabs, each controlling a different part of the Amplify experience.

Settings
The Settings tab is primarily used during initial setup to connect Bullhorn to your LLM![]() An AI language model (or LLM) is a system trained on large amounts of text that can read, interpret, and generate human-sounding language. Amplify uses one to read your Bullhorn records and produce output based on the prompts you configure. It does not search the internet or access outside data on is own. It only works with what you give it. provider. You usually won’t need to update this unless your API key or connection details change.
An AI language model (or LLM) is a system trained on large amounts of text that can read, interpret, and generate human-sounding language. Amplify uses one to read your Bullhorn records and produce output based on the prompts you configure. It does not search the internet or access outside data on is own. It only works with what you give it. provider. You usually won’t need to update this unless your API key or connection details change.
This section also includes settings that control access to Amplify Chat and Amplify Overview:
-
Usertypes for Global Amplify: Choose which users can access Amplify Chat.
-
Show Amplify button in Mainframe: Enables the Amplify button in the top navigation bar.
Data Management
Use the Data Management tab to configure Roles, which help Amplify understand the voice, perspective, or role it should use when generating content. This gives Amplify helpful context, resulting in more tailored, relevant responses.
Learn more here: Managing Roles for Amplify
Entity Settings
Entity Settings control what information Amplify Assistant displays when you open it on a Candidate, Contact, or Job record. Expand any entity type to edit its configuration. Be sure to click Save after making changes.
Entity Settings include three key areas:
Chat Settings
These settings define what Amplify Assistant does automatically for each entity type.
-
Show Activity Counts? Displays key activity counts for the entity (for example, Candidate records show counts for AI Screens, Submissions, Interviews, and Placements.).
-
Run Prompt on Load: If enabled, Amplify automatically runs a selected prompt whenever a user opens the Assistant on that record type.
-
Select Prompt: Choose which saved prompt runs automatically when Run Prompt on Load is turned on.
Card Settings
These settings control whether Amplify Summary Cards display for each entity, and which prompts run by default for each card.
See Amplify Summary Cards to learn more.
Enrich Fields
These settings control Note Enrichment, which extracts structured data from notes and updates record fields.
-
Note Enrichment: Toggle Note Enrichment on or off for the entity.
When enabled, you’ll see a table of fields that Amplify can enrich based on note content.
Learn more here: Enrich Records from Notes
Prompts
The Prompts tab is where you build and manage all custom prompts for Amplify Assistant, Amplify Chat, and the Enrich automation step.
To learn more about designing prompts, see Amplify Prompt Studio
The Prompts tab in Amplify Admin controls admin-configured prompts available to all users. These are different from the prompts users save for themselves in Amplify Chat. For end-user saved prompts, see Saving Amplify Chat Prompts.
Screening Agent Settings
These settings ensure Amplify Screening runs smoothly.
-
Submission Status: Defines the status Automation uses to add candidates into the Screener. This value is automatically applied when a screening is initiated from Amplify.
-
Template Name, Question Field, Category Field: These are pre-configured fields that allow the Screening Agent to display job screening questions in the “Add to Screening Agent” page and on the Amplify tab of Job records.
Amplify Present
Use this section to create and manage templates for Amplify Present, including the content structure and formatting settings used to generate AI-powered documents.
Learn more here: Amplify Present Admin.