Creating an Invoice Aging Report in Bullhorn Reporting (Previously Canvas)
Would you like to see how up-to-date your clients are with their approved invoices at a glance from within Bullhorn Reporting?
The following instructions assume you use Bullhorn Back Office and have the Bullhorn Back Office in Bullhorn Reporting add-on activated. This report will not include partially paid invoices.
Creating the List Report
We will begin by creating a list that will hold our data.
Steps
-
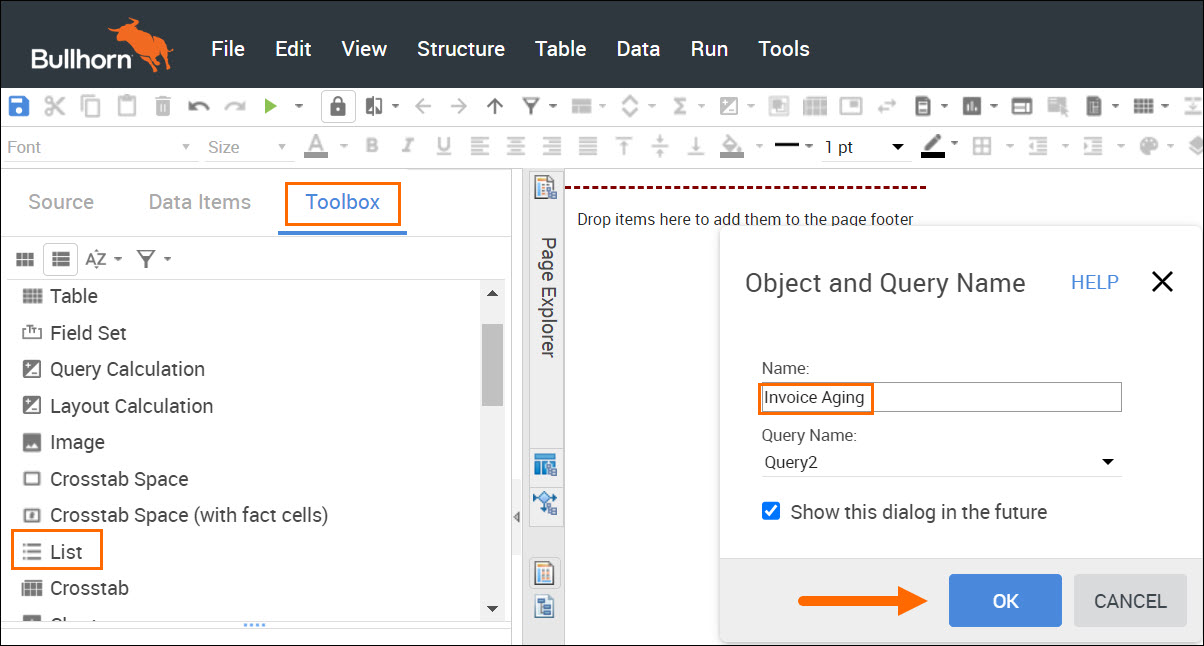
From the Toolbox, double-click List.
-
In the Object and Query Name pop-up, for the name type “Invoice Aging”, then click OK.
-
Under Insertable objects, from Sources, click Company Analysis > Company.
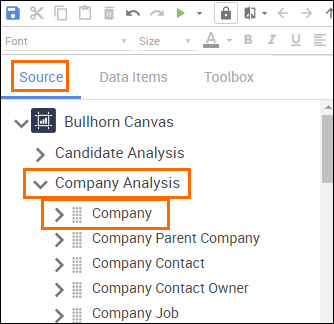
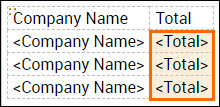
- Double-click Company Name to add it to your list.
- Still under Company Analysis, click Company Invoice.
- Double-click Total to add it to your list.
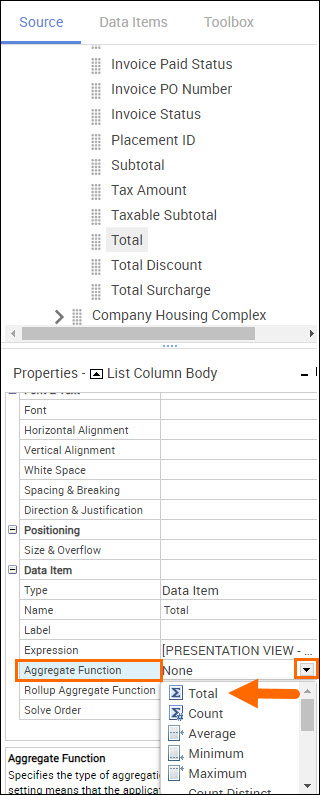
- To ensure we get a total of all invoices rather than just the most recent invoice, we need to tell Bullhorn Reporting to use the Total aggregate function instead of Automatic. We also want to see the total in our local currency.
- In the table, click the <Total> to highlight the data column's data rows.
- In the Properties pane, under Data Item, set the Aggregate Function and the Rollup Aggregate Function to Total.
- In the table, right-click the Total data column and select Style, then choose Data format….
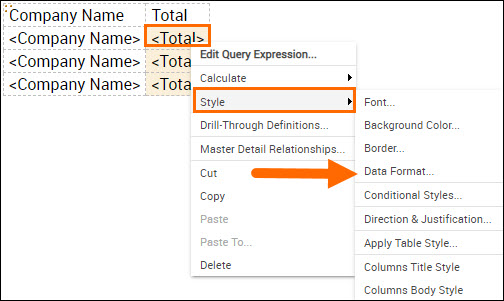
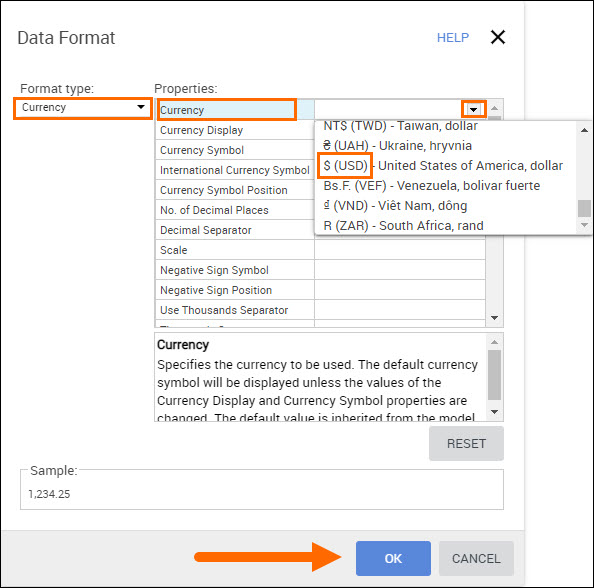
- In the Data Format pop-up, set the Format type to Currency.
- Under Properties, click Currency, then from the drop-down select USD (or your local currency). Then click OK.
Filtering the List
Next, we want to insure we are only looking at invoices that have not yet been paid.
Steps
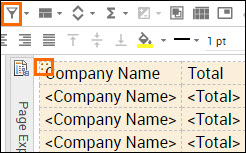
- In the table, click the three dots.
- Select Filters, then click Edit Filters....
- In the Filters - Query2 pop-up, click Add.
- In the Create Filter pop-up, select Advanced and then click OK.
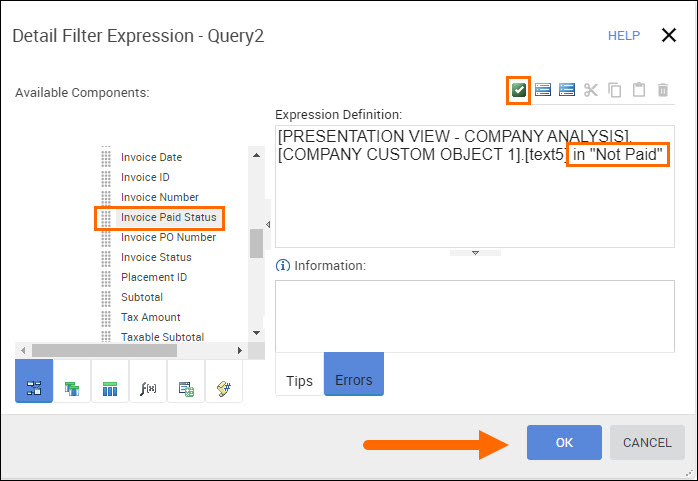
- Under Available components, select Company Analysis > Company Invoice.
- Double-click Invoice Paid Status. This will populate an expression into the Expression Definition box.
- In the Expression Definition box, put your cursor after the populated expression and Press the space bar on your keyboard. Paste in the following expression:Copy
in "Not Paid" - Click Validate to verify the expression.
- Fix any errors.
- Click OK.
- In the Filters - Query2 pop-up, click OK.
Calculating the Overdue Range
Now we want to visually identify which invoices are past due by what amount.
Steps
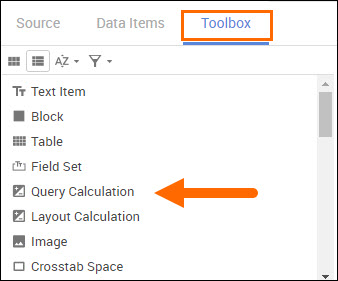
- From the Toolbox, double-click Query Calculation.
- In the Data Item Expression -Data Item1 pop-up, for the Name field, type “Overdue Range”.
- Into the Expression Definition box, paste the below expression:Copy
CASE WHEN _days_between (getdate(),[DUE DATE])<30 THEN ('0-30 days past due') WHEN _days_between (getdate(),[DUE DATE])<60 THEN ('30-60 days past due') WHEN _days_between (getdate(),[DUE DATE])<90 THEN ('60-90 days past due ELSE ('90+ days past due') END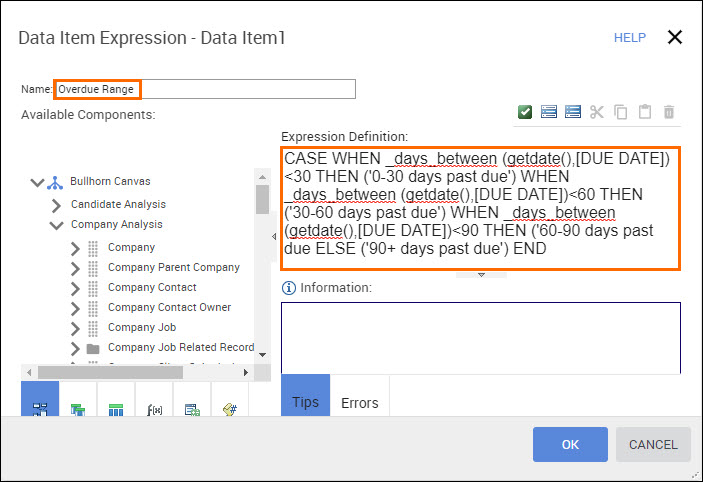
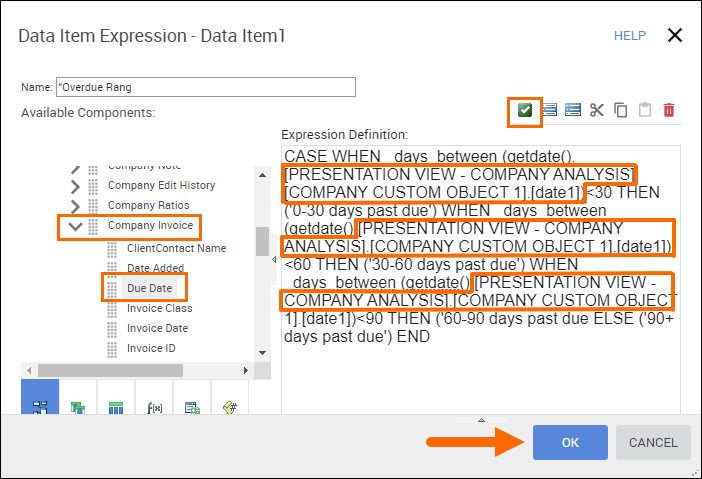
- Starting with the above expression in the Expression Definition box, replace each instance of the [DUE DATE]. To do this:
- In the Expression Definition box, highlight [DUE DATE].
- For our example, under Available Components, click Company Analysis > CompanyInvoice.
- Double-click Due Date.
- Repeat these steps, until all of the [DUE DATE]s in the expression are gone.
- Click Validate to verify the expression.
- Fix any errors.
- Click OK.
Formulating the Report
We want to see our data so that the company invoices are sectioned by how far past due they are.
Steps
- Highlight the Overdue range data rows and select Section/Unsection.

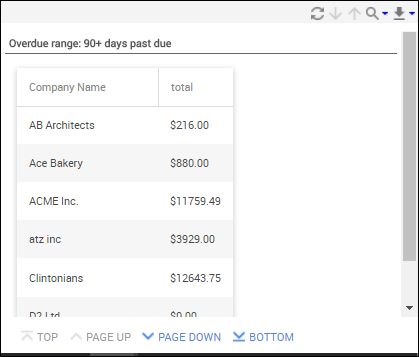
- Save and Run your report.
You now have a basic invoice aging report that you can customize to suit your company’s needs. You can enhance this report by adding invoice numbers or other data items, linking to the company’s Bullhorn record, etc.