Creating a Job Activity by Client Report in Bullhorn Reporting (Previously Canvas)
The following instructions will help you to create a report, grouped by client, that shows you counts for placements, submissions, and interviews, plus how many calendar days old your open jobs are.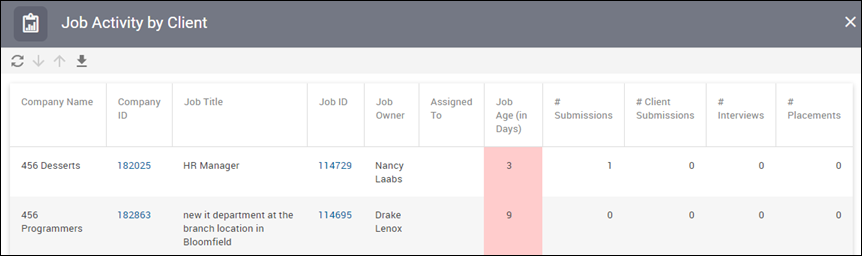
Building the Base of the Report
We are going to use the Job Analysis package because the fields we’re reporting on are stored in the the job record.
Throughout these instructions we’re going to add our chosen fields. You can select other fields as desired to customize your own report.
For our example, we will add the Company Name, Company ID, Company Date Added, Company Name, Job ID, Job Title, Job Owner Name, Job Assignment Name, Submission Count, Client Submission Count, Interview Count, and Placement Count for our jobs.
Steps
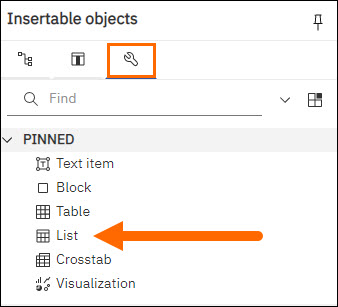
- Under Insertable objects, from the Toolbox tab, double-click List.
- In the Object and Query Name pop-up, name your list as you like then click OK.
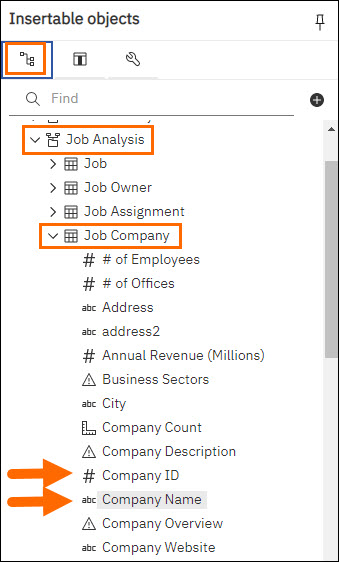
- Under Insertable objects, from the Sources tab, click Job Analysis > JobCompany.
- Double-click Company Name > Company ID > Date Added to add these fields to your table.
Grouping Results
To group our results by client, we need to take a specific action.
Steps
- Click on the Company Name data rows.
- Click Group/Ungroup.
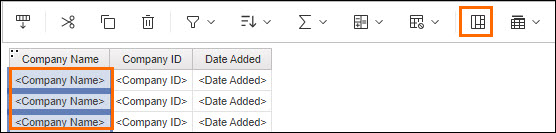
- Results will now be grouped by client.
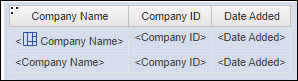
- Results will now be grouped by client.
Adding More Fields to the Report
Steps
- Back under Insertable objects > Sources > Job Analysis, click Job.
- Double-click Job ID > Job Title to add these fields to your table
- Still under Insertable objects > Sources > Job Analysis, click Job Owner.
- Double-click Name > to add this field to the table.
Renaming and Adding Columns
We will be adding several names fields, so at this point we want to rename them as we add them.
Steps
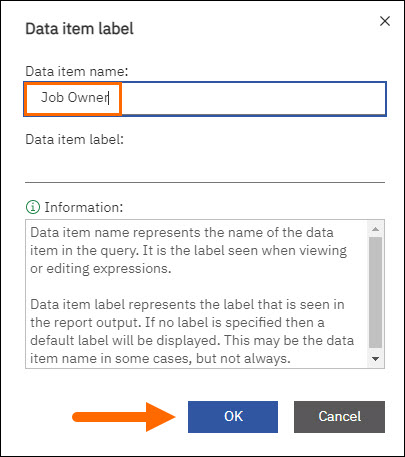
- In the table, click the Name column header > More > Edit Data Item Label....
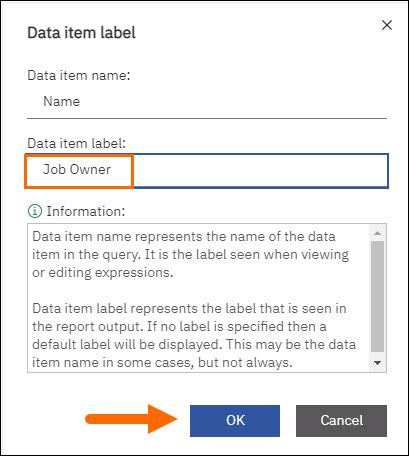
- In the Data item label pop-up, for the Data item name type "Job Owner" and click OK.
- Still under Insertable objects > Sources > Job Analysis, click Job Assignment.
- Double-click Name > to add this field to the table.
-
Follow the first two steps to change the title of this column to “Assigned To”.
Adding Count Fields
Now we’re going to add some count fields, so we can see more information about our jobs at a glance.
In Bullhorn Reporting we split Internal Submission information from Client Submission information, because we treat those submissions as separate from each other, even though they are closely related.
Steps
- Still under Insertable objects > Sources > Job Analysis, click Job Submission.
- Double-click Submission Count > to add this field to the table.
- Follow the first two steps under Renaming and Adding Columns to change the title of this column to “# Submissions”.
- Still under Insertable objects > Sources > Job Analysis, click Job Client Submission.
- Double-click Client Submission Count to add this field to the table.
- Follow the first two steps under Renaming and Adding Columns to change the title of this column to “# Client Submissions”.
- Still under Insertable objects > Sources > Job Analysis, click Job Interview.
- Double-click Interview Count to add this field to the table.
- Follow the first two steps under Renaming and Adding Columns to change the title of this column to “# Interviews”.
- Still under Insertable objects > Sources > Job Analysis, click Job Placement.
- Double-click PlacementCount to add this field to the table.
- Follow the first two steps under Renaming and Adding Columns to change the title of this column to “# Placements”.
- Rearrange the columns as you like.

Calculating Job Age
Now, we’re going to tell Bullhorn Reporting to compute the number of days between the day the job was added and the day the report is run.
Steps
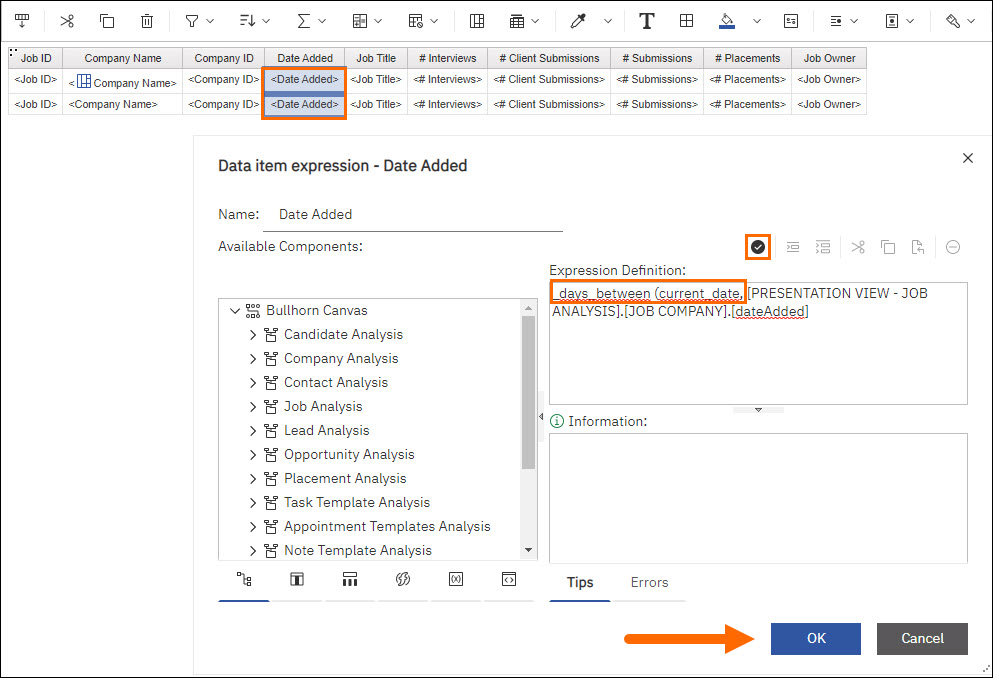
- Double click the Date Added data rows. The Data item expression - Date Added screen will pop-up.
-
In the Expression Definition box, put your cursor in front of the expression in the paste in the following expression:
Copy_days_between (current_date,- This formula is telling Bullhorn Reporting to calculate how many days are between today’s date and the date the job was added.
- Click Validate to verify the expression.
- Fix any errors. See Untangling Validation Errors in Bullhorn Reporting (Previously Canvas) to determine where your mistake is and make any corrections.
- Click OK.
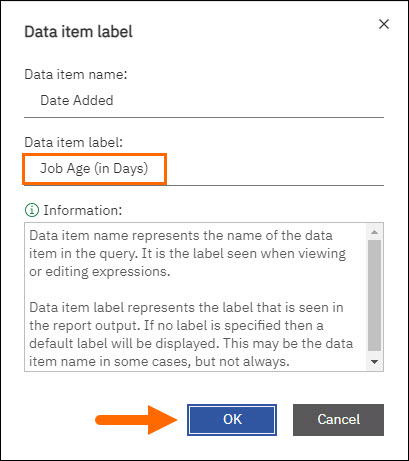
- In the table, Click the Date Added column header > More > Edit Data Item Label...

- In the Data item label pop-up, for the Data item name type “Job Age (in Days)" and click OK.
Applying Conditional Formatting
We want our results to highlight jobs older than 30 days. You may elect to choose a different number as your threshold.
Steps
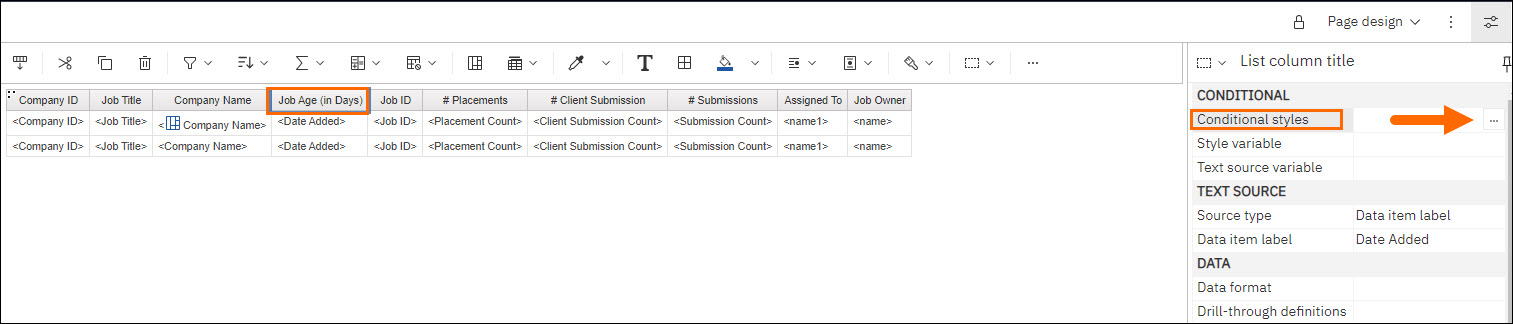
- In the table, click Job Age (in Days).
- Under Show properties > CONDITIONAL, click Conditional Styles > More.
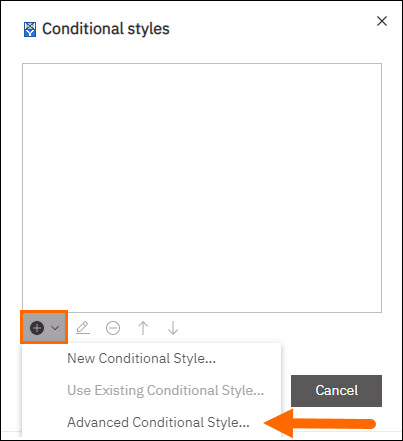
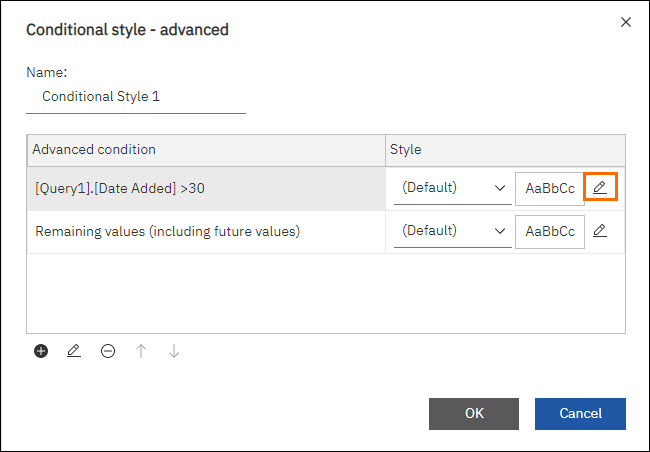
- In the Conditional styles pop-up, select Add, then click Advanced Conditional Style….
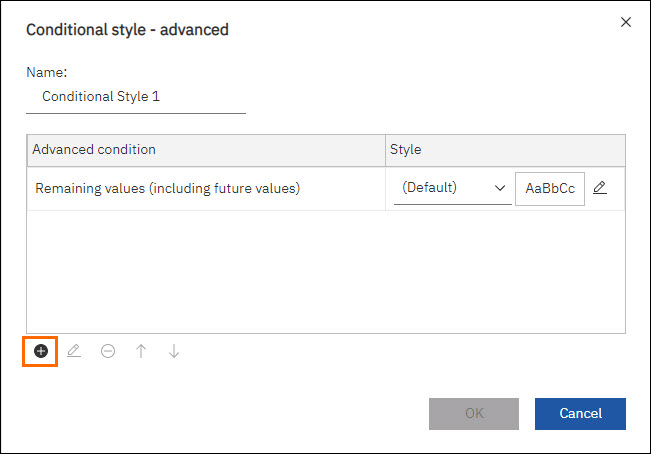
- In the Conditional style - advanced pop-up, click New Advanced Condition.
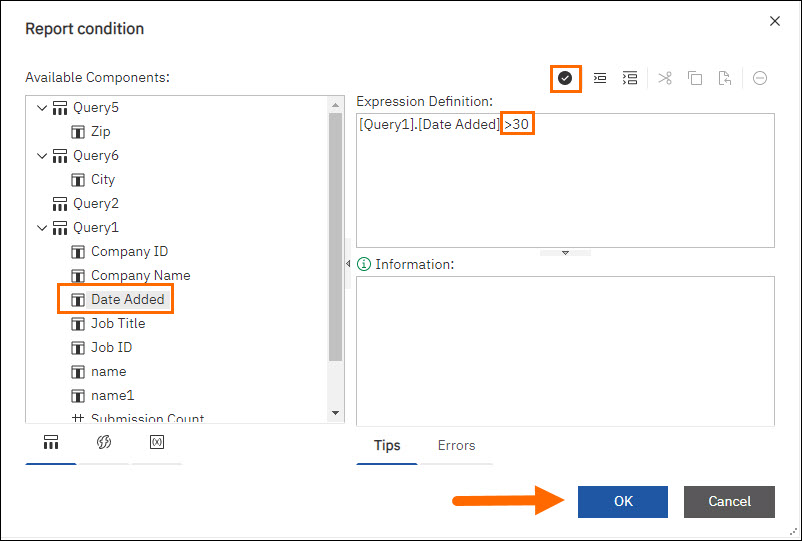
- In the Report condition pop-up under Available Components >Query1, double-click Date Added.
- In the Expression Definition box, put your cursor after the expression and type ">30".
- Query Definition: This tells Bullhorn Reporting to highlight any results over 30 days.
- Click Validate to verify the expression.
- Fix any errors. Read through this article to determine where your mistake is and make any corrections.
- Click OK.
- In the Conditional Style - advanced screen, find the Advanced Condition you created. Click Edit Style on that row.
- Click on the Background color drop down.
- Select a shade of red from any of the tabs.

- This will be the background color of the results that are over 30 days old.
- Alternately, you may choose to apply a red font color by clicking on Foreground Color instead of Background Color.
- Click OK three times so it closes all the conditional styles windows and you’re back on your studio.
Adding a Filter
We want to tell Bullhorn Reporting to only show us open jobs.
Steps
-
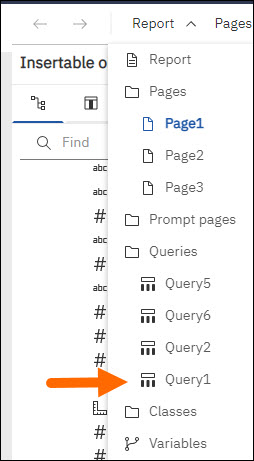
Go to Report > Queries, click Query1.
-
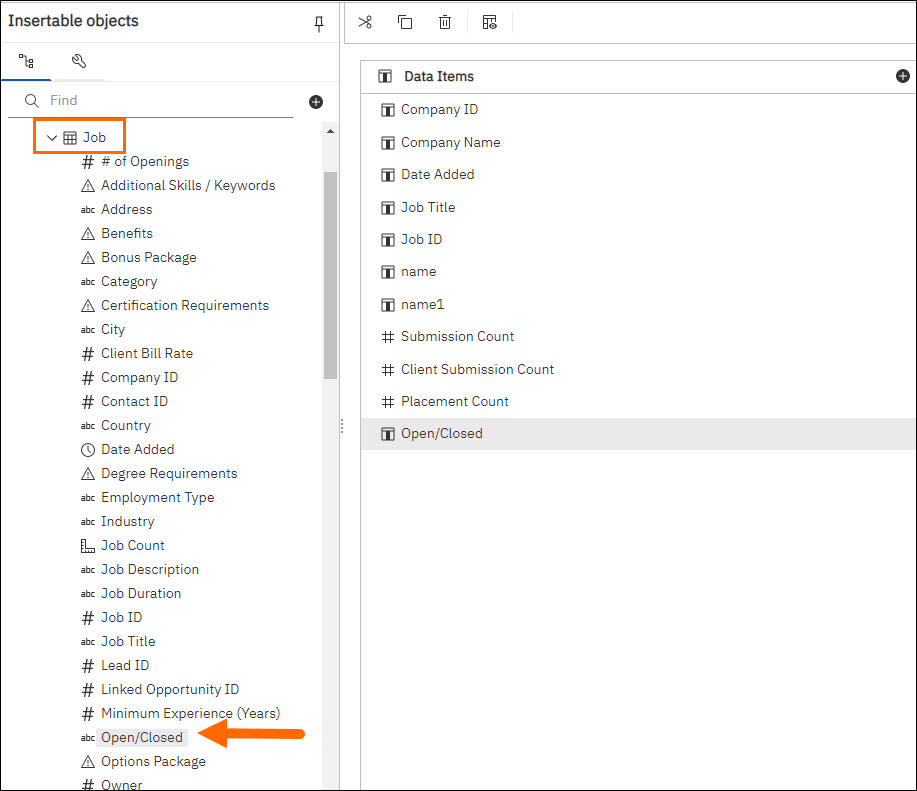
Under Insertable Objects > Sources > Job Analysis, click Job.
-
Double-click Open/Closed to add it to Data Items.
-
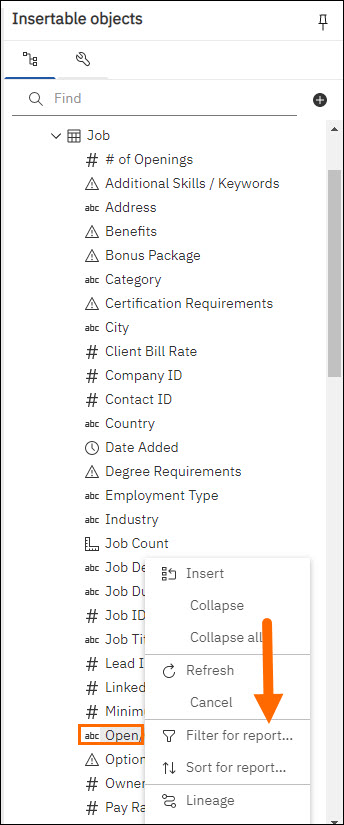
Still under Insertable objects > Sources > Job Analysis > Job, right click Open/Closed then select Filter for report….
-
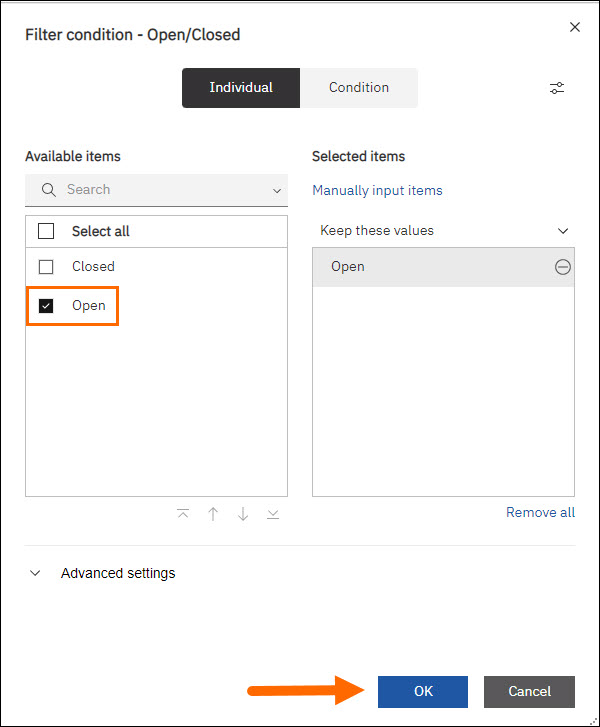
In the Filter condition - Open/Closed pop-up > Available items, click Open. This will move it to the field Keep these Values.
-
You may add additional filters as desired at this point.
-
-
Click OK.
Linking Results to Bullhorn Records
Finally, we want the results linked to their respective records. See Linking to Bullhorn Records in Bullhorn Reporting (Previously Canvas) for these steps.
Steps
- Create a new Company ID column that is linked to company records.
- Check the URL and ensure it contains the ClientCorporation entity, for example https://clsX.bullhornstaffing.com/BullhornSTAFFING/OpenWindow.cfm?Entity=ClientCorporation&id=
- Check the URL and ensure it contains the ClientCorporation entity, for example https://clsX.bullhornstaffing.com/BullhornSTAFFING/OpenWindow.cfm?Entity=ClientCorporation&id=
- Create a new Job ID column that is linked to job records.
- Check the URL and ensure it contains the JobOrder entity, for example Example: https://clsX.bullhornstaffing.com/BullhornSTAFFING/OpenWindow.cfm?Entity=JobOrder&id=
- Save and run your report.
You have now finished your Job Activity by Client report!
For more information about advanced Canvas techniques you can search for “Cognos Workspace Advanced” on your desired search engine.
To learn the basics of writing an expression, see Building Expressions in Bullhorn Reporting (Previously Canvas) .