Website Tracking
Bullhorn Automation allows you track everything your contacts are doing on your company's site. It also makes it easy to distinguish between actions like browsing blogs and news on your site from the pages that represent "buying" behavior, such as viewing jobs or viewing the Contact Us page. This article explains how to set up and edit your website tracking in Bullhorn Automation.
Setting Up Website Tracking
1. Access Website Tracking Settings
-
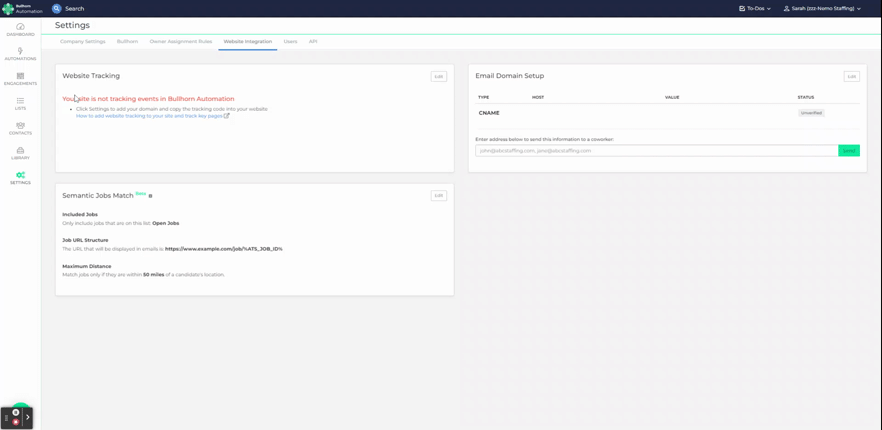
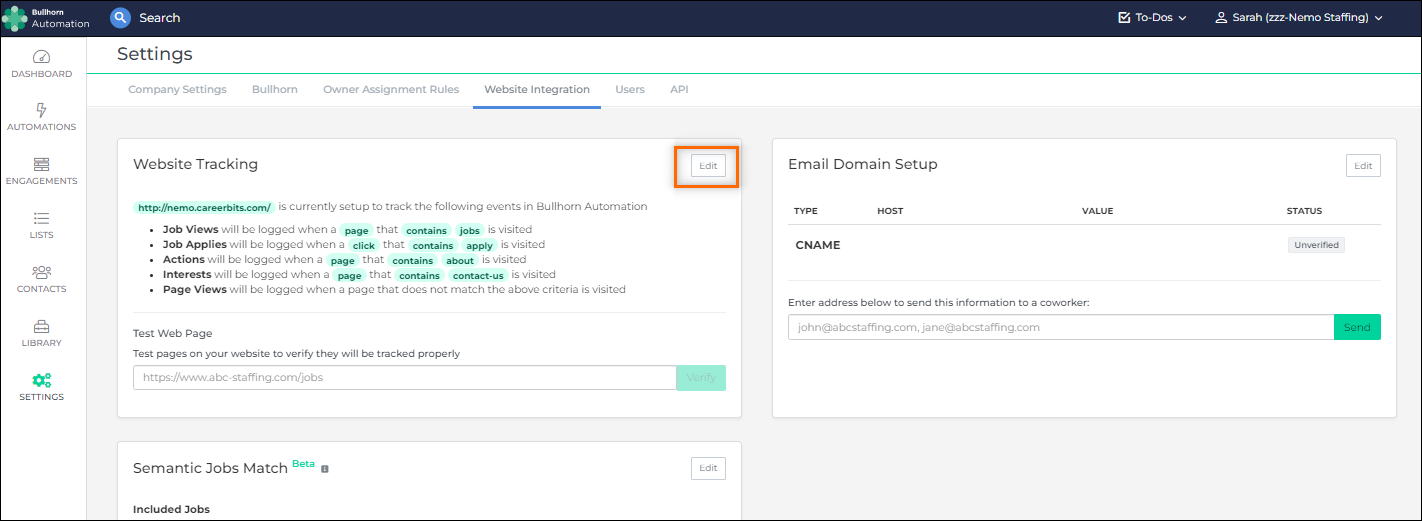
To view and edit your website tracking, go to SETTINGS > Website Integration > Website Tracking > Edit.
-
This opens a panel on the right side of the screen.
2. Enter Your Website Domain
-
In section 1) Website Domain, enter your domain name. (e.g., www.yoursite.com)
This domain is for testing purposes only and you'll still be able to track multiple domains with the same tracking code. You would test different domains by changing this field.
3. Copy the HTML Tracking Code
-
In section 2) Copy and paste this tracking code into your site's header, copy the HTML code found here.
-
Be sure to enter the Website Domain before copying the code.
-
-
This code needs to be placed in the header of your website, the part that loads on every page.
What to do with the tracking code:
-
Send it to your IT contact or Website Administrator, or
-
If you have access, add it yourself to your site’s <head> section
-
If your job listings are on a separate domain, you’ll also need to add the code to that domain.
4. Click Save
After adding your domain and copying the code click Save. 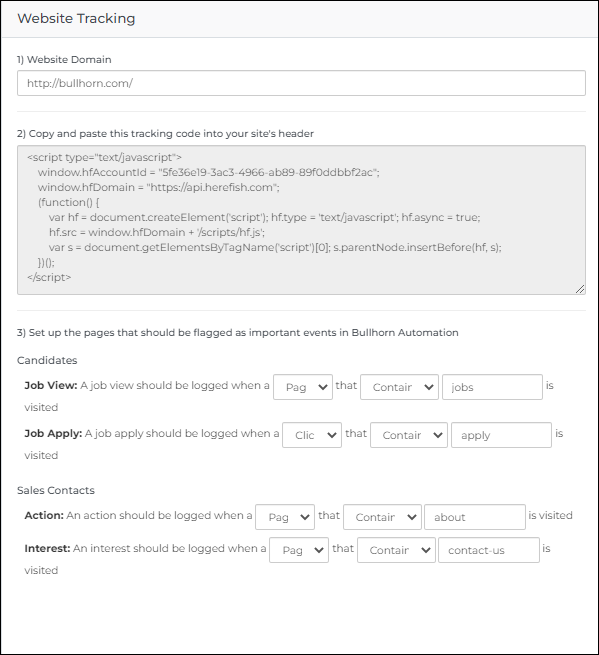
After you've entered the tracking code into your site, every time you come back to Bullhorn Automation, you'll see that it is automatically tested to ensure that it is entered properly to track job views:

If you can't get your website to verify, then check out our Website Tracking Troubleshooting article.
Continue Setup: Tracking Specific Activity
Now that we are sure the code is entered properly, we can set it up to track certain pages.
5. Section 3 Set Up
-
To edit your website tracking, go to SETTINGS > Website Integration > Website Tracking > Edit
-
Scroll to section 3) Set up the pages that should be flagged as important events in .
Bullhorn Automation tracks website activity via an invisible pixel attached to Bullhorn Automation emails. Once a candidate or contact opens this email, the pixel can download and they will be eligible for website tracking.
-
Job Views: You will want to track any pages that show jobs. People often set up automations to notify recruiters when a job is viewed and also track job views as a key performance metric. Just enter the text that is contained on your job pages.
-
Apply: This is usually the first page that someone goes to in your application process. This can also be a "click." This would be used if you want to track every time someone clicks the "APPLY NOW" button.
-
Action: This is often used to track when a sales lead takes a buying "action," such as looking at the "Our Services" or "Our Customers" type page.
-
Interest: Similar to an "Apply," this is when someone goes the next level deeper and starts to express interest in your services. This is often the "contact us" page or another page that indicates they are interested in speaking with you.
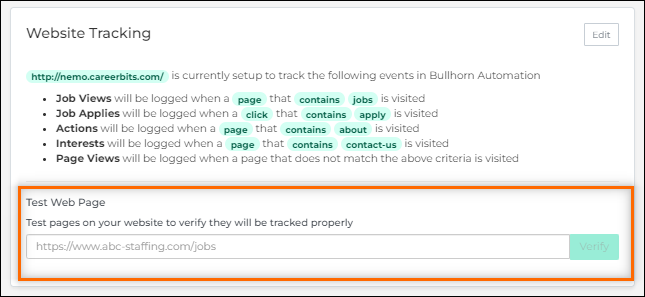
Once you click on Save, all those settings will be saved. You'll see a new box which allows you to enter URLs and click Verify to confirm everything is working as you'd expect. We recommend you actually visit that page on your site in a separate tab and copy the URL, then click Verify. This will go to your page and show you if it is tracking the individual pages as expected.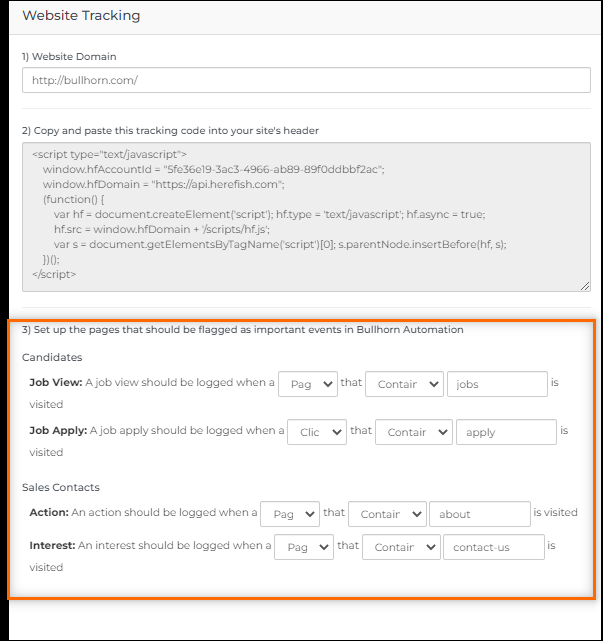
To test additional pages from your website, simply paste the URL into the Test Web Page section and Bullhorn Automation will verify access.
Overview of all Website Tracking settings: