Configuring Your User Calendar
’s calendar integration feature allows recruiters to efficiently schedule meetings with candidates and sales contacts without the need for third-party tools.
Inviting Users
The steps in this section must be completed by an Admin.
When Automatically send invites to new Bullhorn users is enabled, new users are invited to integrate their calendars.
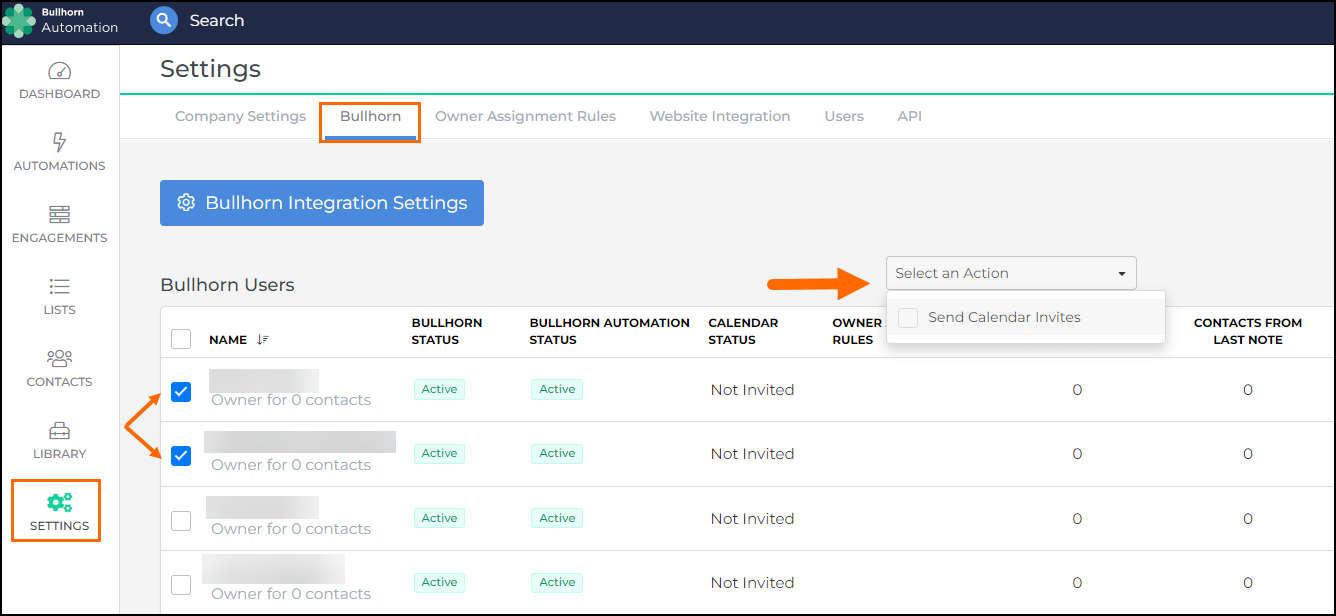
Users can be manually invited to integrate their calendar from the ATS Page.
- Navigate to Settings > ATS (Bullhorn/Salesforce/etc.)
- Check the box(es) of users to invite.
- Single-select and Multi-select functionality is supported.
- From the Select an Action drop-down click Send Calendar Invites.
- Click Yes on the Are you sure? pop up to confirm.
The Calendar Status automatically updates from Not Invited to Invited.
Calendar Statuses
You can check a user’s Calendar Status under the ATS section of the Settings page. The following statuses may be shown for each user:
- Not Invited: The user has not been invited to use the calendar integration.
- Pending: The calendar integration invite is in the process of being sent to the user.
- Invited: A calendar integration invite has been sent to the user.
- Active: The user has set up their calendar integration.
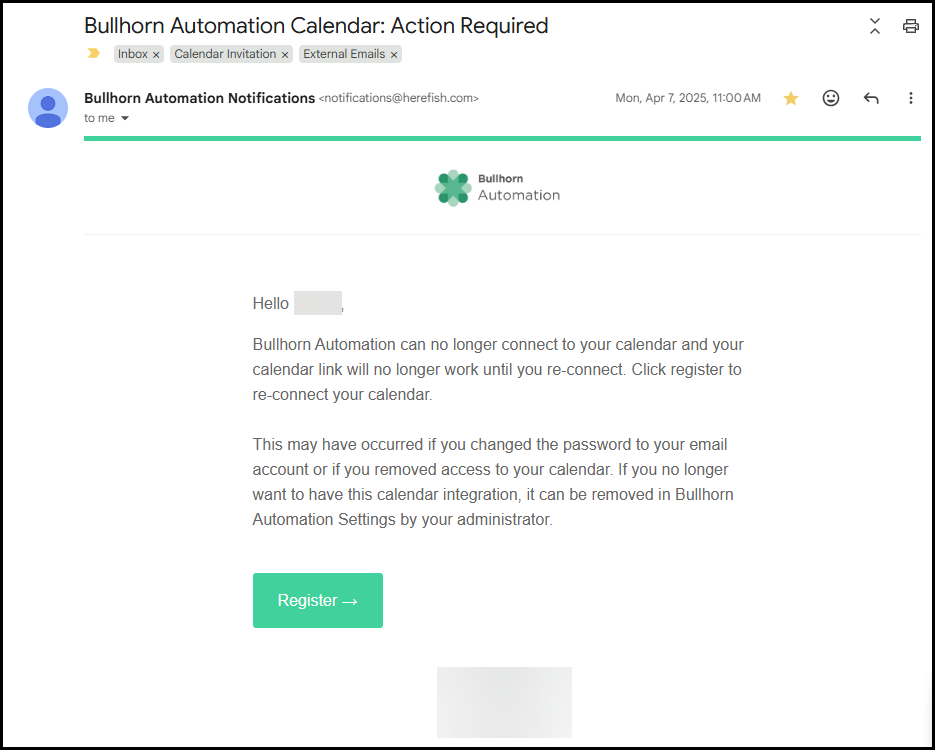
- Not Connected: The invited user’s calendar integration is unable to connect. The user will also receive a "Bullhorn Automation Calendar: Action Required" email notification asking them to reconnect their calendar.
- This status most often occurs when a user has changed their calendar credentials or when the calendar has been inactive for an extended period of time. For more information, see Calendar FAQ.
- This status most often occurs when a user has changed their calendar credentials or when the calendar has been inactive for an extended period of time. For more information, see Calendar FAQ.
Accepting the Calendar Invitation
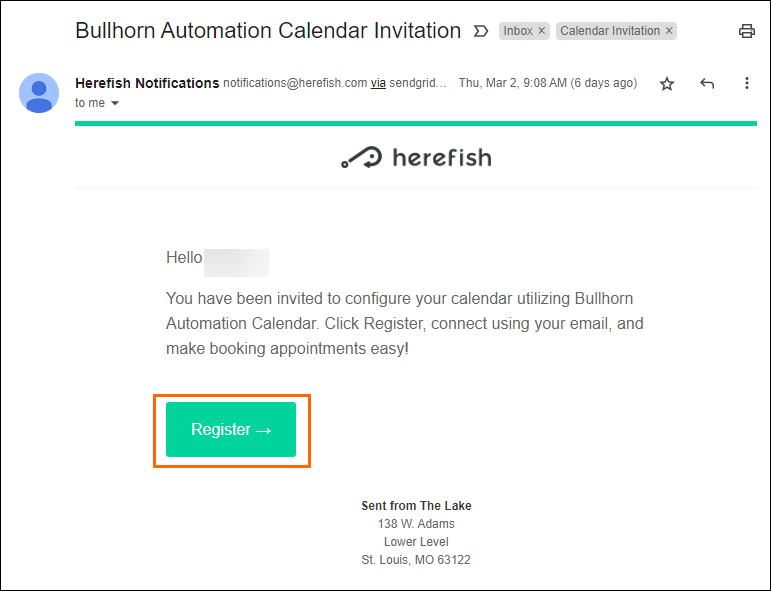
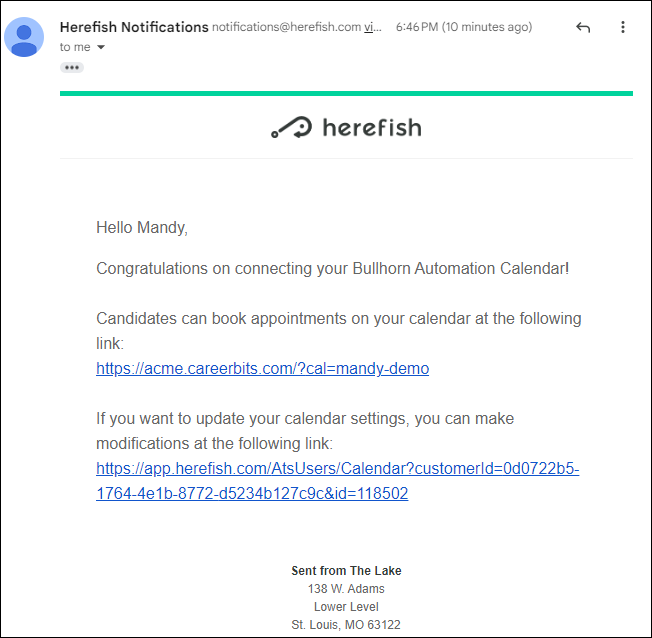
When a calendar invitation is sent, the user will receive an email from Herefish Notifications letting them know they have been invited to use the feature and providing a link to register.
Registration Steps
-
Click the Register button in the email.
-
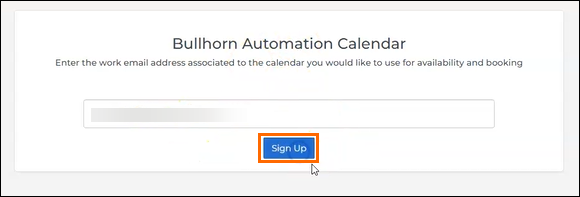
The calendar sign-up page will open with your email address pre-populated. Click Sign Up to continue.
-
If you need to use a different email address, you can change it at this time.
-
-
On the next screen, select your email provider.

-
Select the email account you want to provide calendar access to.
-
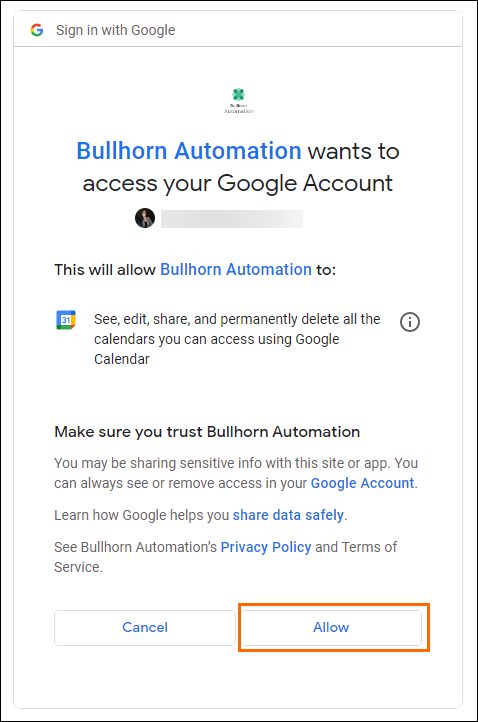
You will be prompted to allow Bullhorn Automation to access the email account. Click Allow to continue.
-
The calendar integration requires read, edit, and delete access in order to schedule, reschedule, and cancel meetings.
-
-
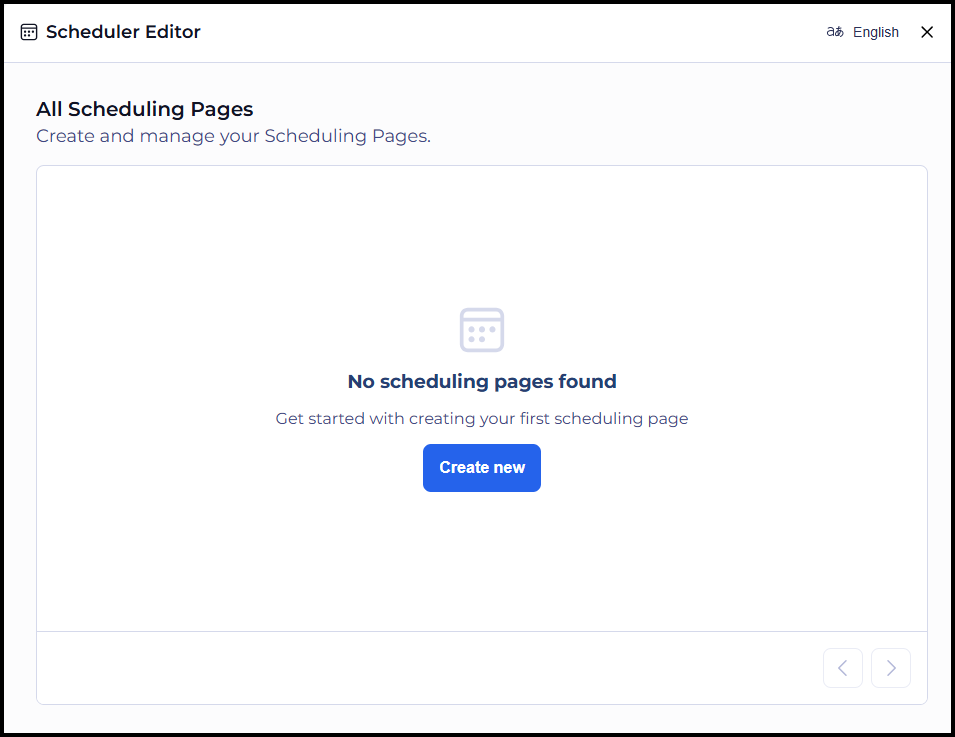
Your personal Schedule Editor page will open, where you can create or edit scheduling pages.
-
If you do not have a saved Scheduling Page you will have a Create New button.
-
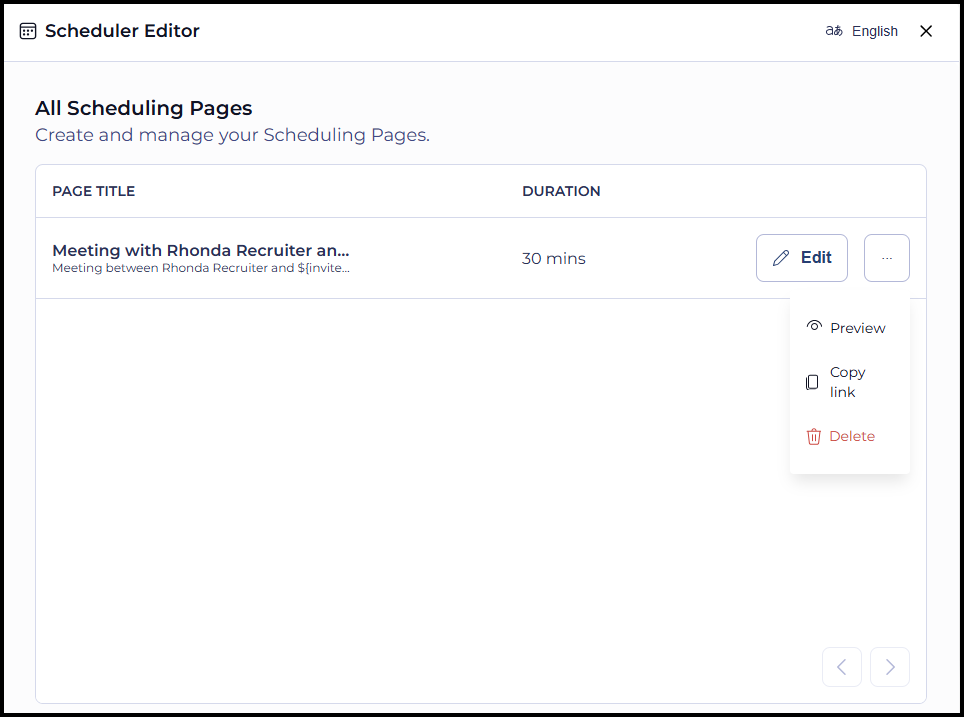
If you have an existing Scheduling Page you have the option to Edit, Preview, Copy Link, or Delete it.
-
Your calendar link can be copied for manual use, such as adding it to your email signature.
-
Users are only allowed one Scheduling Page.
-
-
-
Once your calendar is connected you will receive a confirmation email.
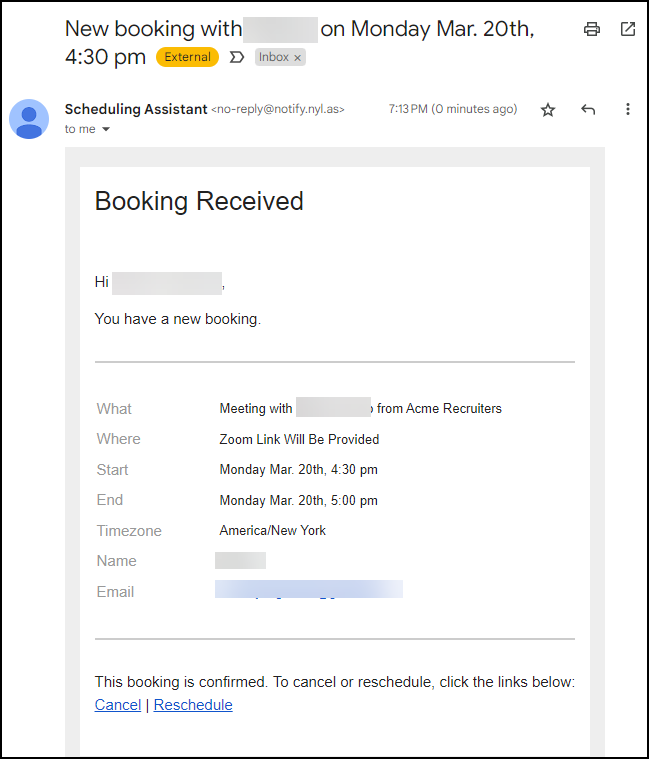
We recommend bookmarking this page for easy access should you need to make changes.
Creating a New Scheduling Page
To create a new scheduling page follow these steps:
-
Select Create new.
-
Enter an Event Title. This is what will appear on your calendar.
-
There are options to add a few dynamic template items by typing $ and then selecting the template item from the drop-down.
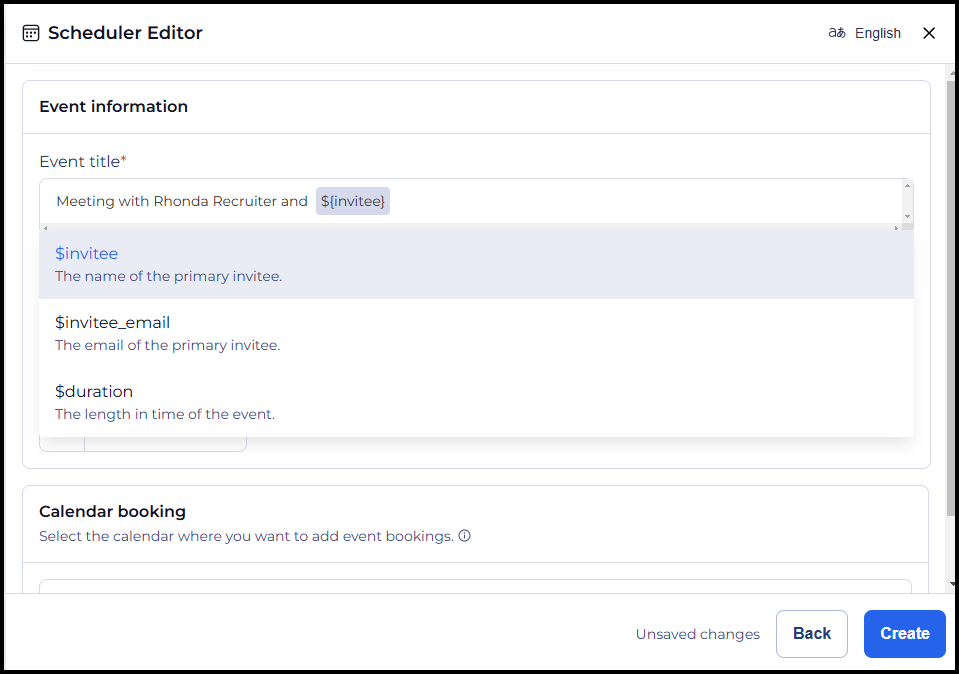
-
-
Enter the Event Duration in Minutes or Hours.
-
Select the Meeting Location using the following options:
-
None: No location is added.
-
Custom Location: Enter a custom link or address.
-
Google Meet or Teams (depending on what email you use): This will generate a unique ID for the meeting.
-
If you use a static meeting link you run to risk of people joining a meeting already in progress.
-
Select the Calendar to add the event bookings.
-
Click Save.
-
You will receive an email confirming that your calendar integration is now active and ready to use!
Scheduler Editor Overview
Once a scheduling page has been created, users will be directed to the Scheduler Editor, where they can configure and manage their scheduling settings. The Scheduler Editor can also be accessed later by clicking the Edit button next to an existing scheduling page. The editor consists of seven tabs on the left side, allowing users to customize their scheduling preferences.
Language Selector
Located at the top of the Scheduler Editor, the Language Selector allows users to set their preferred language for the scheduling interface. This is the first setting users may want to configure before proceeding with other customizations.
Tab 1: Event Info
This tab contains the same settings initially configured when creating a new scheduling page. Users can make edits to their Event Title, Duration, and Meeting Location if changes are needed.
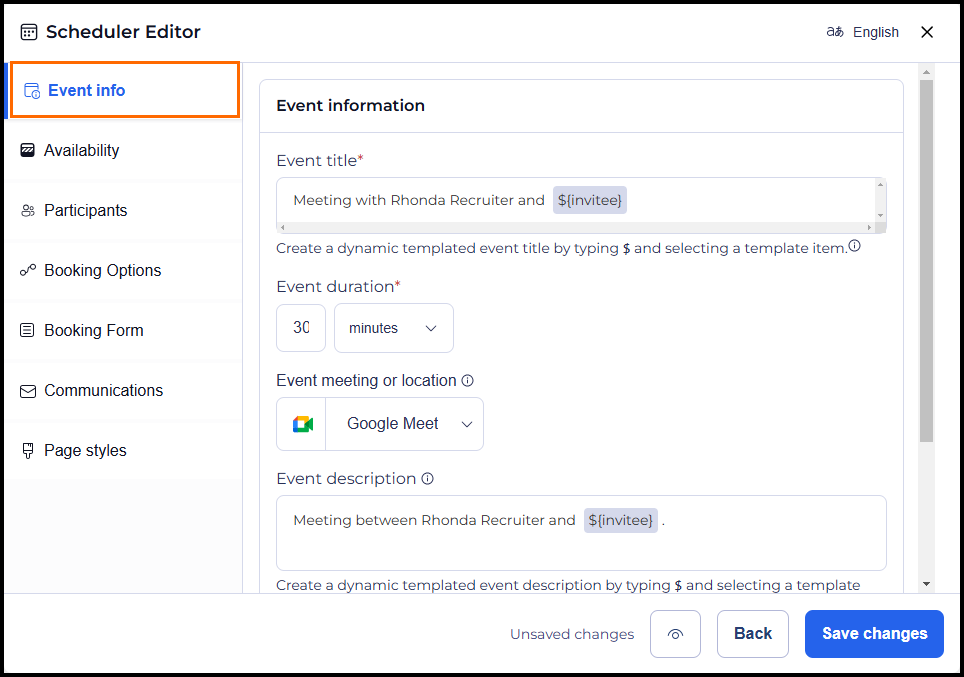
The options shown in the Event meeting or Location field depend on the connected email provider. Once selected, the system automatically generates a meeting link when a calendar event is created.
Google Meet for Gmail, or Microsoft Teams for Outlook.
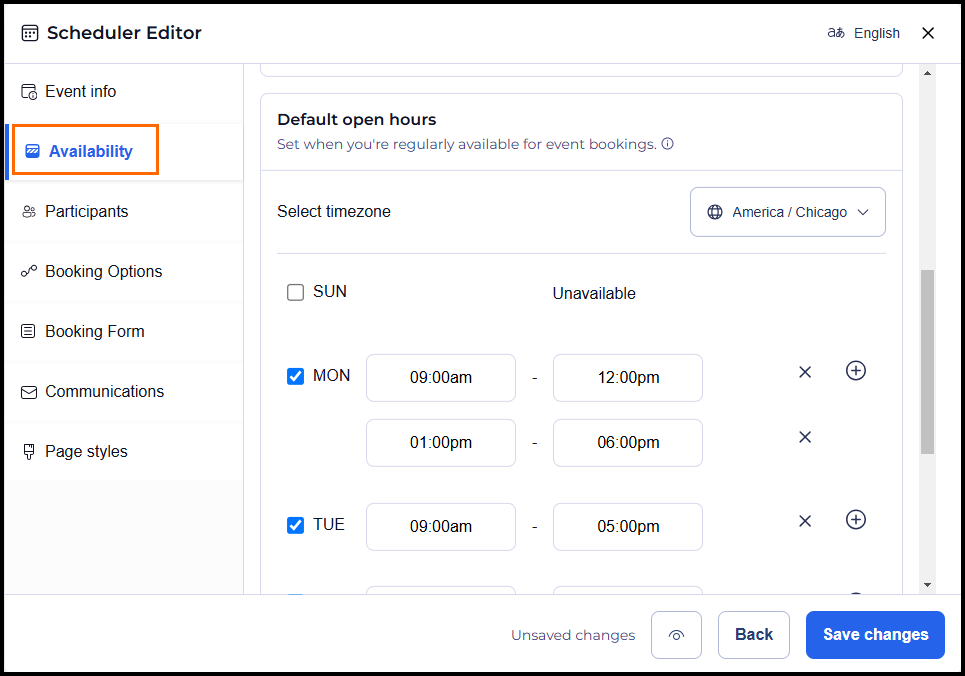
Tab 2: Availability
The Availability tab has the following settings:
Book this Calendar
From the drop-down select which calendar will receive event bookings.
Connected Calendars
Here you choose which calendars will be checked for your availability. Multiple calendars can be added.
Default Open Hours
This is where you set when your are regularly available for bookings. You can select the timezone from a drop-down, it defaults to your browser timezone.
To set your availability:
-
Check the box next to your available days of the week and enter your available time frame(s) for the day.
-
Additional ranges can be added to each day by clicking the +.
-
The range can be removed by clicking the X
-
-
Unselected days will be marked as "Unavailable"
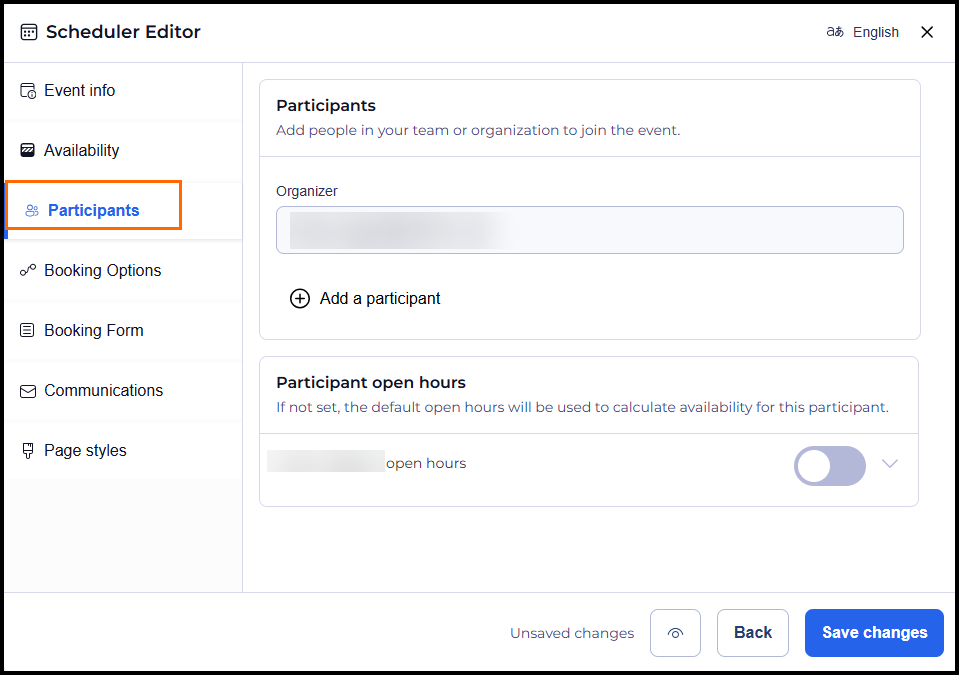
Tab 3: Participants
Users can add participants from their organization to events. The scheduling page owner is automatically set as the Organizer.
Participant Open Hours:
-
When enabled, allows setting specific availability for added participants.
-
When disabled, participants' availability defaults to the event organizer's open hours.
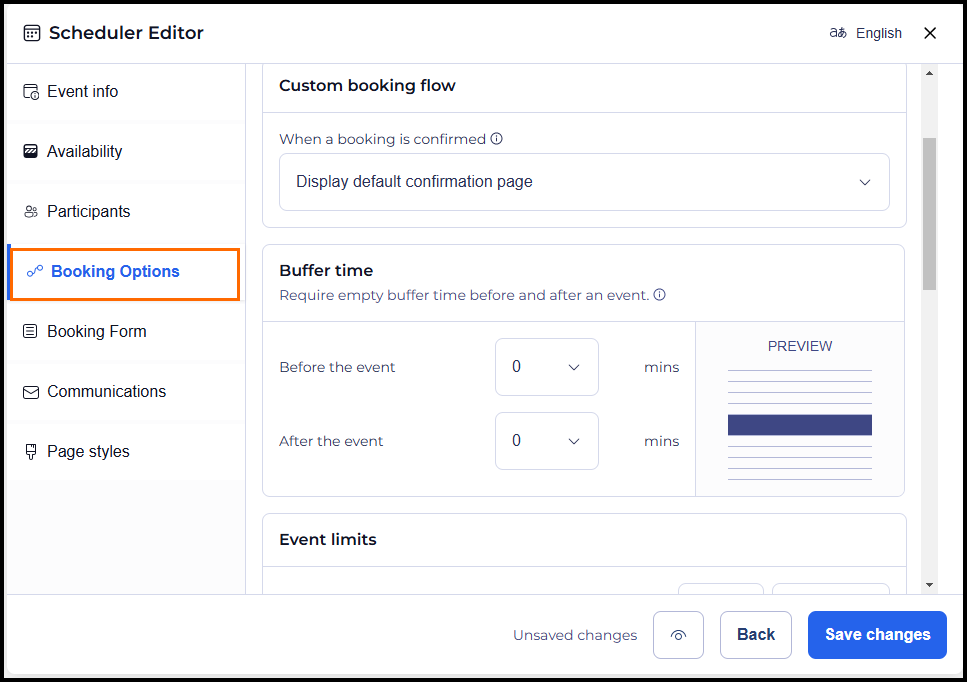
Tab 4: Booking Options
This tab allows users to define how their events are scheduled, including methods for assigning participants, booking limits, and additional customization settings.
Sections in Booking Options include the following.
Scheduling Method
Currently, the Scheduling Method feature defaults to Standard (one-on-one (1:1). Other scheduling methods, such as Round-Robin options, are not yet supported.
Custom Booking Flow
This section allows users to define what happens when a booking is confirmed. Users can choose to display the default confirmation page or redirect to a custom URL for a more tailored experience.
Buffer Time
Set buffer periods before and after an event to prevent back-to-back scheduling and allow time for preparation or follow-ups.
Event Limits:
-
Minimum Booking Notice: Time required before an event can be scheduled.
-
Limit Future Bookings: Restrict how far in advance bookings can be made.
-
Minimum Cancellation Notice: Define how much notice is required for cancellations.
-
Cancellation Policy Message: Optional policy description.
Time Slot Settings
Control how available time slots are structured and displayed. Users can define the length of each booking slot and how time slots are rounded for a more predictable scheduling experience.
-
Time Slot Interval: Defines booking length the available options are 15, 30, 45, and 60 minutes.
-
Time Slot Rounding Type: Controls how time slots are displayed. Options include:
-
Default: Time slots will be rounded to the nearest quarter-hour.
-
Interval Rounding: Time slots will begin at times rounded to the interval value.
-
Additional Settings
-
Allow guests to invite additional guests.
-
Hide rescheduling option: Hides the reschedule button in the booking confirmations.
-
Hide cancellation option: Hides the cancellation button in the booking confirmations.
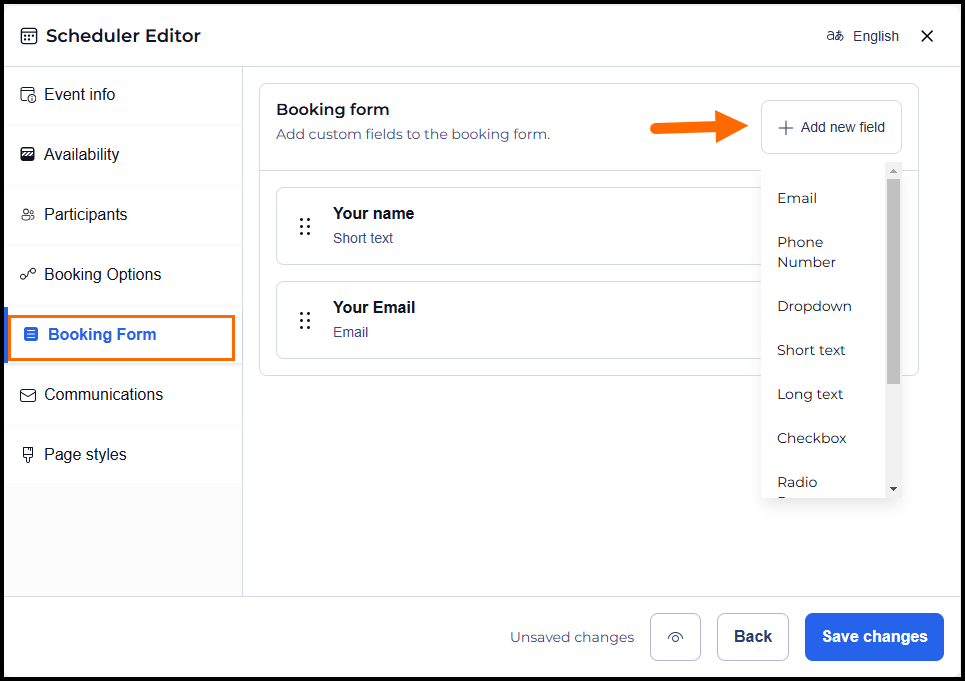
Tab 5: Booking Form
The Booking Form tab allows users to customize the form that invitees fill out when booking an event. By default, the form includes fields for the invitee’s name and email address. Users can add additional fields to collect more information, tailoring the booking process to their needs.
Available field options include:
- Phone Number
- Dropdown
- Short Text
- Long Text
- Checkbox
- Radio Button
- Metadata
- Date
- Multi-Select
Tab 6: Communications
The Communications tab allows users to configure how event notifications and confirmations are handled. Users can set up automated email confirmations, customize email content, and schedule reminders for event participants.
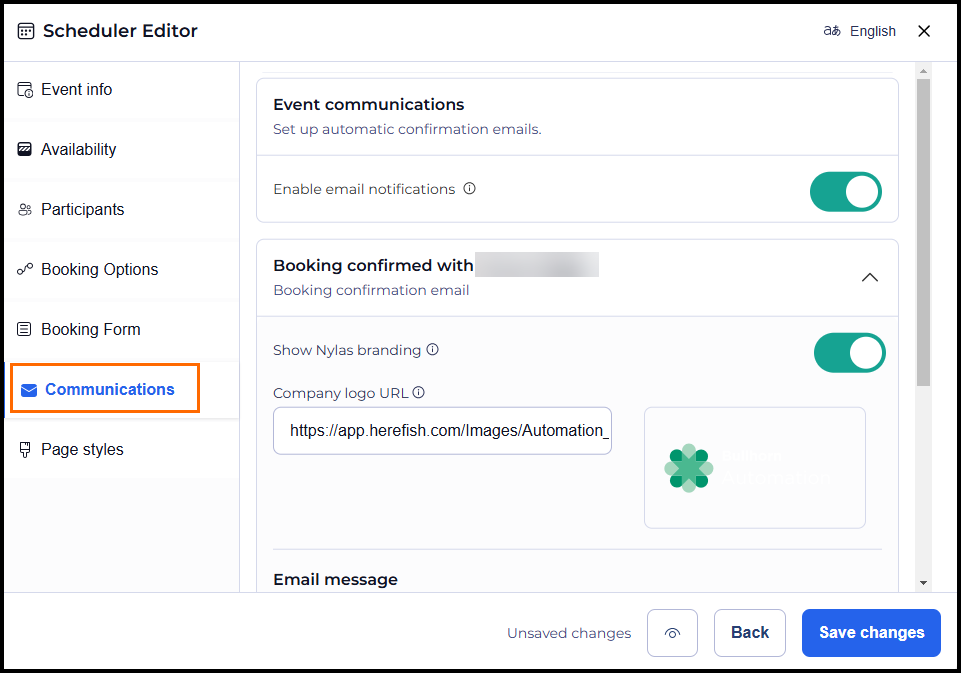
Event Communications
Enable or disable automatic email notifications sent by the system. These notifications include confirmation messages and event reminders.
Booking Confirmed Email Settings
When an event is booked, a confirmation email is sent to attendees. This section allows users to control the branding and content of these emails with the following options:
-
Show Nylas Branding: Toggling the switch lets users choose whether to display Nylas branding in the footer of the confirmation email.
-
Company Logo URL: Add a publicly accessible URL for an image.
-
The logo appears in the email header and is scaled to a maximum size of 200px x 100px.
-
Email Message
This section provides customization options for the email content. Users can define the following:
-
Custom Email Title: Serves as a headline within the email body but does not affect the subject line.
-
Additional Info: This field allows users to insert extra details that will be included in the confirmation email body.
New Reminder
Reminders can be set up by clicking + New reminder. Complete the following options:
-
Email Recipients: Select from the following options in the drop-down:
- All Hosts & Guests
- All Event Guests
- Only Event Host
-
Send confirmation email when: Choose how far in advance the reminder email will send. Options are in minutes, hours, or days.
-
Email subject: Add what the reminder email's subject should be.
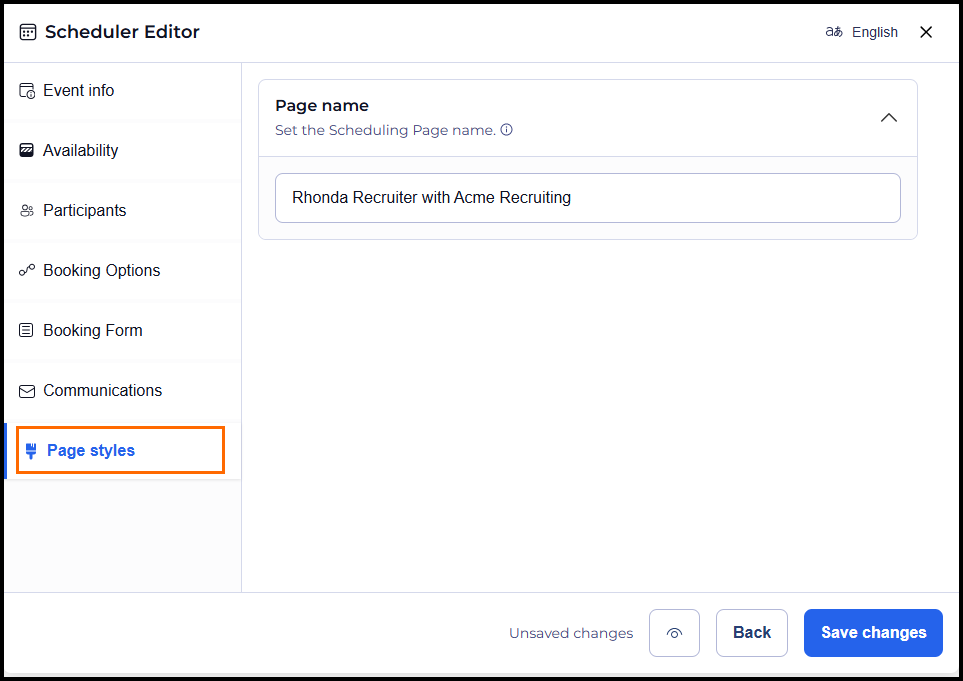
Tab 7: Page Styles
The Page Styles tab allows users to customize the appearance of their scheduling page. The Page Name setting defines the title displayed at the top of the scheduling page where invitees book appointments. By default, this name is set to the user's name but can be changed to better reflect the event type or organization.
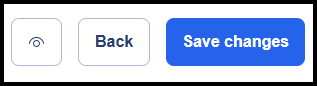
Saving and Previewing
Once all settings are configured, click Save Changes. Users can preview their scheduling page or navigate back if further adjustments are needed.