Configuring the Default Calendar Settings
Upcoming Calendar System Migration: Our scheduling system is being updated to improve functionality and usability. Any new users invited to set up their calendars will use the new setup by default. Existing users can switch early by resending their invite. On March 30, 2025, all remaining users will be migrated to the new system.
Follow these steps to switch existing users to the new functionality:
-
Navigate to.
-
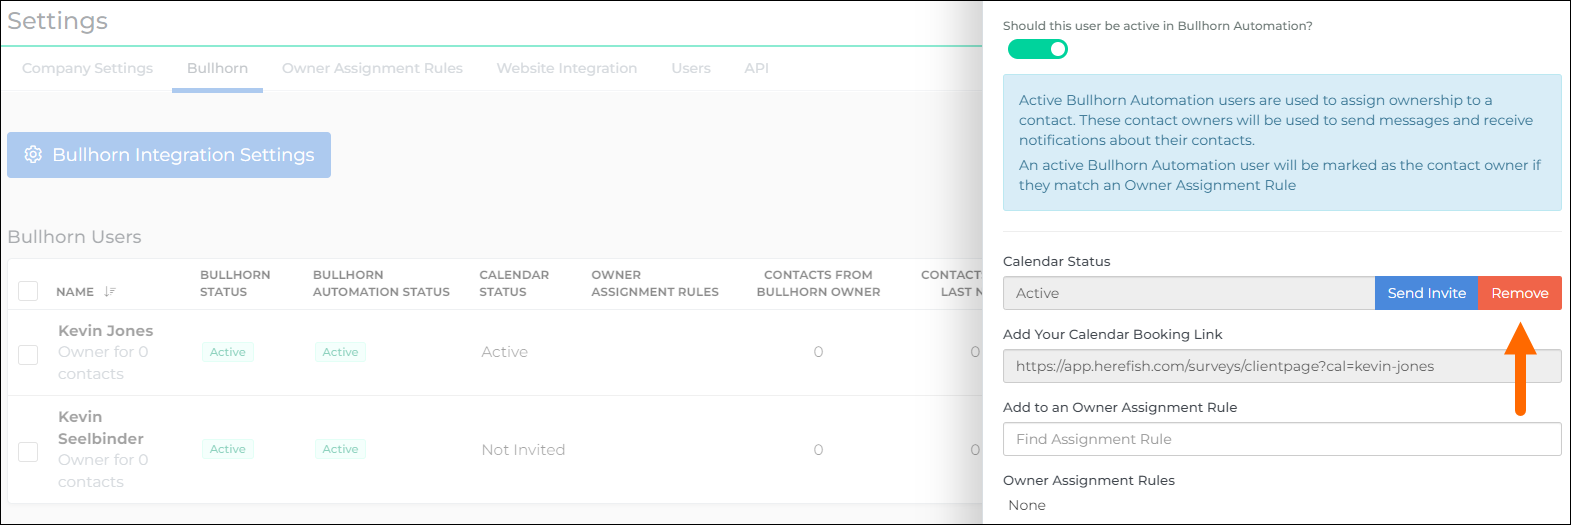
In the slide out click Remove on the Calendar Status.
-
Click Yes to confirm.
-
Click on the User again.
-
In the slide out click Send Invite.
-
Click Yes to confirm.
Bullhorn Automation’s calendar integration feature allows recruiters to efficiently schedule meetings with Candidates and Sales Contacts without the need for third-party tools.
The calendar feature is part of the Automation Enterprise package. Website Tracking must be enabled and active in order to use this feature. In order to utilize the calendar reach out to Bullhorn Support to have it turned on.
Company-wide Settings
An admin can configure the company-wide calendar settings by going to Settings > Company Settings > Calendar Settings and clicking Edit.
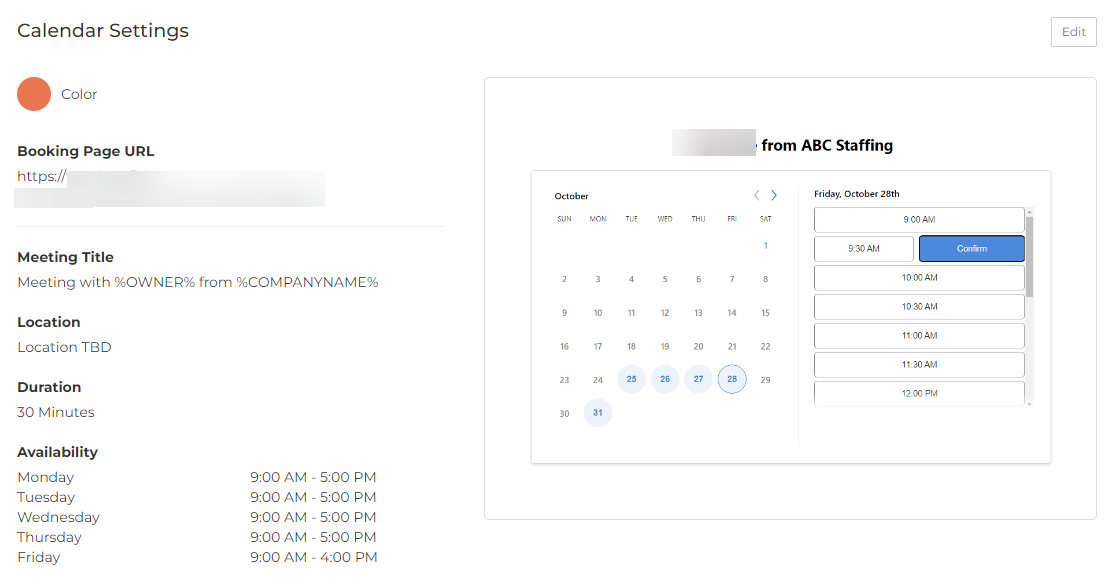
This section contains the following settings:
- Booking Page URL: The link you can share directly with invitees if you want them to pick a specific date and time.
- Meeting Title: The name you’d like for your event.
- Location: Where or how both parties will connect at the booked meeting time.
- Duration: How long your event will be.
- You can select 15 minutes, 30 minutes, 45 minutes, or 60 minutes.
- Minimum Booking Notice: The minimum amount of advance notice that is required to book an event.
- You can select None, 15 minutes, 30 minutes, 45 minutes, 60 minutes, 90 minutes, 2 hours, 3 hours, 4 hours, 5 hours, or 6 hours.
- Minimum Cancellation Notice: The minimum amount of advance notice needed to cancel an event.
- You can select None, 15 minutes, 30 minutes, 45 minutes, 60 minutes, 90 minutes, 2 hours, 3 hours, 4 hours, 5 hours, or 6 hours.
- Meeting Buffer: Add extra time before and after your booked event to ensure you have enough time to prepare or wrap up the event. For example, if you have a 30 minute call and set a five minute buffer, a scheduled opening will only appear if there are 40 minutes available in your calendar.
- Availability: Your hours of availability on specific days of the week.
- Automatically send invites to new Bullhorn users: When enabled this will automatically send invites to new users to connect their calendars.
Removing the Calendar Integration
Calendar integrations can be deactivated for individual users from the ATS page located under Settings.
To remove a calendar integration, select the user and click the Remove button to the right of the Calendar Status. This option is only available for users with an active calendar integration.