Update Submission Status Based on Screener Knockout Questions
This article shows you how to build an automation that automatically updates a submission status (for example, to Rejected) when a candidate answers a knockout question in a screener engagement in a way that disqualifies them from continuing. With this setup in place, submissions that fail your knockout questions are automatically updated to the status of your choice. This saves time, keeps your data clean, and ensures submissions that don’t meet the requirements are handled consistently.
What Are Knockout Questions?
Knockout questions are text-based chat questions that appear before the voice portion of the screener. If a candidate answers in a way that makes them ineligible, the screening ends immediately.
-
Are you over the age of 18?
-
Are you authorized to work in the United States?
These questions help avoid wasting a candidate’s time if they cannot meet the basic requirements for the job.
Using Branching with Knockout Questions
When setting up knockout questions, you have two options for how they work in the screening engagement:
-
With branching:
-
Eligible answers move the candidate forward to the voice screening.
-
Ineligible answers display a polite message and end the screening.
-
-
Without branching:
-
Candidates continue the screening even if they are disqualified for the current position.
-
This allows you to capture their screening summary and score, which may be useful for future opportunities where they could be a better fit.
-
Setting Up Your Automation
Step 1: Create the List
You’ll first need to create a submission-based list to identify candidates who answered a knockout question in a way that disqualifies them.
-
Go to Lists
 A collection of ATS records that meets specified criteria, such as a scheduled end date or a low NPS response. and create a new submission-based list.
 -
Set Choose the type of list to Always Updated so submissions flow into the list automatically.
-
Add the following criteria:
-
Taken Engagement: Select your screener engagement.
-
Answered: Select your knockout question.
-
With Answer: Select the disqualifying answer (e.g., “No” for “Are you over 18?”).
-
Within Last: (Optional) Apply a timeframe if desired.
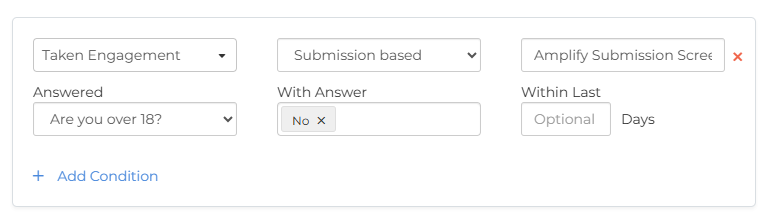
If you have multiple knockout questions, add each with an OR condition so submissions will enter the list if the candidate fails any of them.
-
-
If needed, add additional criteria to narrow down which submissions enter the automation.
-
Save your list.
Step 2: Build the Automation
-
Go to Automations and create a new submission-based automation.
-
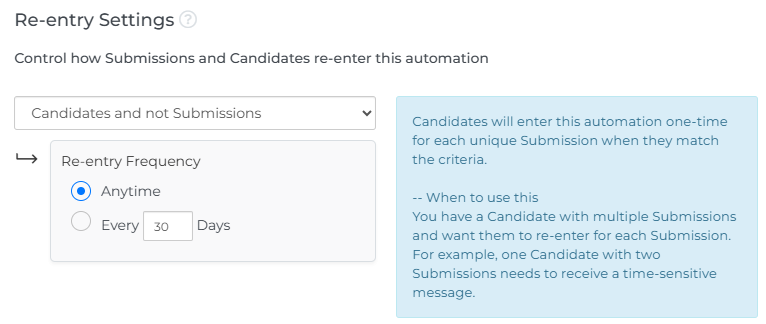
Under Automation Settings, set the re-entry settings to Candidates and not Submissions. This means that if a candidate has multiple submissions that meet the criteria, each unique submission will be processed through the automation.
-
In Automation Enrollment, select the list you just created.
-
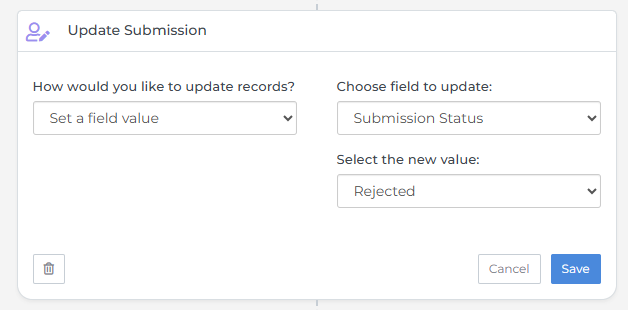
Add an Update Submission step, and set the following options:
-
How would you like to update records?: Set a field value
-
Choose a field to update: Submission Status
-
Select the new value: Rejected (or another value of your choice)
-
-
(Optional) Add any extra steps as required, such as:
-
Add Note: Log a note with the reason for rejection.
-
Send Notification: Notify the candidate or job owner of the rejection.
-
Update Candidate: Update the candidate’s status or another field on their ATS record.
-
-
Add an End Automation step.
-
Turn on your automation.