User Defined Field (UDF) Entry
As an approver, you must authorize that the time recorded for employees for a period is accurate. If your approval screen includes the Reject feature and UDF entries are enabled, you may be able to view, modify, or enter UDF (CRF) entries as well. UDF entries can include items like number of rooms cleaned, total sales for a shift, cost center hours worked, or more. UDF fields are created and defined by your agency.
The following steps only apply if your time approval screen includes the Reject icon.
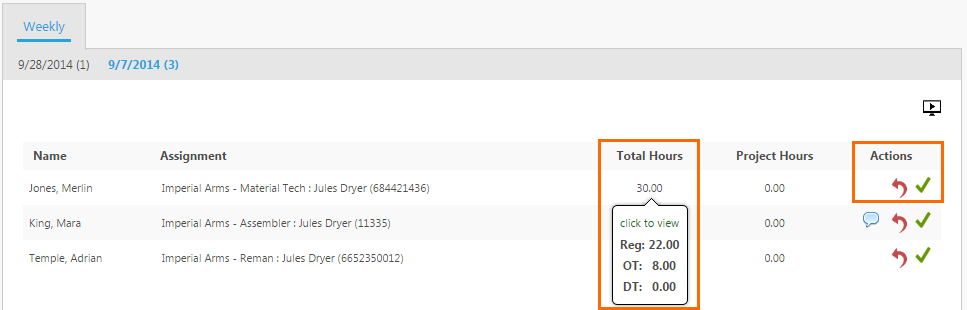
- From the Approval Application, review the total hours entered by each employee.
To see more details about time entered, hover over the Total Hours or click to view.
- Next complete one of the following actions:
- If the total is incorrect, select the Reject icon in the Actions column to reject the time card.
- If the total is correct and you are ready to review any UDF entries, select the Approve icon. This will launch the Approve Timesheet window, where you can view UDF values entered by employees and/or enter UDF values for employees.
- From the Approve Timesheet window, view or enter UDF values in the provided fields.
- Select the green + icon to add a row.
- Select the red x icon to remove a row.
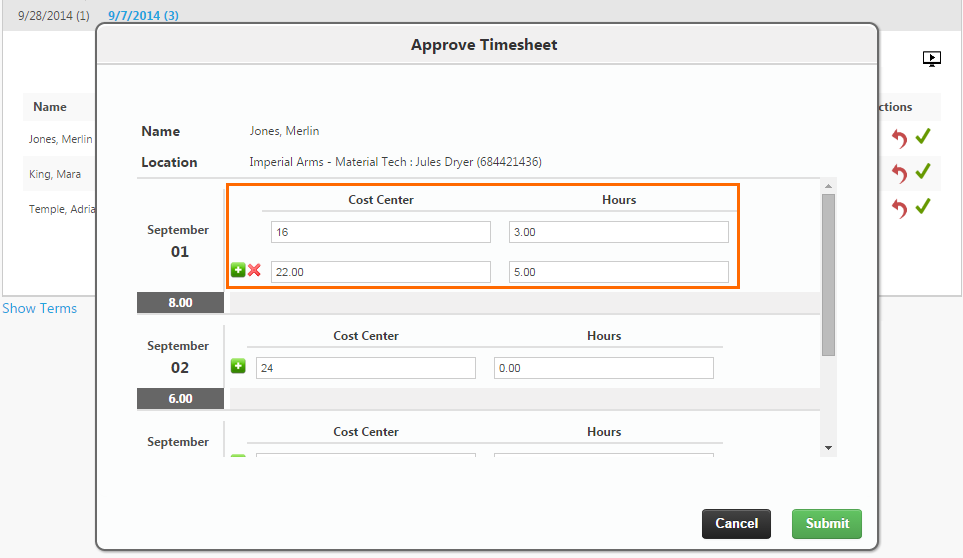
- When you are done editing UDFs, review the employee entered time and UDF values. If everything looks correct, select Submit.
You cannot adjust an employee’s UDF values or reject a time card after pressing Submit. If you need to adjust time cards or UDF entries that have already been approved, speak to your agency representative.
- Repeat this process until you have submitted all UDF values for the week.