| Package: Recruiting(JS2) |
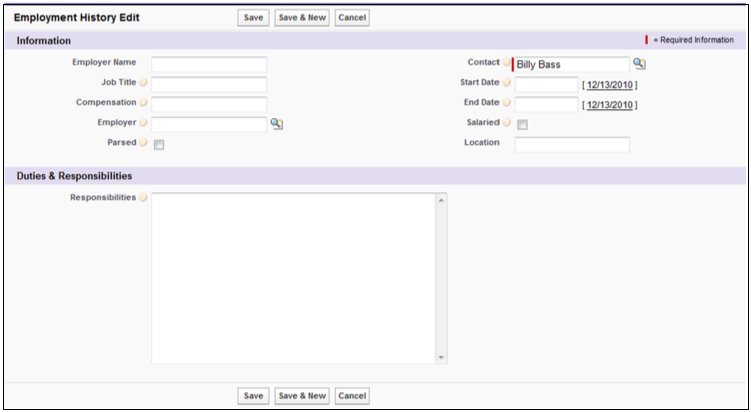
Adding Employment History
![]()
-
Navigate to Contacts.
Note that Candidates have the 'Candidates' Account Name. Other entries in the List View are Contacts. -
Choose the link in the Name column.
-
Scroll down to the Employment History panel and select New Employment History.
-
Optionally,
-
Enter the Employer Name.
-
Enter the Job Title for this employer.
-
Enter the Compensation the Candidate was making while working for this employer.
-
Click
 to open a search dialog and find the specific Employer that the Candidate worked for.
 -
Select Parsed if you want the current resume removed and replaced with data from a new resume.
If not selected, the resume will be left as is. -
Enter the Start Date for this employer by:
-
Click the box to display a calendar and select any date.
-
Click the date link at the right to insert today's date into the field.
-
-
Enter the End Date for this employer by:
-
Click the box to display a calendar and select any date.
-
Click the date link at the right to insert today's date into the field.
-
-
Pick Salaried if the Candidate was a salaried employee for this employer.
-
Enter the Location of this employer.
-
Enter the Responsibilities that this Candidate had for this employer.
-
-
Finish
-
Save to apply your changes. The Employment History screen appears.
-
Save & New to apply your changes and display a new Employment History Edit screen.
-
Cancel to discard your changes. The Contact screen appears.
-
View This Video for Additional Information