| Package: Recruiting(JS2) |
Configuration & Use of Locked Email Templates
![]()
New in Jobscience Winter 17, code name Moose, comes the ability to Lock certain content of an Email Template. The setup steps are found below and must be completed by a User with System Admin permissions to the database. The use steps can be completed by any User with permissions to the Jobscience Email UI.
This feature can be used in conjunction with 'Email Folder Hierarchy' & 'Visual Email' functionality.
Prep Work
- Decide which Email Templates will be locked from editing for Users.
Capture Email Template ID's:
-
Access these Email Templates within Salesforce
-
Capture the ID found in the URL. (The ID is the orange highlight section.)
-
Example URL's:
-
https://mycompanyname.my.salesforce.com/00X?setupid=CommunicationTemplatesEmail&fcf=00l3A000002bte7
-
https://na12.salesforce.com/00X?setupid=CommunicationTemplatesEmail&fcf=00l3A000002bte7
-
-
Repeat steps 2&3 for every Email Template you want to be locked. Using a spreadsheet to track this information would be useful if you have more than 1 Email to configure.
Optional Configuration:
Set editable Fields
-
Access the Email Templates that will support optional free hand content.
-
Edit to access the email body of the Template.
-
Input the following 'code' where freehand content will be supported.
-
{#1 This is my custom text.} The content in Orange is the default text that the email recipient will receive. End Users have the ability to overwrite this content during the sending process.
You may repeat this step as many times as desired, we recommend no more than 10 to keep the process easy for End Users sending emails. If additional freehand content will be supported, replace the 1 with the next numerical number for tracking purposes.
-
-
Save when done.
Configuration
Set the Metadata
-
Navigate to Setup > Develop > Custom Metadata Types.
-
Select Manage Records for Email Template.
-
Click New (or edit if you want to edit an existing configuration)
-
Label: value displayed to the end user of the Email Template. It's recommended to use the same value from the actual Email Template.
-
Template ID: value captured in 'Capture Email Template ID's ' step #2
-
Locked: True (checkbox)
-
-
Save your changes.
Use
-
Access the Jobscience Email UI & select the desired Email Template.
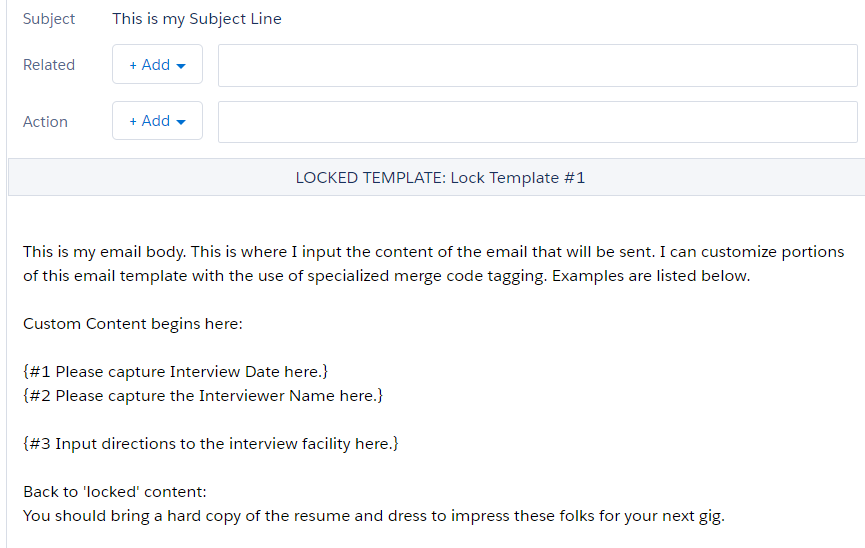
Notice how the Subject Line does not have an editable text box around it. This content is locked at the Email Template level.
Notice the {#1 Please capture Interview Date here.} This is the 1st of 3 custom areas for the Sending User to update. -
To edit the custom text areas, select the Merge Field Icon at the bottom of the Email Interface.

This action will pop up the interface to update the content.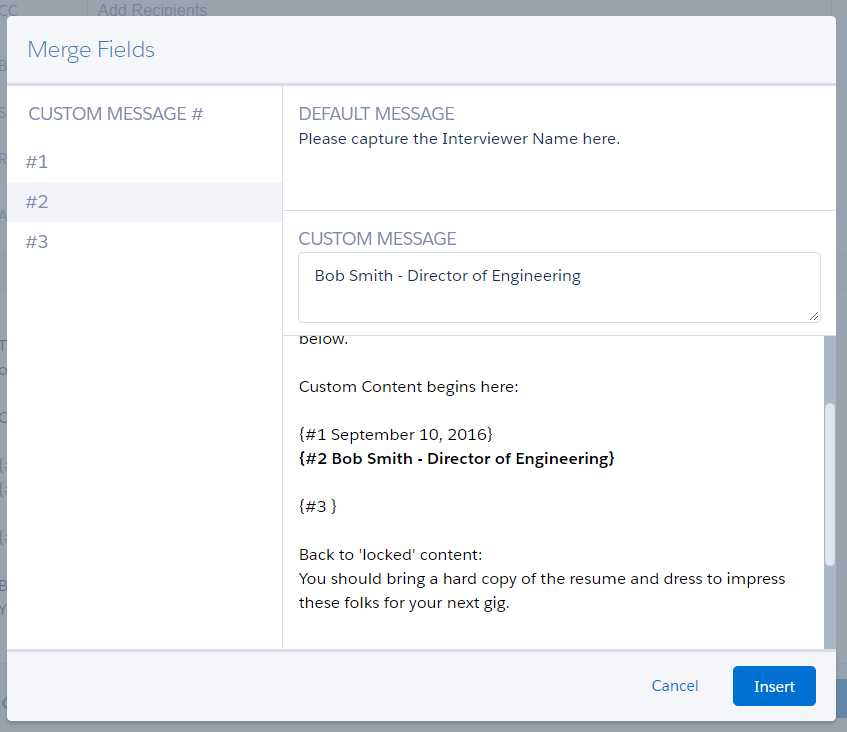
-
Choose which individual Custom Message options along the left side to edit.
-
Input the desired information the Email Recipient will be reading into the 'Custom Message' box. As you type into the 'Custom Message' box, the text auto updates into the Email Body for a preview of the end result as well. Repeat for all desired 'Custom Messages' then click 'Insert' when done to return back to the Email Interface for actual sending.