| Package: Recruiting(JS2) |
Using Jobscience Email
![]()
Overview
The email interface has all the fields you would expect from other tools:
-
Recipients (To)
-
Carbon Copy (CC)
-
Blind Copy (Bcc)
-
OBO (On Behalf Of)
-
Subject
-
Message Body
-
Send Button
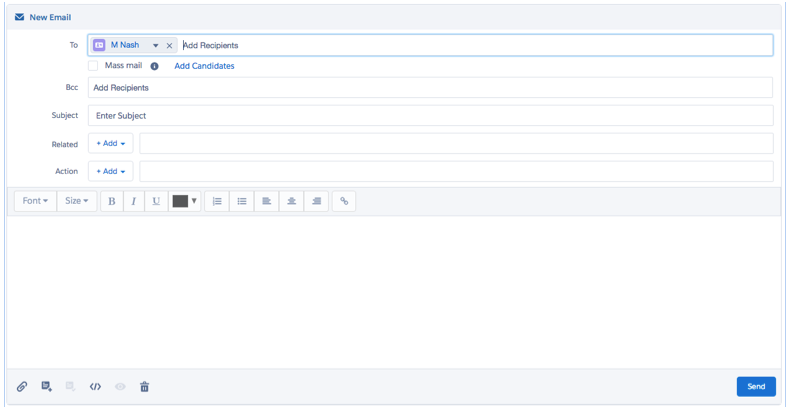
These fields all work as expected, although the recipients line has several enhancements that are described below.
As you can see from the formatting tools above the message body, this tool supports HTML Rich Text messages.

Header Tools
There are several additions to the header, which deliver the features that make this tool ideal for recruiting:
-
Recipients
-
Mass Mail
-
Email Type
-
Add Candidates
-
Related
-
Action
Recipients
Recipients work like most web mail tools. When you start typing a name in the To or Bcc field, you will see suggested names of both contacts and users. Messages may be sent to both. If sending to a Portal User, it is beneficial to choose their User information since this email will not count against any daily limits, as mentioned above.
This field will generally be pre-loaded with names you selected from Sourcing Center Results, Short Lists, List Views, or Applicants from AMS before invoking the email.
Multiple Email Addresses
Jobscience Mail supports selecting between multiple email addresses when available for a recipient. The standard Contact record only supports a single standard Email field, but Jobscience Mail scans the Contact record each time it launches to determine if your organization has created any additional email fields on the contact.
If there are multiple email type fields with addresses available, the recipient will display with a down arrow, which is your indication that a choice is available.
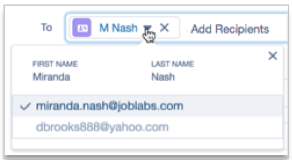
By default, we choose the address in the Standard Email field. This choice is also available for Distribution Lists. See the section below and the down arrow in the first list entry.
Distribution List
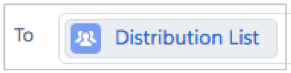
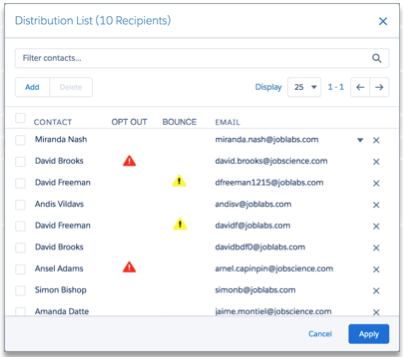
If the number of recipients reaches 10, the individual names will transform into a distribution list. Click the Distribution List entry in the To field to display the following dialog box:
-
This dialog box enables you to filter contacts in order to locate them. This is important for very large lists.
-
You can control the page size for display and page through the list to review.
-
A single recipient can be deleted by clicking the X after their email address.
-
Multiple names may be selected and deleted by selecting check boxes on the left and then clicking the Delete button.
-
Additional recipients may be added by clicking the Add button. No changes are made until the Apply button is clicked.
Mass Mail
Normal emails send an identical copy of the message to all recipients of the message. All recipients see all of the names and email addresses of the other recipients on the To row, but there is no visibility to the Bcc row recipients.
Mass mail mode changes this behavior and makes the email more like a mass marketing campaign. Each recipient on the To row receives an email addressed only to themselves. Any contact or account merge fields in the subject or message body will apply to the individual recipient's contact and account record.
Bcc recipients will only receive one version of the email. The behavior is different for Salesforce and MailGun as back end services. With Salesforce, the Bcc recipient will see all of the recipients; with MailGun, they will not.
Mass mail mode will be checked automatically when sending messages with more than 10 recipients. The user can deselect this for distribution lists that are under 100 recipients. If there are over 100 recipients, the Mass Mail selection will be locked on.
Note that 100 recipients is also the limit for a single message with Salesforce Standard Email, while MailGun supports up to 6,000 recipients.
Add Candidates
Submitting candidates for review by hiring managers or clients is a common use case. Sending out candidates unsolicited to a large distribution list is also a technique used by some firms.
When the user clicks Add Candidates, a new row appears in the header, called Candidates.
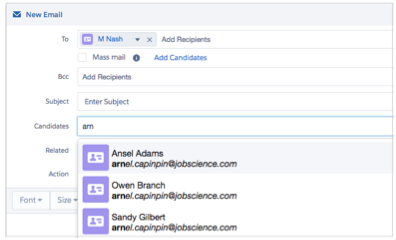
Select Candidates and begin entering the names of the candidates you want to share.
This list of candidates is used in the Attachment controls to help with choosing documents to attach. It also ensures that a copy of the email is accessible from the candidate's record.
This row is visible and prepopulated when email is invoked from a Send Resumes or Review Email link in Sourcing Center, Short Lists, or AMS.
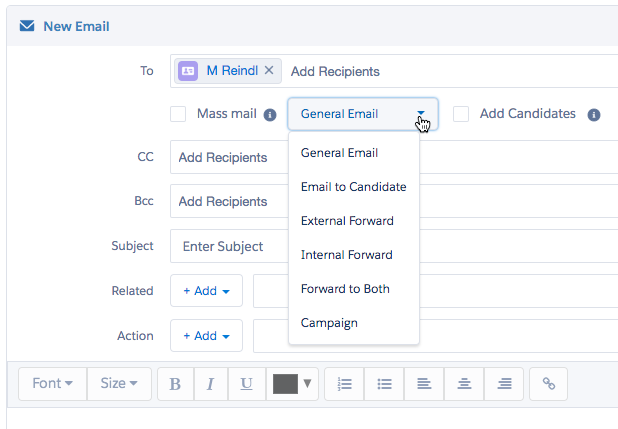
Email Type
There are many common recruiting use cases for email. A few of them are:
-
Sending a job description to a prospective candidate
-
Sending out one or more resumes to an external client or prospect
-
Forwarding one or more candidates to someone in your firm
-
Blasting a Mass mail campaign to large numbers of recipients
Each of these have a combination of settings that typically apply, for example when sending out candidates. The Candidates control should be visible and all of the contacts selected should be in the Candidates control, not in the To line. When sending a Mass Mail, that check box should be checked.
We have made it easier than ever to ensure all of the settings are correct. We've created a list of presets that updates everything you need with one selection. It will even move contacts between the To and Candidate if necessary. So if you clicked on Send Email, but should have clicked on Send Resume, you don't have to manually update the settings. Just choose the right email type and everything will reset to the proper place.
If you don't use all of these or if your organization has a different set of needs, then you will be happy to learn that all of these settings are configurable by your system admin. They can remove, rename, and add new presets to meet the exact needs of your company.
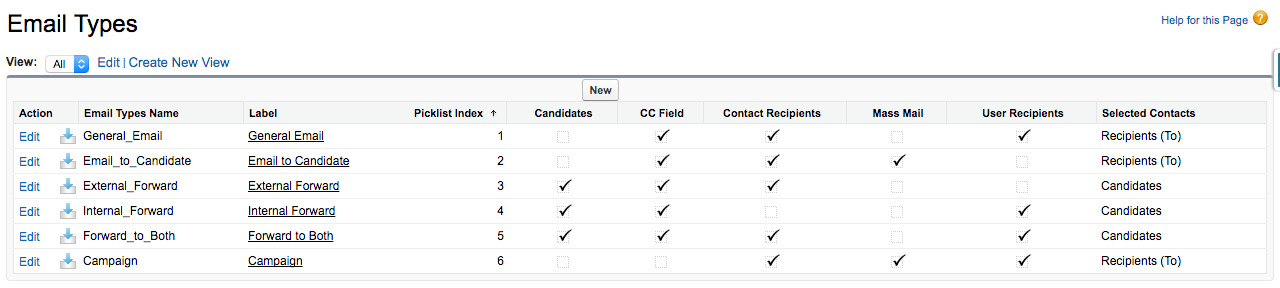
The Email Types setting in setup enables your organization to define the following settings for each email type:
-
Label: The name that shows up in the pick list.
-
Index: The order of appearance in the pick list.
-
Candidates: Enable visibility of the Candidates Related list.
-
CC Field: Enable the visibility of the CC Field.
-
Contact Recipients: Enable the use of External Contacts in the To line.
-
User Recipients: Enable the use of Users in the To line.
-
Mass Mail: Check the Mass mail box by default.
-
Selected Contacts: Specify if the Contacts selected in a list are treated as recipients in the To line, or if they are treated as Candidates in the candidates row.
On Behalf Of (OBO)
Often an email is prepared and sent by an assistant on behalf of (OBO) someone else in the company. When OBO is enabled, a user name may be inserted in to the field such that when the email is sent, the return address will contain that email address.
Related
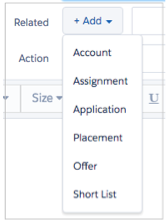
The power of an Applicant Track System (ATS) is the ability to relate emails to records within the ATS. Jobscience email is embedded within the ATS and is able to relate emails to multiple touchpoints.
Click the Add button next to the Related row and select an option from the drop-down menu to determine what type of record you would like to relate this message to.
Selecting the Account object type opens a dialog box, which enables you to choose a specific account record.
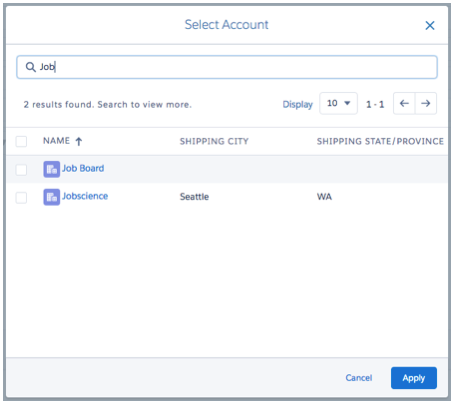
The most recent records accessed are presented as an initial choice. Therefore, your record may very well be in this list and selected with a single click.
If not, simply type in enough of the name in the search bar to bring up your choice in the list below. Select the check box to the left of the account and then click Apply to add the record to the Related List.

After the email has been sent, you will see an Engagement Program related to each of the records specified in the Related field.
The objects listed in the related to field is managed through a Custom Metadata Item called Related Object Lookup. This table is editable only by Administrators.
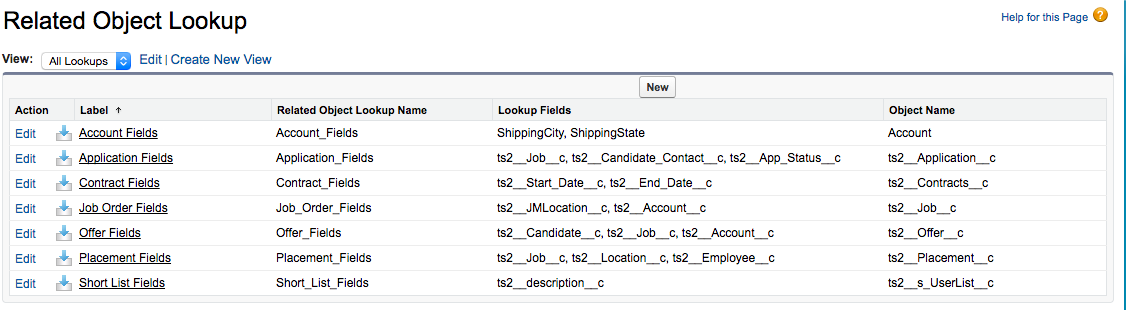
To add an Object, create a new record, add the API Name of that object in the Object Name field, and list the Fields presented to look up the Record.
This is also the place to edit fields if you wanted to change which fields are presented when searching for a record of an existing object. For example, if you wanted to add Account Type or Industry to the Account lookup, simply add the API name for that field into the Lookup Fields list of the Account object.
Action
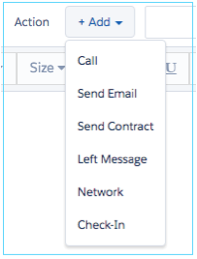
Actions enable you to set multiple follow-up actions relating to this email.
Click the Add button next to the Action row and select an option from the drop-down menu to choose a follow up action type.
This Task is assigned to the Sender of the email with the Subject provided from the drop-down menu. It is related to the Engagement Stage Record, which enables access to all of the Details and Analytics information about this message.
When the email is sent, a Task is also created:
-
Assigned to the sender of the email.
-
The subject will be Email: Subject Line.
-
The Related To field is filled in with the first Related Object.
-
The Recipient Email Address, Attachment name, and Email body is provided in the Comments field.
Footer Tools
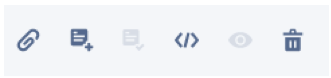
In the lower left corner of the email tool there are several tools that can assist you when composing and sending email.

|
Select File |

|
Select a Template |

|
Save Template |

|
Merge Fields |

|
Preview |

|
Discard Email |
Select a File
The Select File tool enables you to upload a file from your desktop or attach a file from related records in Jobscience.
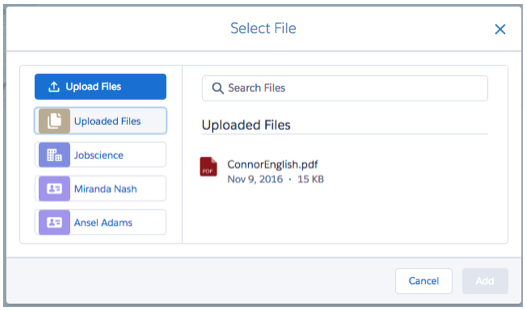
Upload Files brings up a file chooser from your desktop OS and enables you to select any file for upload.
Uploaded Files displays a list of files that have been uploaded.
Below the Uploaded Files button you will find records for:
-
Each recipient listed in the To field.
-
Any related objects from the Related field.
-
Any candidates from the Candidates field.
Click on each of the items in this list to reveal the files attached to their records. Select one or more files from this list and then click the Add button to add them to the attachment list in the footer of the email.
Be careful not to attach files that in total exceed 10 MB in size. Many email systems are unable to process an attachment payload of larger than 10 MB.
Once selected, the attachments will appear in the footer.

An attachment may be removed by clicking the X in the top right corner of the file name.
Select a Template
Jobscience Mail supports mail merge capabilities for both text and HTML emails. You can create your own messages from scratch each time by using the merge fields introduced above, or you can create your messages ahead of time and save them as templates.
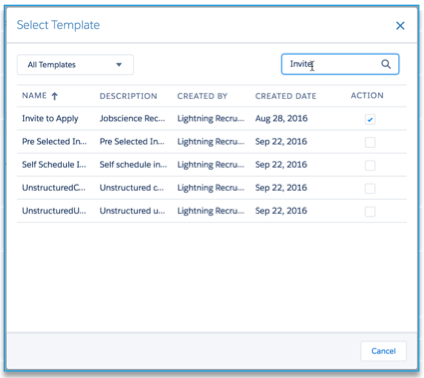
Templates can be used from the public folder (by selecting All Templates from the drop-down list) or from a user's private folder (by selecting My Templates from the drop-down list).
Enter a keyword contained in the name or description of the template in the Filter template... search box to quickly locate the one you need. Select the template by clicking the Action check box.
The template is now inserted into the message.
If you are familiar with mail merge email, you will notice the merge fields in the example below and possibly make out what most of them mean by reading the API name.
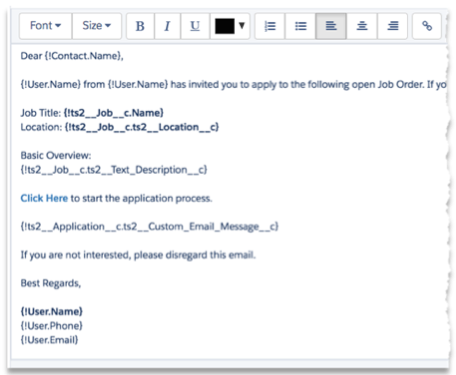
Once inserted into the mail message, the template may still be edited to provide a more personal tone or to include an additional message that was not present in the original template.
Save a Template
Once you select a template and insert it into your message, the Save Template button becomes active. Click this button to display the Save Template dialog box.
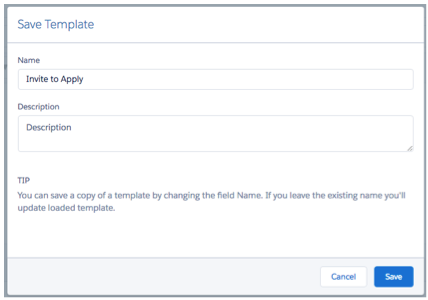
You can create a new template by changing the name in the Name field and then clicking the Save button. Note that if you make changes but do not change the name, you will update the existing template.
Merge Fields
Merge fields are placeholders for information stored in Jobscience records. When you wish to send an email to multiple people with each email addressed to the individual recipient, you can do so by inserting the proper merge field where their name would go. For example:
Dear {!Contact.Name},
This field is fairly easy to understand, even if you have never seen a merge field before. The curly braces and exclamation point tell the email tool to look up the contents of the name field on the Contact record and substitute this in place of the entire string.
By default, Contact (User) and Account records refer to each of the email recipients in turn for a Mass Mail, even if there are other contacts and accounts in the related object list. Other merge fields will be made available based on the additional related objects.
Fortunately, you do not have to memorize these fields. We provide a tool to help you insert the proper fields.
Position your cursor in the email message where you want to insert the merge field then click the Merge Fields icon  in the footer to bring up the Merge Fields dialog box.
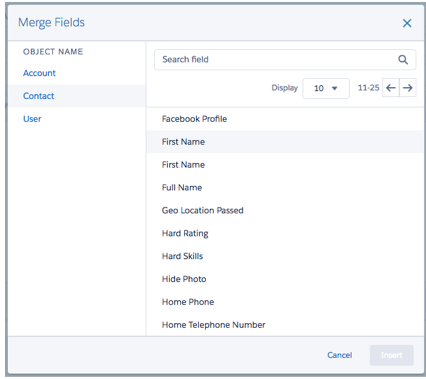
Choose the Object on the left side. In this case, choose Contact, Account, or User. Then page through the list of fields available or type the name of the field you are looking for in the Search field.
In this example, we want the email to sound less formal so instead of using the full name from the example above, we select First Name from the list.
The merge field for First Name will display the following in the email message:
{!Contact.FirstName}
When the email is sent, each contact is greeted by their first name.
Preview
The Preview tool is intended to provide you with a look at what the message will look like to your recipients. It will resolve any HTML references and include any images or special formatting.
Discard Email
The Discard Email icon is used to delete the work you have done so far without impacting any records in Jobscience or sending any messages. When you click the icon, the Discard Email dialog box is displayed.
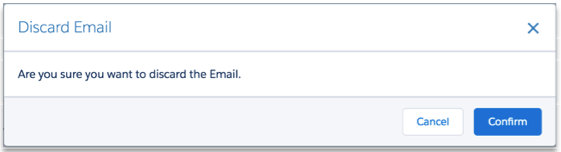
You can Confirm to delete the email. If you change your mind and do not want to delete the email, Cancel or click the X in the top right corner of the dialog box.