Exporting Timesheets to QuickBooks Desktop
Overview
This article covers how to export timesheets from Bullhorn Back Office to QuickBooks Desktop via the QuickBooks Web Connector.
Before You Begin
Configuring QuickBooks
- You will have to have the QuickBooks Web Connector installed and configured.
- Employees must be set up in QuickBooks for Timesheets.
- Contact QuickBooks support to set up employees in QuickBooks.
Timesheet Export Name
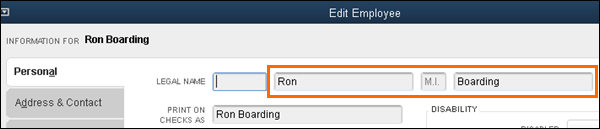
The Timesheet Export Name field on the Employee record in BBO must match the Employee Name in QuickBooks.
- In QuickBooks, locate the employee in the Employee Center and confirm the employee's name.
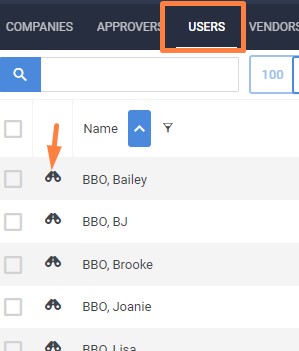
- In BBO, navigate to the Employees/Users tab.
- Locate and open the employee record with the binoculars.
- In the Timesheet Export Name field, enter in the name of the employee as it appears in QuickBooks.
- Select
 to confirm your changes.
Exporting Timesheets
Steps in BBO
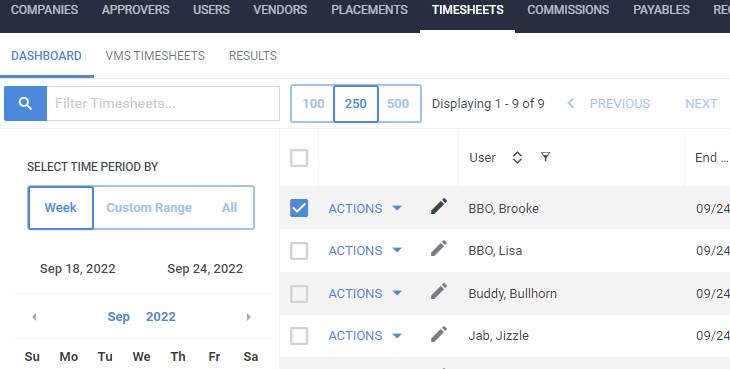
- From the Timesheets tab, search for the timesheet(s) you would like to export to QuickBooks.
- Check the box next to each timesheet you would like to export.
- Only timesheets in the Approved status can be exported.
- Only timesheets in the Approved status can be exported.
- Select the Actions dropdown and choose the Export: QuickBooks Desktop button.

The Status column will change to for the selected timesheets to indicate they are waiting for the Web Connector to run.
Steps in QuickBooks
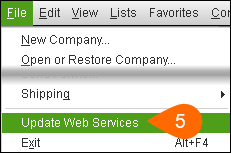
- With QuickBooks open, launch the Web Connector by selecting File > Update Web Services.
- You may receive an error related to the log file. This is normal. Select OK to close the notification.

- You may receive an error related to the log file. This is normal. Select OK to close the notification.
- In the Web Connector, select the box to the left of the application.
- Choose Update Selected.
When the Web Connector finishes running, it will display a "Complete!" message in the application row.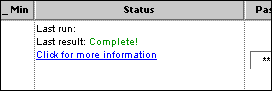
In BBO, the status for the selected timesheets will display to indicate they have been success fully exported.
Additional Resources
Was this helpful?