Setting Up the QuickBooks Desktop Web Connector
Overview
can connect to desktop versions of QuickBooks through the use of QuickBooks Web Connector application. This article walks you through connecting and running the Web Connector.
Jump to Section
- Before You Begin
- Prepping BBO
- Creating the Configuration File
- Installing the Configuration File
- Running the Web Connector for the First Time
- Enabling the Export to QuickBooks Desktop Buttons
- Next Steps
- Additional Resources
Before You Begin
In order to set up the connection, you need:
- Administrator access to QuickBooks with the highest possible level of permissions.
- You will not be able to install the Web Connector Configuration file without this access.
- The QuickBooks Web Connector application.
- If you do not already have the Web Connector, you can download it from the Intuit Developer Site.
- Read the descriptions of each Web Connector version to determine the appropriate download for your version of QuickBooks.
- Install the Web Connector on the same server or computer that stores your QuickBook company file.
- If you do not already have the Web Connector, you can download it from the Intuit Developer Site.
Prepping
Before you can install the Web Connector configuration file, will need to know where to find your QuickBooks company file.
- In QuickBooks, press F2 to open the Product Information screen.
- In the File Information section, copy the location of your company file.
- Select OK to close the window.
- Leaving this window open will cause an error when installing the configuration file.
- In the BBO Control Panel, select Settings from the menu on the left.
- Select Defaults.
- In the Search field, type "file path" to narrow the results.
- In the Branch.Quickbooks File Path field, paste or enter the file path of your company file.


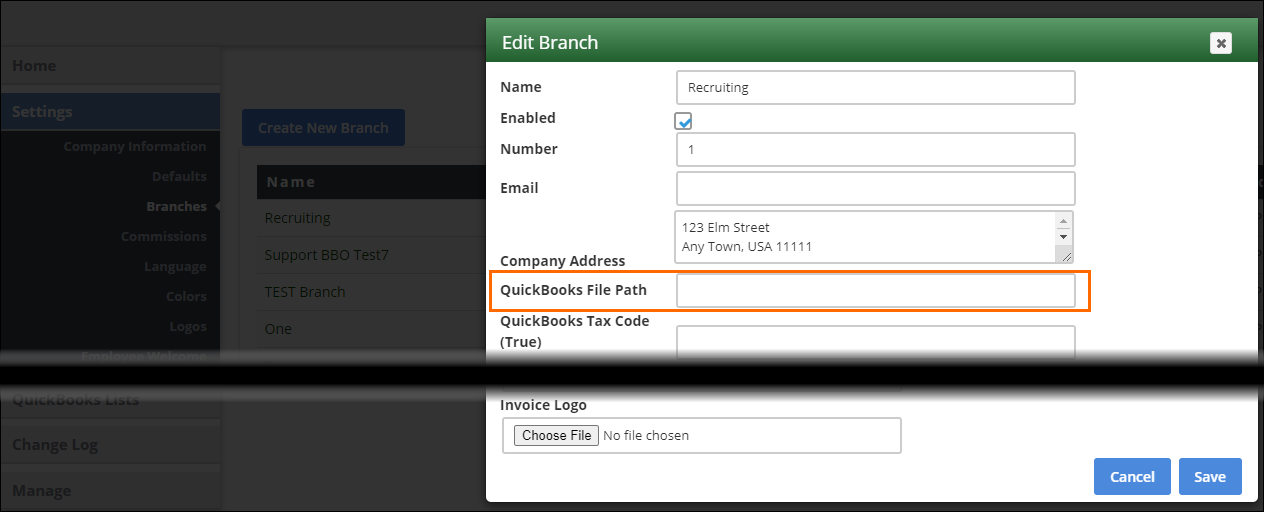
If you are using multiple company files based on branch, this field must be blank. Instead, the file path should be added to the branch by selecting Settings > Branches. Then click the branch name to bring up the Edit Branch screen.
- Select Save to update the settings.
Creating the Configuration File
With the Web Connector installed, you will need to tell it how to connect to your . This is done through a configuration file that you create in the BBO Control Panel.
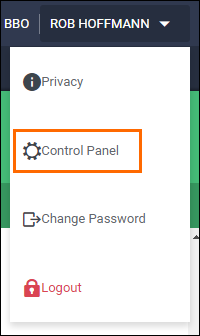
- While logged into BBO, navigate to the Control Panel.
- Select Integrations from the menu on the left.
- Choose Invoice.
- Expand QuickBooks Desktop.
- Select Enable to access the Create Configuration File option.
- This will also enable the Export to QuickBooks button on the Receivables tab.
- If the Create Configuration File button is already visible, skip to the next step.
- Give a name for the connection, if desired.
- This is helpful for determining which connection to run if you have multiple branches connecting to different company files.
- Select Create Configuration File.
- Make sure to save the file in a place you will remember on your hard drive.
Installing the Configuration File
- In Quickbooks, select File > Application > Management to launch the Web Connector.
- Quickbooks versions earlier than 2023: Select File > Update Web Services to launch the Web Connector.
- You may receive an error related to the log file. This is normal. Select OK to close the notification.
- In the Web Connector window, choose Add an application.
- Browse for and select the configuration file you saved earlier.
- In the Authorize New Web Service window, select OK.
- In the QuickBooks - Application Certificate window, select Yes, always; allow access even if QuickBooks is not running to grant the Web Connector permission to write to you company file.
- Select Continue...
- One the Access Confirmation window, select Done.
- You should now see your application listed in the QuickBooks Web Connector.
- Uncheck Auto-Run.
- The Web Connector can take a long time to run depending on the amount of data being transferred. If Auto-Run is enabled, it could cause the application to crash if an export is already in progress.
- In the Password field, enter in your BBO admin password.
- Select Yes when prompted to save your password.
Running the Web Connector for the First Time
The Web Connector will update your with your QuickBooks list information. This includes accounts, items, employee information, terms, etc.
- In the Web Connector, select the checkbox to the left of the application.
- Choose Update Selected.
Depending on the size of your QuickBooks lists and the speed of your internet connection, it may take the Web Connector 30-45+ minutes to complete the first time it is run.
Updated list information will push into each time you run the Web Connector to export invoice and timesheet data.
Enabling the Export to QuickBooks Desktop Buttons
If you are going to be exporting timesheet and vendor payable data to QuickBooks, you will need to enable the Export to QuickBooks Desktop button for the Timesheets and Vendor Payables tabs.
You already enabled the Export to QuickBooks button for the Receivables tab in the Creating Configuration File section.
- From the BBO Control Panel, select Integrations from the menu on the left.
- Enable the Export to QuickBooks button for Timesheets and Vendor Payables as needed.
- For Timesheets: Select Timesheets > QuickBooks Desktop > Enable.
- For Vendor Payables: Select Vendor Pay > QuickBooks Desktop > Enable.
- In , press F5 to refresh your browser.
Next Steps
Before you can start exporting data from to QuickBooks, you will need to make sure the company, employee, and placement records have been properly set up. See Setting Up Records to Export to QuickBooks for more information.
Once the records are set up, you can export data to QuickBooks:
- Sending Invoices to QuickBooks Desktop
- Exporting Timesheets to QuickBooks Desktop
- Sending Vendor Payables to QuickBooks Desktop