Approval Attachment
If you are required to use the Web Time Entry Approval Attachment feature, your agency has determined that your time must be approved with approval attachments. An approval attachment is an image that indicates that your time has been authorized by a local approver. Follow the steps below to utilize the Approval Attachment feature.
Attach an Approval Image
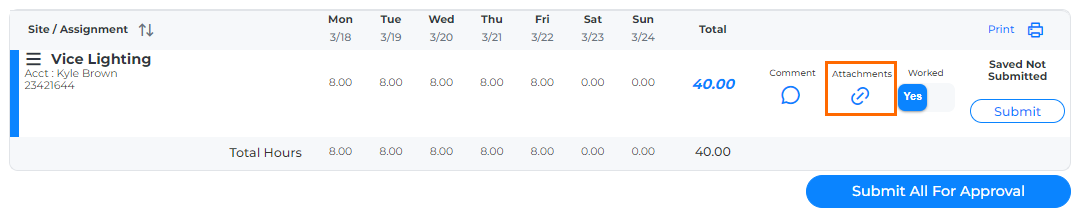
- After entering your time for an assignment, click the attachments icon on your timesheet.
- In the window that appears, click Add Attachment.
- Choose the attachment from your device to upload.
You may only attach one image per file type per assignment. If you have multiple pages for the attachment, please combine to one image.
- Acceptable file types for uploads: .gif, .png, .jpg, .tif, .pdf
- Maximum Image Size: 4MB
- Select Approval Attachment from the drop down menu options.
- Click Attach. When your upload is complete and the file name is showing as uploaded, close the Attachments window.
- When you are done attaching your files, submit your time for approval by clicking Submit or Submit all for Approval.
You must Submit time for it to be sent to payroll. Saved time will not be processed for payment.
View or Delete an Attachment
You can view and remove attachments if you upload the wrong file.
- To View: Hover over the name of the attachment and click the link.
- To Delete: Click the red X to the right of the file type.
Converting a File to an Image for Upload
The following methods can be used to convert a file into an image for uploading:
- Save a Word or Excel document as a PDF for upload.
- Make sure the image is only on one page and that you are not creating a 20 page document due to the page settings.
- Take a photo from your smart phone and upload or email to your computer.
- Capture a picture of your screen: FN+Prnt Scrn, paste to Paint, then Save As one of the acceptable image formats. For Mac users, use the keys Command + Shift + 3, to save the image as a .png.
- Make sure the image is only on one page and that you are not creating a 20 page document due to the page settings.
- To convert an existing image from your screen, right‐click and choose Save As one of the acceptable image formats.
- Scan documents to save as images on your computer.
Was this helpful?