Invoice Attachment
Independent Contractors are required to attach a vendor invoice to their timesheets before the system will accept the time entry submission. This process is to be used in conjunction with your current timesheet approval method. Follow the steps below to learn how to attach an invoice to your timesheet.
Contact your agency if you are unsure if you are required to attach an invoice to your timesheet.
Before You Begin
- You must Submit time for it to be sent to payroll. Saved time will not be processed for payment.
- You may only attach one image per file type per assignment. If you have multiple pages for the attachment, please combine into a single image.
- Acceptable file types for uploads: .gif, .png, .jpg, .tif, .pdf
- Maximum image size: 4MB
Submitting Timesheets and Invoices
- Create an invoice attachment in the correct format (.gif, .png, .jpg, .tif, .pdf) on your device.
- Enter your time into your Web Time Entry timesheet.
-
Select the attachments icon.
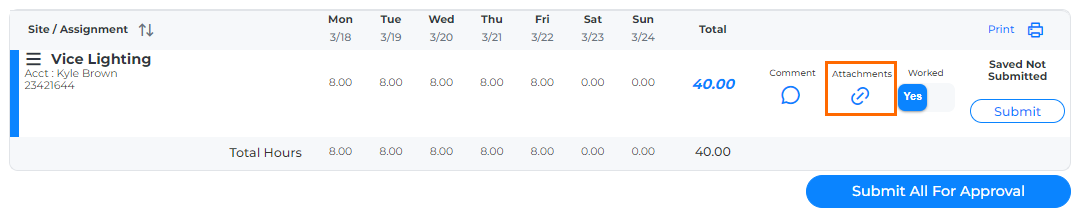
- In the window that appears, click Add Attachment.
- Choose the attachment from your device to upload.
- Select Approval Attachment from the drop down menu options.
- Click Attach. When your upload is complete and the file name is showing as uploaded, close the Attachments window.
- When you are done attaching your files, submit your time for approval by clicking Submit or Submit all for Approval.
Modifying Attachments on Submitted Timesheets
After you have submitted your timesheet for processing, you have the ability to modify and remove your invoice attachment if you upload the wrong invoice. You will only be able to modify your invoice attachment if the invoice attachment is in the unapproved status.
- Select the link for the appropriate period ending date.
- Click the attachment icon.
- Click the Red X to remove the current attachment.
- Select Yes to confirm deletion.
- You can then proceed to upload the correct attachment following the steps above.
Was this helpful?