| Edition: Enterprise | Audience: Metrics Admin |
Creating and Editing Metrics
Only Bullhorn Analytics Enterprise Edition users with Metrics Admin permission can create or edit metrics directly. Starter, Growth, and Corporate users cannot create or edit metrics and should contact Bullhorn Analytics Support with any Metric filter queries.
This article explains how to access, create, and edit custom metrics for your business. Use the advanced metric editing tools to add a metric from scratch or modify the underlying calculations and filters of your existing ones. While your system includes the Enterprise Edition Standard Metrics Dictionary by default, these tools allow experienced administrators to set up custom metrics and customize how data is captured and calculated.
Following the how-to steps below, you can independently create and add new metric variations with specific ownership, segments, or date attribution to ensure your data aligns with your business logic.
Note: This article was formerly entitled Advanced Metric Editing: Adding and Editing Metrics.
Common Scenarios for Creating and Editing Metrics
Use these advanced tools to move beyond standard reporting and align data with your specific business logic:
-
Custom Filtering: Create unique metrics to track deeper insights by filtering for specific job statuses, interview types, or custom field values.
-
Fixed Timeframe Reporting: Build metrics with "hard-coded" time logic (e.g., "Jobs Added in the Last 90 Days") that remains static regardless of the dashboard's global date filter.
-
Excluding Internal Data: Clean up your reporting by creating custom metrics that filter out internal Client IDs, internal job postings, or test candidates.
-
Regional Requirements: Use filters to create "Child" metrics that apply different logic or date attributions for specific global offices.
-
Data Integrity: Inherit from a "Parent" metric to ensure that multiple reports share the same baseline calculation while allowing for minor variations.
Enabling Metric Editing
Ask your Bullhorn Analytics administrator to grant access to the Metrics Admin permission:
-
In Users Admin, open the user's profile and navigate to Admin Permissions.
-
Check the box for Metrics Admin to enable access.
-
For detailed instructions, see Setting App and Admin Permissions.
Accessing Metric Editing Tools
To access the metric editing tools, go to Admin > Metrics and select the Edit Metrics tab.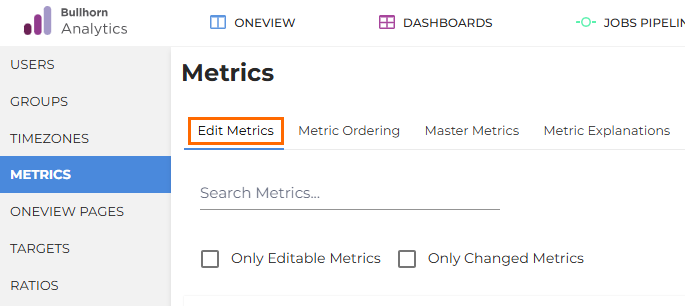
You will see all your entities listed (e.g., Candidates, Jobs, Placements). Click an entity to expand it and view the associated metrics. You can use the checkboxes at the top of the tab to filter your view:
-
Only Editable Metrics: Hides system-locked metrics.
-
Only Changed Metrics: Shows only metrics with unsaved changes.

System-Locked Metrics
Some metrics are system-locked to ensure data integrity and cannot be edited, duplicated, or inherited. These are noted in the Config tab, and indicated by an icon ( ) to the right of their name in the list. If you see the message "This metric cannot be edited, duplicated or inherited from this page", contact Bullhorn Support to request changes.
Using the Edit Slideout Tabs
When you create or edit a metric, the edit slideout opens. Use these tabs to customize how your data is captured and displayed:
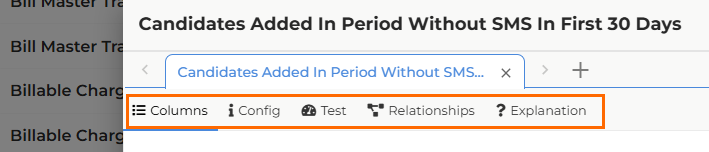
- Columns: Adjust the display of a metric by adding, removing, reordering and mirroring columns. See Managing Metric Names, Visibility, and Column Layouts for more information.
- Config: Set up the core logic, including Aggregation (how data is counted) and Filters (which data is included). See Edit Metrics: Config Tab for more information.
- Test: Run the metric against specific users or groups to verify results before saving.
- Relationships: View the connections between metrics to see how changes might impact "child" metrics.
- Metrics Explanations: Set the definition text that users see when they clickthrough a metric for more details.
How to Set Up a New Custom Metric
To create a new metric:
- Click +ADD METRIC at the top of the Edit Metrics tab.
- You can also click the + button at the top of the edit slideout and select ADD NEW METRIC.
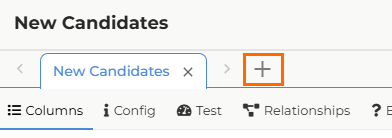
- You can also click the + button at the top of the edit slideout and select ADD NEW METRIC.
- Enter a name for your new metric.
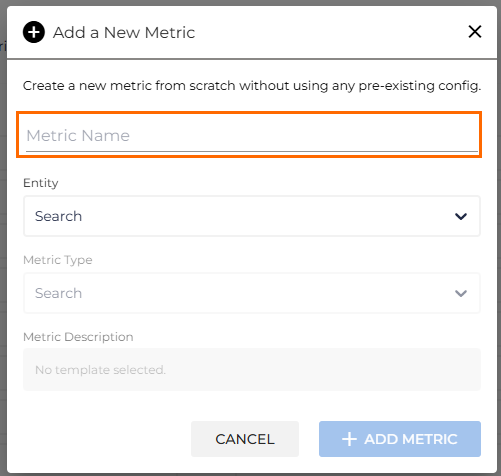
- Select the Entity (e.g. Candidates) and the Metric Type to base your metric on.
- Some entities will have a single metric type, while others have multiple choices. Review the Metric Type Description to ensure you are selecting the appropriate one.
- Configure your logic: Click + ADD METRIC to open the edit slideout. Use the various tabs to define your metric:
-
Use the Columns tab to select and order the data fields your users will see. See Managing Metric Names, Visibility, and Column Layouts.
-
Use the Config tab to set your Aggregation (how it counts) and apply specific Filters. See Edit Metrics: Config Tab
-
Use the Explanations tab to add a clear definition so users understand the metric's purpose. See Metric Explanations
-
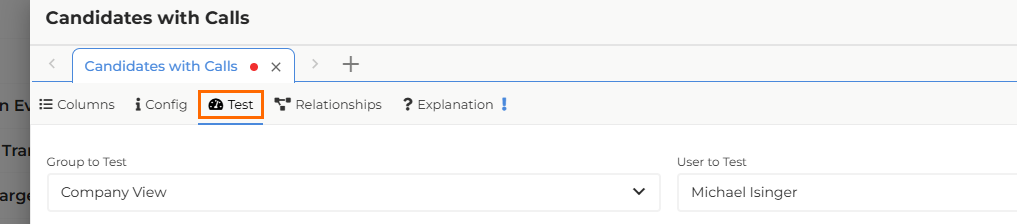
Test your logic: Before saving, select the Test tab in the slideout:
-
Select the group and user to test, along with a timeframe, then click TEST.
-
Click View Results to verify the data returned by your metric configuration for the user and group selected.
-
Summary shows the number of results returned.
-
Details show the results as viewed in metric click-throughs.
-
Trend shows the trend chart for this month.
-
Leaderboard shows the current leaderboard for this metric.
-
We recommend using the Test tab to test any metric before saving changes, as metrics cannot be deleted.
-
- Once verified click SAVE ALL METRICS at the bottom of the slideout to save your changes.
Editing an Existing Metric
To modify an existing KPI, click on the metric name to open the edit slideout.

You can open multiple metrics within the slideout to compare logic or edit in bulk:
-
Click the + button at the top of the slideout to open another existing metric, or add a new metric.
-
All open metrics are displayed in tabs along the top of the slideout, so you can easily switch between them.
Once a metric is open, use the Edit Slideout Tabs to customize the logic as needed. After modifying a metric's filters or calculations, always use the Test tab to ensure the data is correct before clicking SAVE ALL METRICS.
Remember that certain metrics are system-locked and cannot be changed in metric editing. These are noted in the Config tab, and indicated by an icon () to the right of their name in the list. To request changes to these metrics, please contact Bullhorn Support.
Duplicating, Inheriting or Hiding Metrics
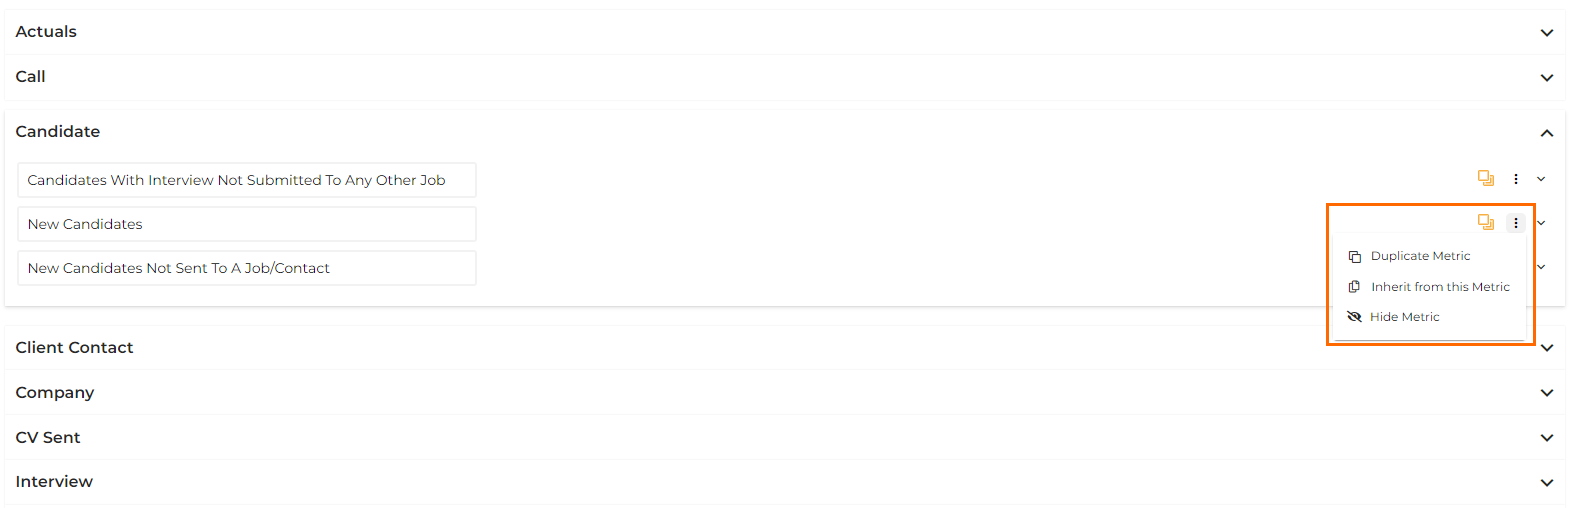
To create a duplicate or child metric, or to hide a metric, click the menu icon ( ) against a metric in the list and select an action from the menu:
You can also select these actions from the Actions button on the edit slideout.
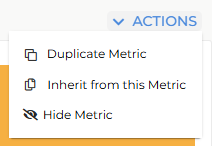
- Duplicate Metric: Creates an independent copy of the metric for further editing.
- Inherit from this Metric: Creates a child metric with the same settings and filters as the parent. You can override certain fields and apply additional filters. Any changes made to linked fields in the parent metric will impact the child metric.
- Hide Metric: Sets the metric as hidden and prevents it from displaying throughout the app.
For System-Locked Metrics, the Duplicate and Inherit options will be disabled. If you need to adjust the logic for a locked metric, please contact Bullhorn Support.
Troubleshooting
Use this section to resolve common issues you might encounter while creating or modifying custom metrics.
-
If you cannot see the "Add Metric" button: You must be on the Enterprise Edition of Bullhorn Analytics and have Metrics Admin permission enabled. Starter, Growth, and Corporate editions do not support custom metric creation.
-
If the "Duplicate" or "Inherit" options are greyed out: You are likely looking at a system-locked metric. These are protected to ensure data integrity. To adjust these, please contact Bullhorn Support.
-
If your test results don't match your Bullhorn ATS: Check the Config tab for specific filters or date attributions that might be narrowing the data. Ensure you are testing against the same user and timeframe.
-
If a "Child" metric changed unexpectedly: Check the Relationships tab. If the metric was created using the "Inherit" function, changes made to the "Parent" metric will automatically flow down to the child.
Frequently Asked Questions (FAQ)
What is the difference between "Duplicate" and "Inherit"?
Duplicate creates a completely independent copy; changes to the original won't affect the copy. Inherit creates a "Child" metric linked to the "Parent." If you update the Parent's core logic, the Child updates automatically.
Why are some metrics marked with a lock icon?
These are System-Locked Metrics (like Actionable Insights). They are foundational to the system's logic and cannot be edited manually. However, if you need a simple logic change, contact Bullhorn Support to check if they can perform these edits for you.
Will my new metric show up for recruiters immediately?
Once you click Save All Metrics, the metric exists in the library. However, if it is a brand-new metric, you may need to ensure it is un-hidden and that your team refreshes their browsers to see it in their available lists.
Can I delete a custom metric once it is created?
No, metrics cannot be deleted to prevent historical data gaps. However, you can use the Hide Metric option to remove it from all user dashboards and reports.
Will my changes to a metric update historical data?
Yes. When you edit and save a metric's logic (filters or aggregation), Bullhorn Analytics recalculates the data across all timeframes to ensure consistency.
If I edit a "Parent" metric, what happens to my "Inherited" metrics?
Any changes made to the linked fields in a parent metric will automatically flow down to all inherited child metrics. This is a great way to update filters across multiple KPIs simultaneously.