Using Macros to Limit View by Department
In Bullhorn Reporting (previously Canvas), you may want to create a report so your direct reports will see how their department is doing considering their KPIs. Creating a separate report for each direct report or department would work, but would be time consuming and redundant. You can do this more efficiently by creating a single report with a macro that picks up your who your report consumer is and to which department they belong.
We will be building off of a sample report that uses the User Activity Analysis package. This is an advanced Bullhorn Reporting concept, so if you haven’t built a report or used query joins, be sure to read these articles first:
Steps
Modifying the Existing Report
Ensure you select a report that has been built using the User Activity Analysis package, or uses the username field.
- From the list view, select More next to the desired report, then choose Modify Report.
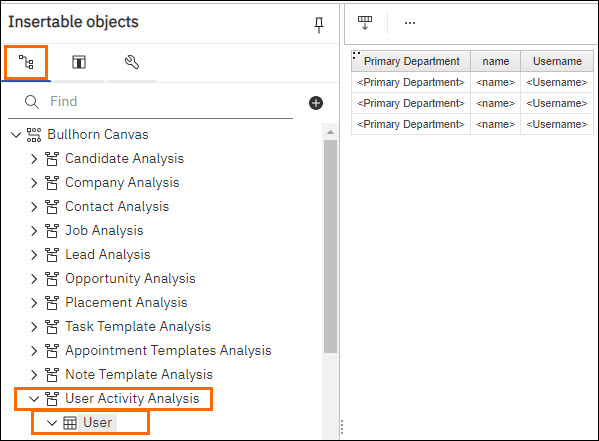
- Click on Sources > User Activity Analysis > User . Then double-click Primary Department > Name > Username.
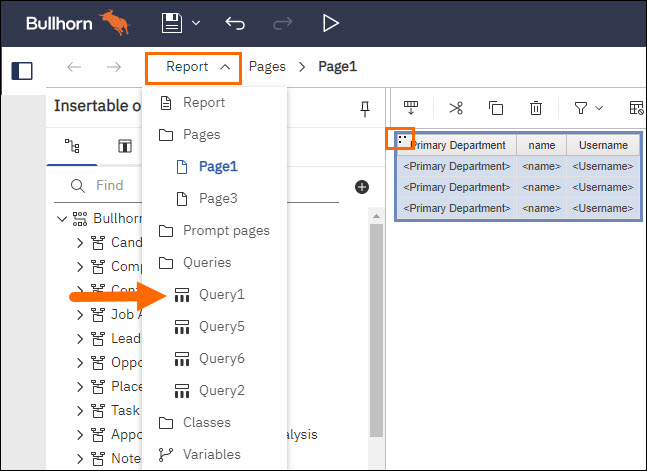
- Click the three dots on the table, then select Report and click on Query1.
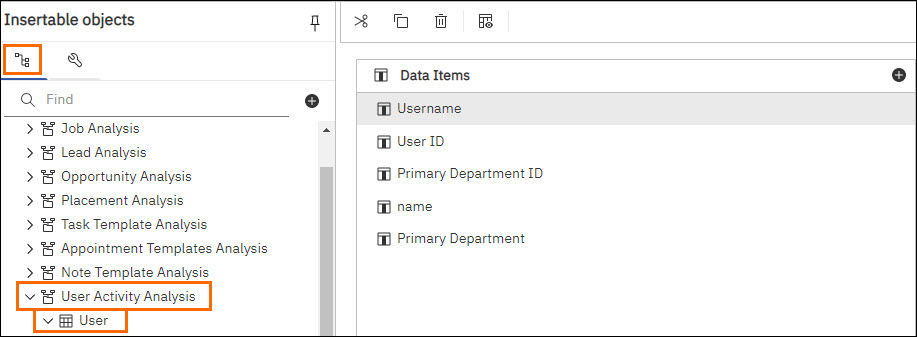
- Ensure the following fields are under Data Items:
- Primary Department
- Name
- Username
Creating the Secondary Query
We will be creating a secondary query that houses our macro. This will be later joined with the previous query.
- Select Report and click on Query2.
- Click on Sources > User Activity Analysis > User . Then double-click the fields Primary Department > Primary Department IDName > Username > User ID.
Adding the Macro
We will now add a macro that tells Bullhorn Reporting to look up the user’s information so they can only see what pertains to them. When coupled with a Query Join, this creates a restriction so the user can only see that which pertains to their own department.
- Select Report and click on Page1.
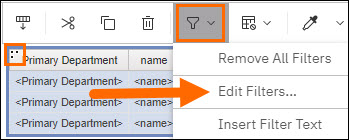
- Click the three dots on the table, then click Filters > Edit Filters....
- In the Filters - Query1 pop-up, click Add.
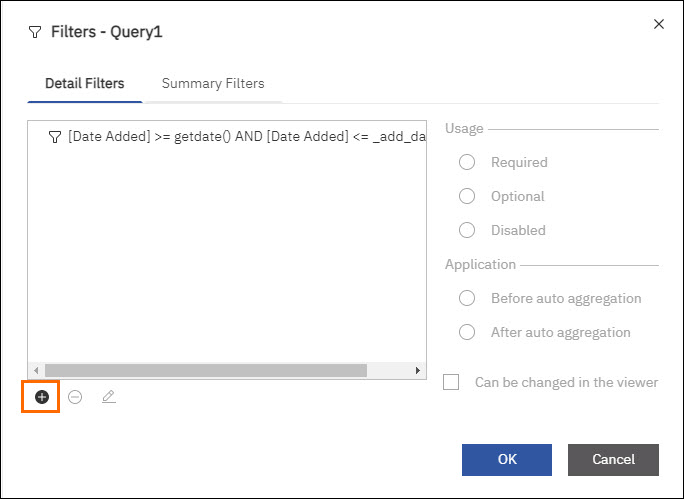
- In the Create filter pop-up, select Advanced, and then click OK.
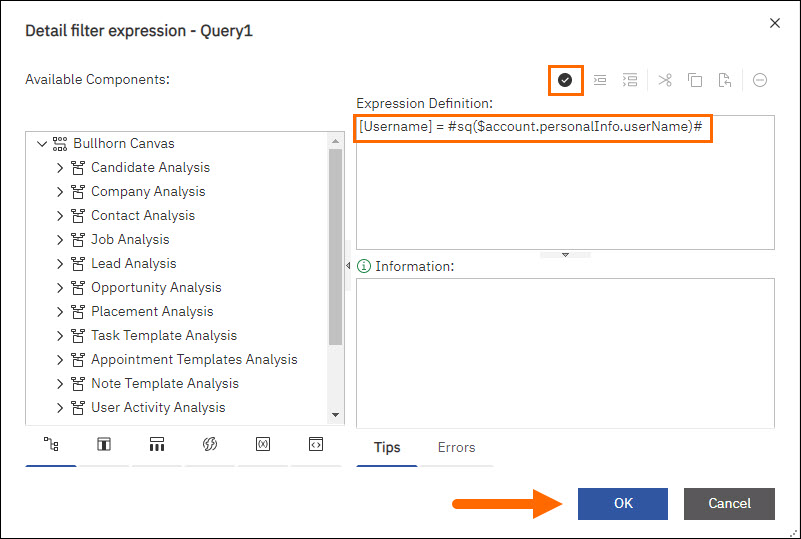
- In the Detail filter expression - Query1 pop-up, in the Expression Definition box type the below expression:
-
Click Validate to validate the expression.
Copy[Username] = #sq($account.personalInfo.userName)# - Fix any errors that come up.
- Click OK.
Query Join
We will now join Query1 and Query2 using the Username field and ensuring the cardinality is set properly.
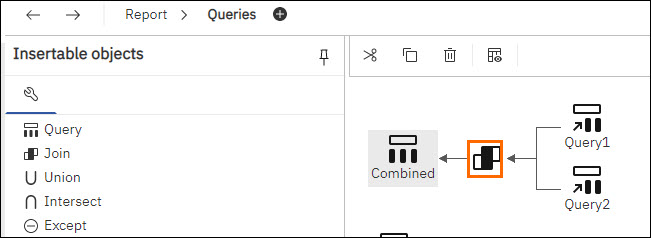
- Select Report and click on Queries.
- Go back to the Queries screen andCreating a Query Join.
- In the combined queries, double-click Join.
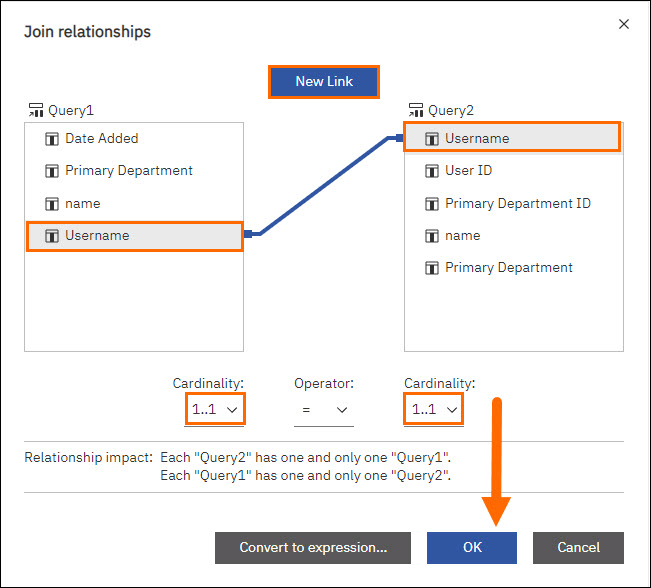
- In the Join relationships pop-up, click New Link > Username. Ensure the link goes from Username to Username.
- In the Cardinality fields under each query, select 1..1, then click OK.
- This ensures this is an inner join, which means your results will only include what is common between the two queries.
- This ensures this is an inner join, which means your results will only include what is common between the two queries.
- Remember to Save your report before you Run it to preview.
You’re now done creating a macro that will limit a user’s report output to their own department. Using these concepts you will be able to create more dynamic reports for your user base. Additional advanced information can be found by searching the internet for “Cognos Workspace Advanced.”