February 2023 Release: Minor Enhancements
2023.02 GA Release - Package Version 6.56.2
2020 Email Editor
Merge Fields from ApplicationV2 Object
Email templates used in 2020EE Submittal and SendOut page now support merge fields from the ApplicationV2 object. No configuration required.
ATS v2
Filter Job Lookup by Status
With the out of the box functionality, all Open Jobs are referenced when searching for a Job in the Job Name lookup on the Apply To Other Job modal. You can now define the job statuses of the Jobs searchable in the lookup.
- Only supported if Generic Lookup is enabled in the .
- Applies to both for Jobs and for Candidates.
Configuration Steps
- Navigate to Setup > Custom Settings > ATS Configuration Settings.
- In the Apply To Other Job Lookup Statuses field enter the name of the Job Status you want to be used to filter the list of Jobs searchable in the Job Name lookup. Use a comma separated list if you are entering more than one.
New Configuration Option for SendOut Schedule
We have added additional optional fields to the New/Edit Send Out Schedule modal window through a new field set added to the SendOutv2 object.
- Both packaged and custom fields are supported for this fieldset.
- Modal supports only editable fields (most common primitive types plus lookup fields) from Send Out Schedule V2 object. Fields from parent objects are not supported.
Configuration Steps
This functionality is dependent on the User Interface (UI) API infrastructure. You must set up a UI API Connected App to use this feature. Contact the Bullhorn Team if you need assistance configuring a Connected App in your .
- Go to Setup > Object Manager > Send Out Schedule V2 > Field Sets.
- Click Send Out Schedule Form.
- Add or remove fields.
Call Lists and Longlists
Add To Call List Action Available from Longlist Records and Longlist Related List on Job Records
You can now add a Longlist candidate to a Call List from:
- The Long List detail page.
- The Long List related List on Job records.
When you are adding candidates from the Longlist Related List on Jobs to a Call List, you have the option of showing or removing the list of Candidates you are adding. This option needs to be configured.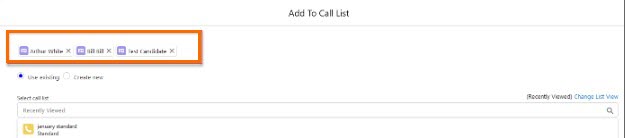
Configuration Steps
To Add the Add To Call List Button to Longlist Records/Related Lists:
- Go to Setup > Object Manager > Long List > Open the Buttons, Links and Actions tab.
- Click New Action and enter the following values:
- Action Type: Lightning Component
- Lightning Component: TR1:AddToCallListQuickAction
- Height: 500px
- Add Label, Name and Description.
- Go to the Page Layouts tab. Add the action to the layout from the Mobile & Lightning Actions section.
- The button for Related List already exists. To add it to the related list navigate to Setup > Object Manager > Job > Open the Page Layouts tab.
- Scroll down to Long List related list. Click on the Properties icon and open the Buttons section.
- Move Add to Call List to the Selected Buttons column.
- Repeat if needed for multiple Job page layouts.
To Show the List of Selected Candidates in the Add To Call List Modal:
- Go to Setup > Custom Settings > Talent Rover Properties.
- Enable Show Candidates on Long List Selection checkbox.
Logic Added to Prevent Duplicate Longlist and Applicationv2 Records
To ensure data consistency for Longlists and Application records related to same JobID+ContactID, the following logic has been added:
- If the Contact already has a Long List record for a given Job and a new Applicationv2 record for same Contact and the same Job is created the following happens:
- The following Longlist fields are updated:
- TR1_Status_c: Converted
- TR1_Comments_c: <<Candidate Name>> has had an Application Record created
- This Applicationv2 field gets populated with the Longlist ID: TR1_Opportunity_Discussed_c
- The following Longlist fields are updated:
- If the Contact has an Applicationv2 record for a given Job and the user tries to create a new Long List record for the same Job and the same Contact, the following warning message appears and the record is not created: “<<Candidate Name>> already has an Application Record for this Job”
- If selection includes more than one Long List record, Long List records without duplicates will be created.
Configuration Steps
- Navigate to Setup > Talent Rover Properties.
- Select the Long List Applications duplicate check checkbox.
New Buttons on Call List Members Screen
Two new buttons are available in the Call List Members related list to allow users to better organize their Contacts in Call Lists:
- Add To Another Call List: The Add To Call List modal will automatically open. The selected contacts will be added to a different Call List while also remaining on the original one
- Move To Another Call List: The Move To Call List modal will automatically open. The selected contacts will be moved to a different Call List and will no longer be found on the original one.
The following custom buttons can only select 50 records at a time from a List View:
- Add to Call List (Lightning)
- Add To Another Call List
- Move To Another Call List
Configuration Steps
- Navigate to Setup > Object Manager > Call List.
- Open the Page Layouts tab and select the relevant page layout.
- Scroll down to the Call List Members related list and click on the Properties icon.
- Open the Buttons section and move the Add To Another Call List/Move To Another Call List to the Selected Buttons column.
- Repeat the steps if you want to add the button to multiple page layouts.
Daxtra Search & Match
Recalculate Order of Candidates in Search Results
Last year we introduced the Enable Search Result Numbering setting. When enabled, users see progressive numbering next to the Candidate's name. This was only available for the default filter, Score.
Now if Enable Search Result Numbering = True, the progressive numbering of the Candidates is recalculated if a different value is selected in the Order List picklist (after the results are returned and ordered based on the default Score value). No extra configuration required.
Additional Information
- Same logic implemented for Search Result column in Talent Rover tab and Potential tab.
- Once the list is numbered based on selected picklist value, it's possible to order in ascending and descending order by clicking on Asc/desc.
- All main field types supported for numbering and re-ordering of the numbering (other than Score).
- As the Order List picklist is customizable (dependent on Contact's SearchListFieldSet fieldset) the logic can handle any selection of supported fields. All returned records in the search result column that are found to have equal value are given the same number.
Resume Parsing
New Popup for Managing Duplicates
This new option helps users decide how to proceed when resume duplicates are detected during parsing.
If this functionality is enabled, a window appears during the parsing process if duplicates are detected. Users are prompted to either create a new Candidate record or merge with existing one. If more than one duplicate is detected, users can choose which existing Candidate record the parsed resume should be merged with.
This functionality is supported only in s with the following configuration:
- Setup > Custom Metadata Types > Search & Match Configuration > SM_Config > Contact Deduplication Engine V2 = StandardDuplicateDetectionEngineV2
- Setup > Custom Settings > Talent Rover Properties > Enable New Architecture = True
- Salesforce native deduplication rules are configured. Multiple duplicate rules are supported.
-
The Allow action is available on the deduplication engines. The Block action is currently not supported.
Configuration Steps
- Navigate to Setup > Custom settings > TalentRover Properties.
- Enable the Enable Parsing De-Duplication Options checkbox
Option to Delete Resume in Resume Manager
You can now delete an unwanted or outdated version of a resume from the Resume Manager without having to navigate to a different section of the Contact record.
This option is disabled out of the box. This can be enabled for an organization, profile, or specific user.
Configuration Steps
- Go to Setup > Custom settings > Resume Manager Settings.
- Check the Enable CV Deletion checkbox.
Global
New Custom Labels
There are new Custom Labels available. Contact Bullhorn Support for more information regarding custom labels.