Break Exception Configuration: General Settings
Overview
This article contains information on the General Settings for Break Exception Configuration. General Settings are the first set of options you will encounter after adding a new rule or editing an existing one.
If you are creating a new configuration, you must navigate through all of the configuration screens and submit your configuration before it becomes active.
If you exit setup before it is complete, the configuration will remain in a pending status.
Please keep in mind that the available options may shift based on the selections you make during configuration. Some options are required and may not be skipped.
Steps
- From the Break Exception Configuration main menu, click either +Add New Rule or Edit to configure an existing rule.
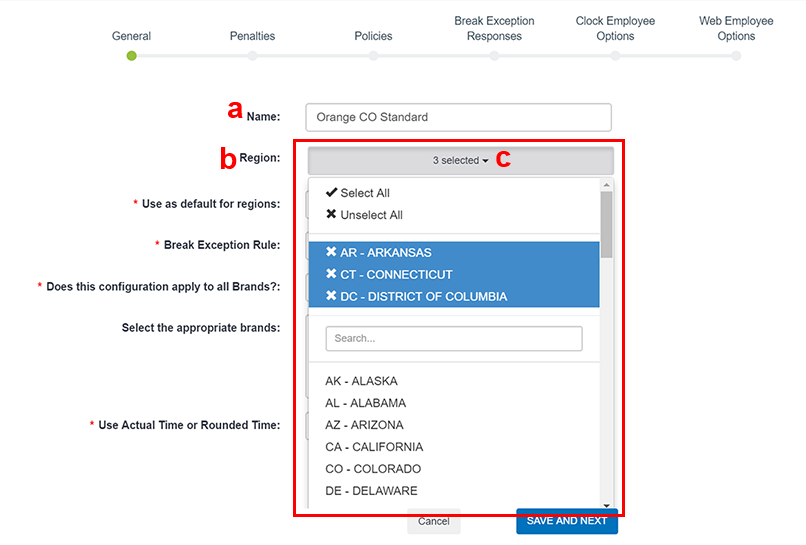
- In the Name field, enter a unique name for the configuration.
- This should be descriptive enough to allow easy and quick sorting of details from the Break Exception Configuration menu. The name may be updated as needed.
- Click the Region menu to open and select the applicable states or provinces impacted by the configuration.
- You can browse the list using the scroll bar in the menu or with the Search feature.
- You can select individual or multiple regions from the list.
- You can also select all available regions with Select All at the top of the list.
- Click the Region menu again to close it.
- This will update automatically as you choose regions.
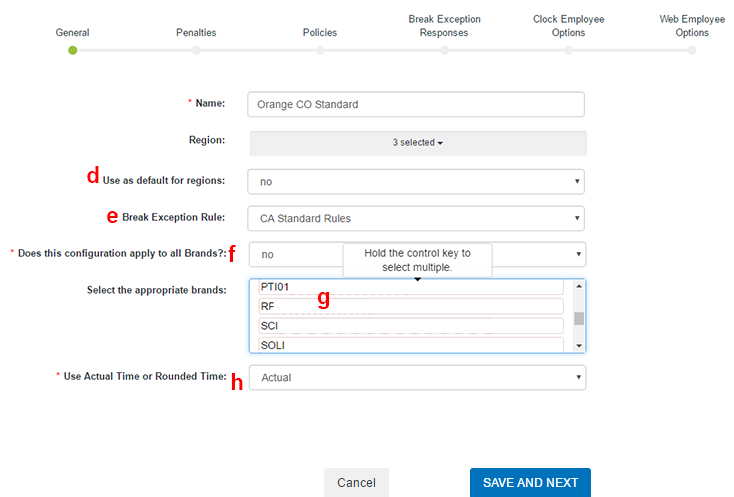
- Choose an option for the Use as default for regions dropdown:
- Select yes if the configuration you're about to set should be used as the default for the regions you selected.
- Leave this option as no if the default should not be set by what you selected above.
- If you're unsure of whether the option should be set as the default, leave this option set to no.
- From the Break Exception Rule drop-down, choose which exception configuration to apply.
- This is a required field.
- In the Does this configuration apply to all Brands? drop-down:
- Select yes if the configuration you selected is applicable to every available brand within your organization.
- Otherwise select no.
- Selecting this will give you the option to Select the appropriate brands.
- If you set Does this configuration apply to all Brands to no, select the brands this configuration should apply to from the Select the appropriate brands menu.
- You must manually select any applicable brand options that should be impacted by the configuration.
- You may select a single option or press and hold the CTRL key on your keyboard and click to make multiple selections.
- In the Use Actual Time or Rounded Time drop-down, indicate whether the configuration will use Actual or Rounded time when calculating exceptions.
- If your configuration does not include any sort of soft scheduling or rounding, you should choose Actual time as worked details are not impacted by rounding or scheduling
- Rounded time may be an option if your setup includes soft scheduling or rounding rules.
- To learn more about these options, please review Soft Scheduling and Rounding.
- Click SAVE AND NEXT to confirm your changes and continue to Penalties.
- Alternatively, select Cancel to return to the main configuration menu.
Related Articles
Was this helpful?

