Creating Email, Meeting, and Interview Actions - Invenias Web App
Overview
The O365 integration enables a User to create Emails, Meeting and Interview invites from templates created using the Template editor in the Essentials web app.
Click here for an admin guide on Enabling the O365 Integration.
This article contains:
- Email Action
- Meeting Action (General availability from 2022.07GA release)
- Interview Action (General availability from 2022.07GA release)
Email Action
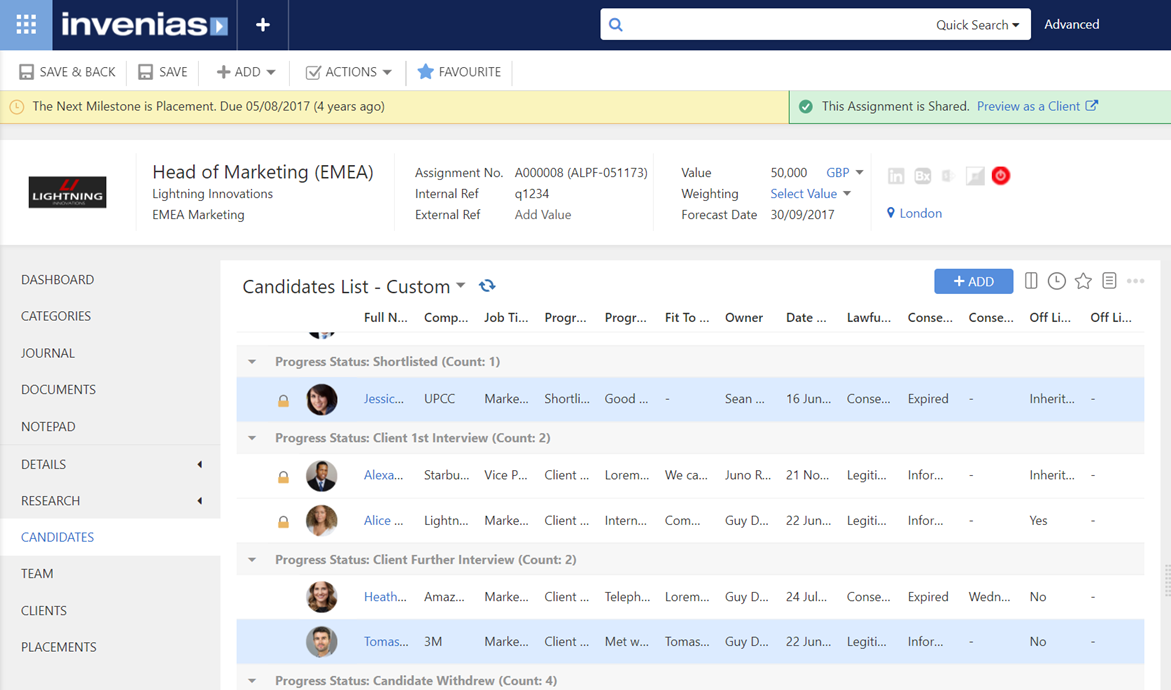
You can create new Email actions from list views and from individual records in the Essentials web app. In this example, we're viewing a Candidate list in an Assignment with multiple people Records selected:
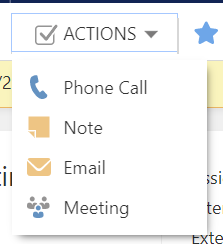
Click the Actions shortcut in the Record header, then Email:
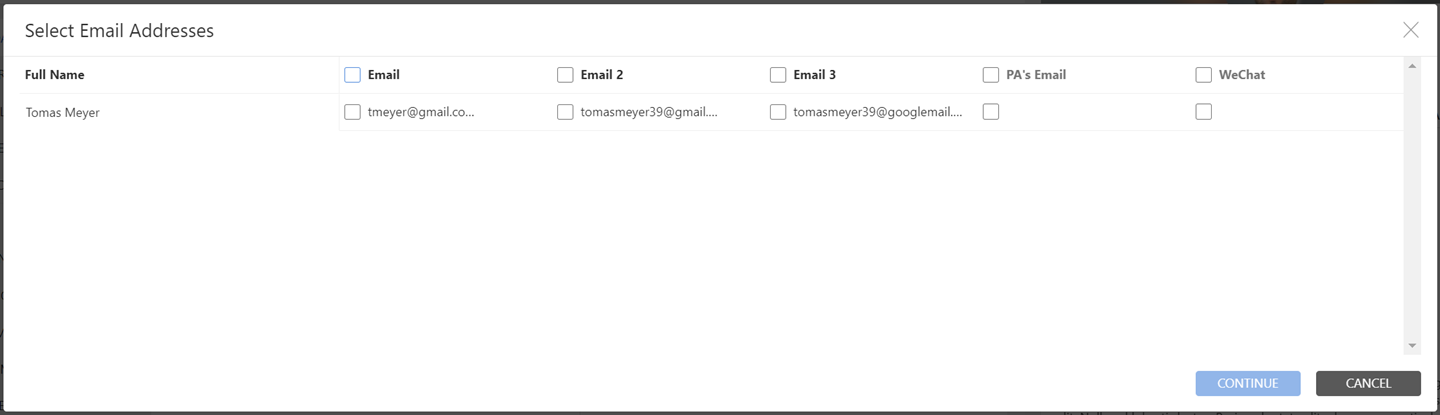
A prompt will appear to confirm which email address to select for each person:
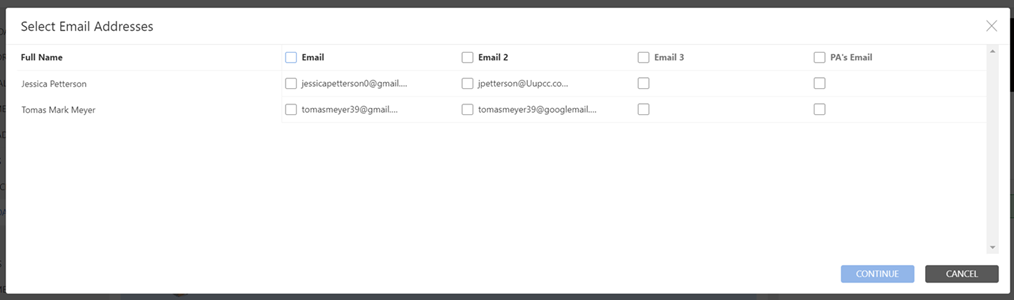
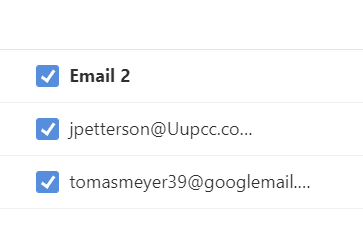
Note you can click a column header (e.g. Email 1, 2, 3) to select that Email field for all the recipients:
If there are any recipients that don't have an email address selected they will be highlighted in red.
Click Continue to move onto the Email action window:

In this window you can add additional recipients to the To, Cc, or Bcc fields. Click Cc Bcc to expand this section which is hidden by default.
You can also define the Action type and Importance of the email. You can manually add a subject and add the body of the email on this screen.
Alternatively you can select a template to populate these fields, you can also edit these if desired before sending.
Note the option to Send individual emails to each person in the To field (default option), or the option to Send a single email to all individuals in the To field. If this option is selected all recipients will see the other recipients in the To field. This is an important consideration as this may not be desirable!
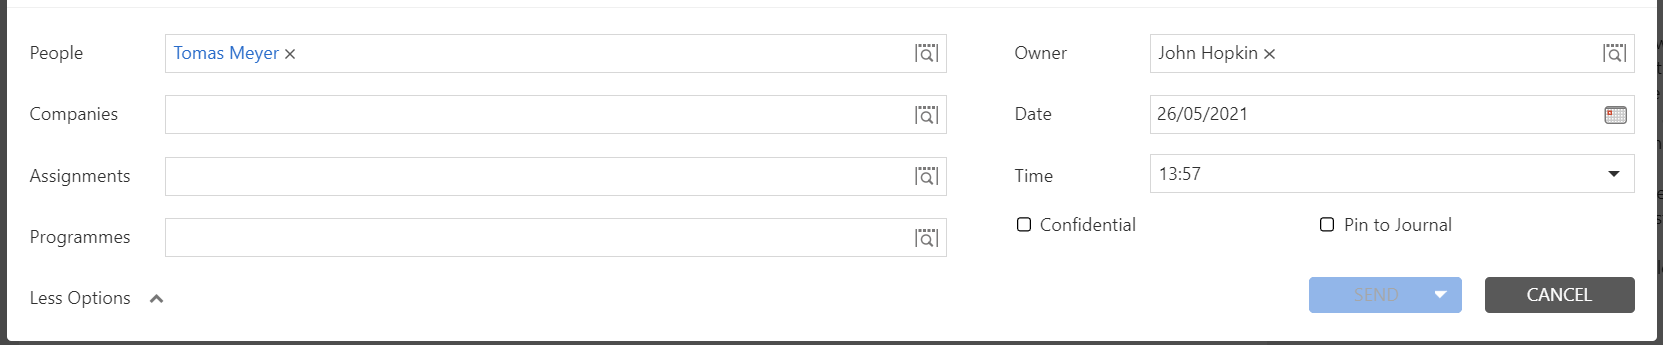
Click More options to reveal the following section:
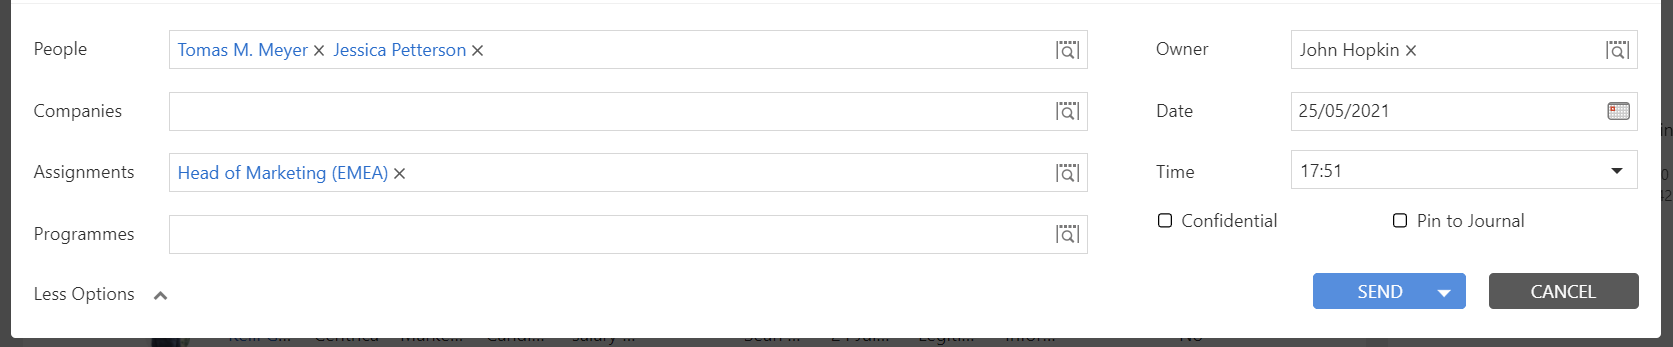
Similar to all other actions, you can define which records this email will be saved to, update the Owner, set as confidential and Pin this to the journal.
When ready click Send and the Email will be sent and saved to the journal.
Meeting Action
You can create new Meeting actions from list views and from individual records in the Essentials web app. In this example, we're viewing a Person Record and want to create a meeting to discuss possible career opportunities.
Click the Actions shortcut in the Record header, then Meeting:
Select an email address for the recipient to receive the invitation:
Click Continue to proceed to the meeting action:
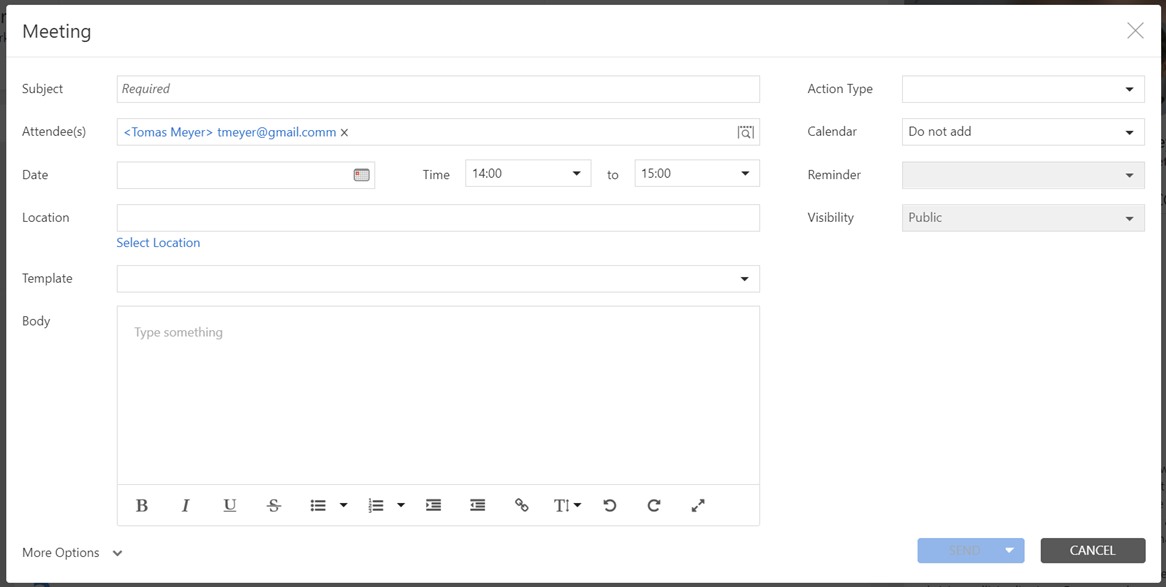
In the meeting action you can manually add a Subject / Body to your invite, or you can select a Template which will populate these fields.
You can also add additional attendees and set the Date, Start / End dates.
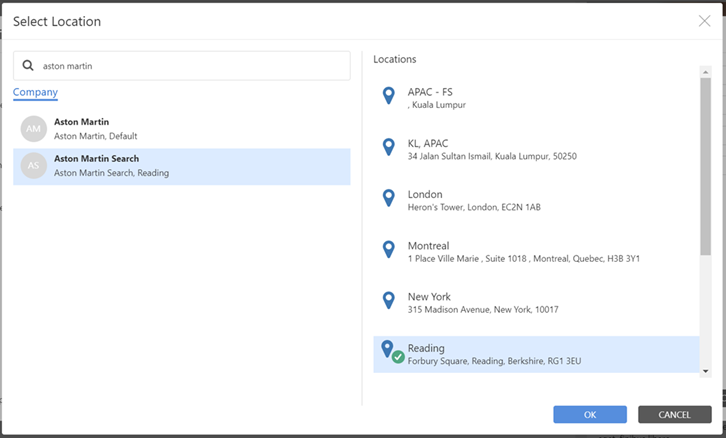
The Location lookup (shown below) allows you to search for any location saved to a Company record:
Additionally, you can select an Action type, select to Add this meeting to your Calendar as Free or Busy, set a Reminder time and whether this is publicly visible in your calendar.
Click More options to reveal the following section:
Similar to all other actions, you can define which records this email will be saved to, update the Owner, set as confidential and Pin this to the journal.
When ready, Click the Send button to send the meeting invitation. If you don't want to send the invitation, click into the dropdown and click SAVE. This will save the meeting action to the journal, but not send any invitations to the recipients.
Interview Action
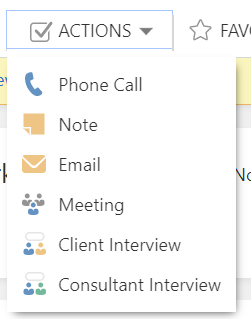
You can create new Interview actions from Assignment Records and the Candidate Assignments Tab of a Person Record in the Essentials web app. In this example, we're viewing a Candidate list in an Assignment with a Candidate Record selected.
Click the Actions shortcut in the Record header, then either Client Interview, or Consultant Interview:
In this example we will create a Client Interview, you will be prompted to select a Client, taken from the list of Client's added to the Assignment Client tab.
A consultant interview has a similar flow, but you will be prompted to select an Internal User as the Consultant at this stage, sourced from the Team tab of the Assignment.
Next you will be prompted to select an Email address for the Candidate and Client:
Click Continue to move onto the Interview action window:
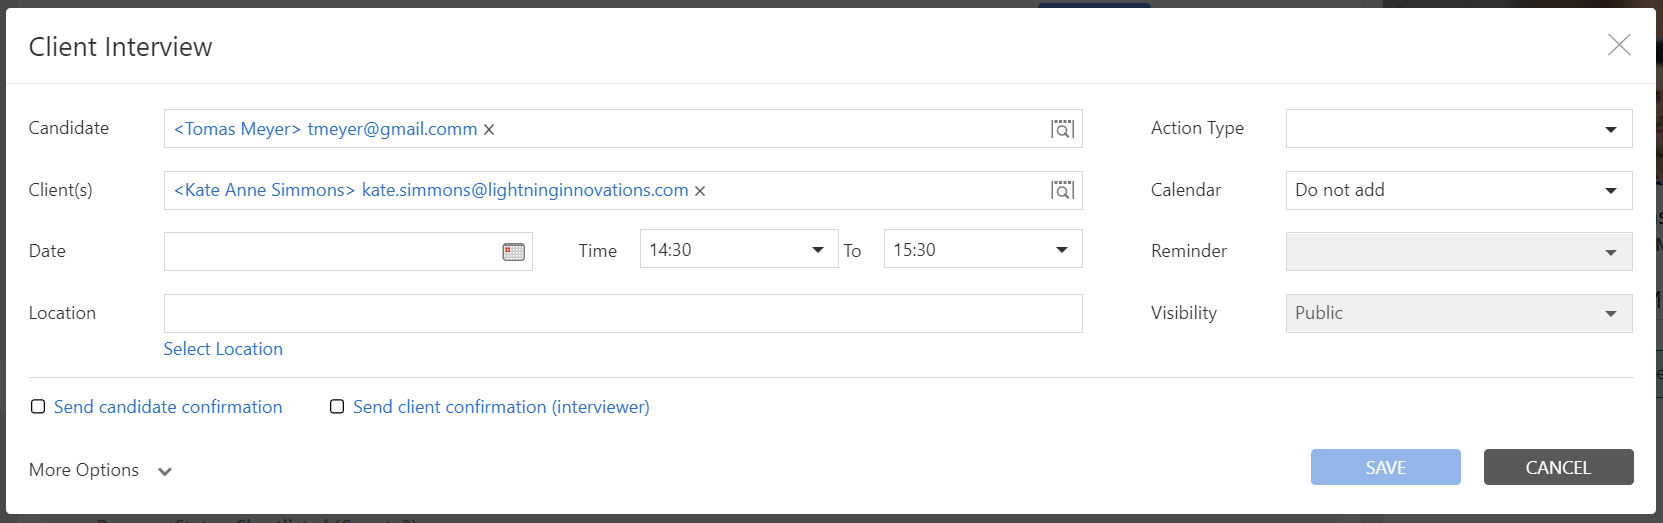
If you wish, you can amend the Candidate / Clients in this interview action, alongside setting the Date and Start / end times for the interview.
The location lookup (shown below) allows you to search for any location saved to a Company record:
Click Candidate Confirmation to open the following window, that allows a User to create an Email to send to the Candidate to confirm this interview:
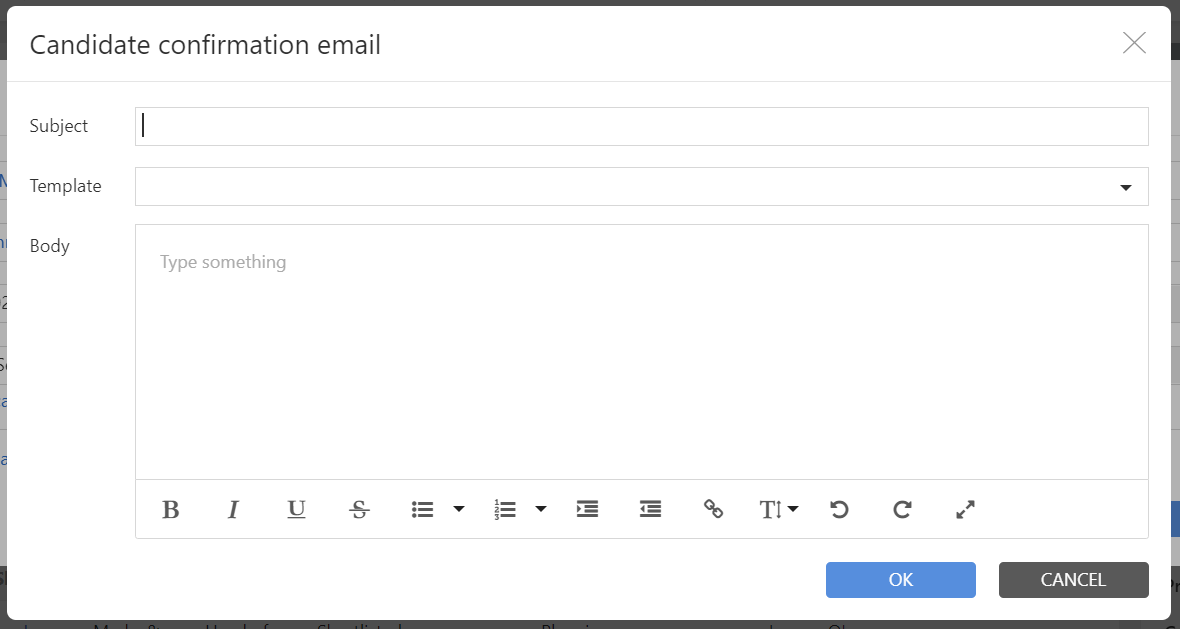
You can free type into this window or select a Template to populate the subject and body. When you're happy with the content click OK.
Click Client Confirmation to launch a similar window to edit the confirmation email sent to Clients.
If you don't want to send confirmation emails, ensure to uncheck Candidate/Client confirmation.
Click More options to reveal the following section:

Similar to all other actions, you can define which records this email will be saved to, update the Owner, set as confidential and Pin this to the journal.
When ready, click SEND to Save the action to the journal and Send the Confirmation emails. If you have selected not send emails, click SAVE to save the action to the journal.