Enabling the Bullhorn Email and Calendar Integration with Older Microsoft Exchange Environments
Set up email tracking and journaling to automatically forward emails from Outlook into the Bullhorn Activity Center. This setup process is for Exchange environments older than 2013—for Exchange 2013 and newer, see Enabling the Bullhorn Email and Calendar Integration with Microsoft Office 365 or Exchange 2016.
The Bullhorn for Email Gadget is only available for Exchange 2013 and later. For older Exchange versions, you'll have email tracking but not the Gadget.
Before You Begin
This setup requires IT professional-level access to your Exchange environment. You may need your IT team or Microsoft Support to complete some steps.
What You Need
-
Tracker address from Bullhorn Support (format: abc.213@sl31tracker.bullhornstaffing.com). If the address provided doesn't match this format, contact Bullhorn Support to verify.
-
SPF configuration: Add Bullhorn to your Sender Policy Framework. See Updating Your SPF Records for steps.
-
Email domain linked to Exchange: Your domain must be linked to your Exchange server for the integration to work. Contact Microsoft Support if you need help.
-
Journaling capabilities: Your Exchange environment must support journaling. Transport rules may work but aren't supported—if you can only use transport rules, contact Microsoft Support for assistance.
-
Admin access to your Exchange Management Console.
-
Distribution group (if selective tracking): If you don't want to track emails for all users, you'll need a pre-built group of the email addresses you want to track.
Important Context
-
Email tracking limitations: Emails sent before you set up tracking won't be available in Bullhorn. Only emails sent after setup will be tracked.
-
Setup time: It may take up to an hour for journaling changes to take effect on your server. Once active, emails should appear within moments of sending or receiving.
-
Case sensitivity: The tracker address must be in all lowercase. If you use any uppercase letters, the integration won't work.
Set Up Journaling
Use these steps to create a mail contact for the tracking address, set up a distribution group (if needed), and create the journaling rule.
-
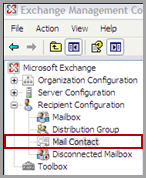
Open the Exchange Management Console.
-
Expand Recipient Configuration and create a new Mail Contact.
-
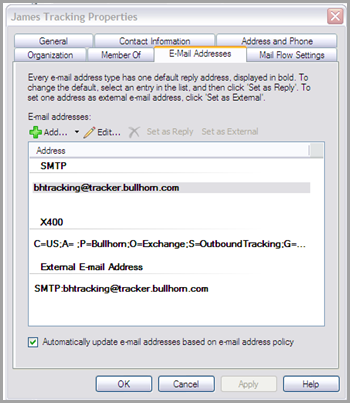
Name the contact "Bullhorn Tracking Email Address" and enter the tracker address provided by Bullhorn Support.
Use all lowercase letters for the tracker address.
-
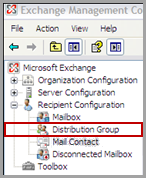
If you're tracking emails for all users, skip to step 6. If you want selective tracking, create a Distribution Group and assign the users whose emails you want to track to this group.
-
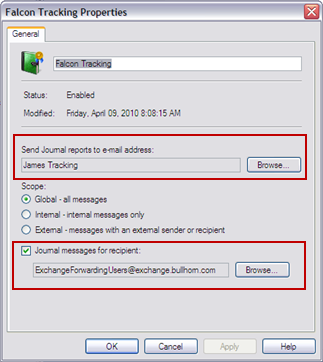
Create a new Journal Rule and name it "Bullhorn Tracking".
-
In the Send Journal reports to e-mail address field, select the Mail Contact created in step 2.
-
Check the Journal messages for recipient checkbox.
-
If you created a distribution group, specify it here. If you want to track all emails for all users, select all recipients instead.
-
Click OK.
Journaling is now active. You can verify it's working by running a message trace in Exchange to confirm copies of inbound and outbound emails are being forwarded.