Enabling Bullhorn Email and Calendar Integration with Gmail
If you're an IT administrator, this guide will walk you through the steps to set up Bullhorn's Email and Calendar integration for your company. Following this process will ensure your users' emails and appointments track automatically to the correct records in Bullhorn.
Before you Begin
-
Add Bullhorn to your company's Sender Policy Framework (SPF) records. Without proper SPF configuration, your emails may be marked as spam or rejected. For more details, see Updating Your SPF Records
-
You'll need your unique corporate tracker address. This address looks like <corpname>.<corpID>@slXtracker.bullhornstaffing.com (where X is your company's swimlane number). If you do not know your tracker address, contact Bullhorn Support.
Set Up Organizations (Optional)
You only need to follow these steps if you have multiple Bullhorn databases or if you want to exclude specific users from having their emails track to Bullhorn. This process allows you to create separate organizational units within your Google account.
For more guidance on Organizations and Google, see How the Organizational Structure Works.
-
In Google Apps Administration, click the Users icon.
-
In the left pane under Organization, roll your mouse over your domain and click the down arrow.
-
Click Add Sub Organization.
-
In the Name field, enter a name for your organization and click Save.
-
Move users to their proper Organization by checking the box next to their name and clicking Move To Another Org.
Once you have completed creating your sub-organization, you must apply the inbound and outbound routing setup (described in the sections below) to your specific sub-organization.
For more guidance on applying Gmail settings with multiple organizations, see Working with Gmail Admin settings in Google Workspace.
Set Up a New Email Host
Creating a new host in Google Admin is the first critical step to route your company’s email traffic to Bullhorn. This ensures that the messages are delivered to the correct destination for tracking.
-
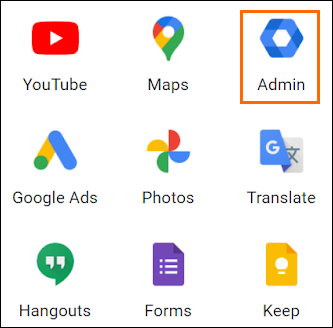
Log into Google as an Admin and select the Google apps menu.

-
Click on the Admin menu. You may need to select More to find this menu option.
-
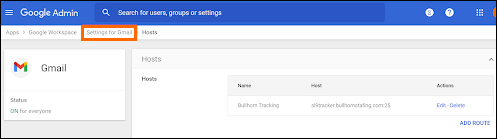
In the search bar, type “Hosts.” Select the Hosts (Apps > Google Workspace > Settings for Gmail) option.

-
In the Routing section, select Configure.
-
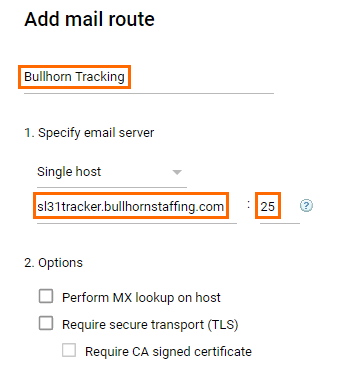
In the Name field, enter a name for your host, such as "Bullhorn Tracking."
-
Under Specify email server, find the field that says Enter host name or IP. Enter the domain of your Bullhorn corporation tracker address.
-
Important: Only enter the domain (the part after the @). For example, if your tracker is corpname.corpID@slXtracker.bullhornstaffing.com, enter slXtracker.bullhornstaffing.com. Using the full email address will break the setup.
-
Make sure you enter the domain in all lowercase letters.
-
-
To the right of the Host field, enter 25 for the port number.
-
Under Options, uncheck the following boxes:
-
Require CA signed certificate
-
Perform MX lookup on host
-
Require secure transport (TLS)
-
-
Select Save.
If you are setting this up for multiple companies or swimlanes, you must create a new host for each.
Set Up Email Routing
Setting up inbound and outbound email routing tells Google where to send copies of your company's emails so they can be tracked in Bullhorn. This is a crucial step for the integration to work correctly.
Set Up Inbound Email Routing
-
After finishing the Hosts, select Settings for Gmail.
-
Next to the Routing header, select Configure.
-
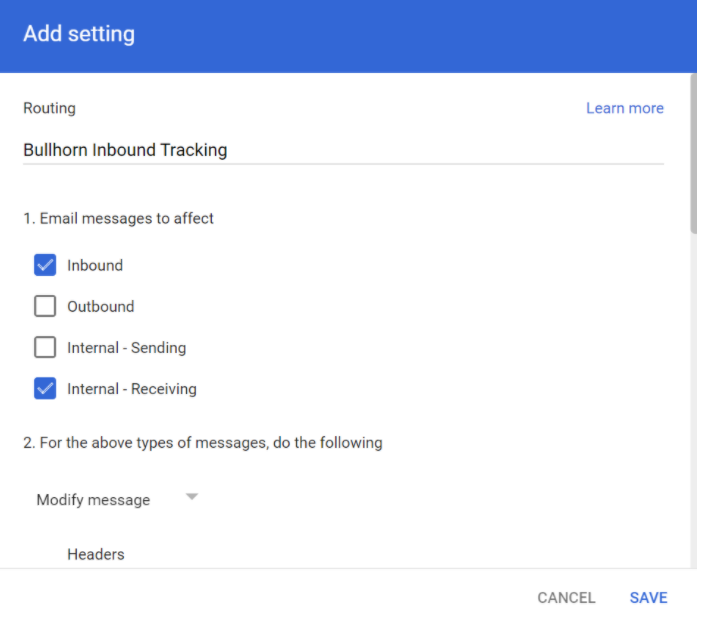
Enter a name for the rule, such as Bullhorn Inbound Tracking.
-
Under Email messages to affect, check the Inbound and Internal - Receiving boxes only.
-
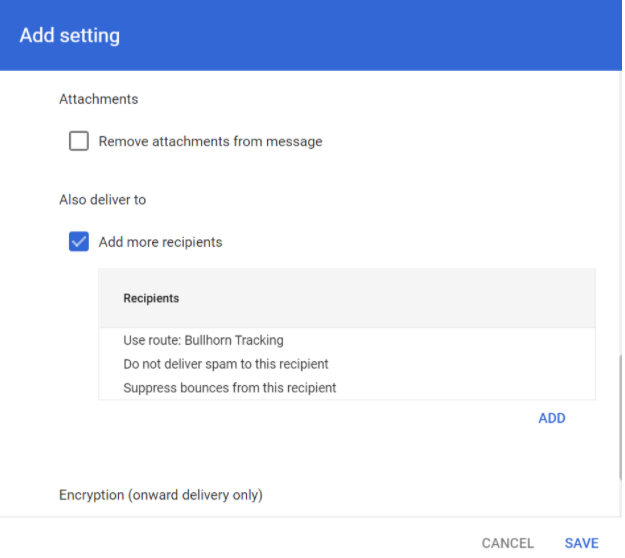
Scroll down to Also deliver to and check the box for Add more recipients.
-
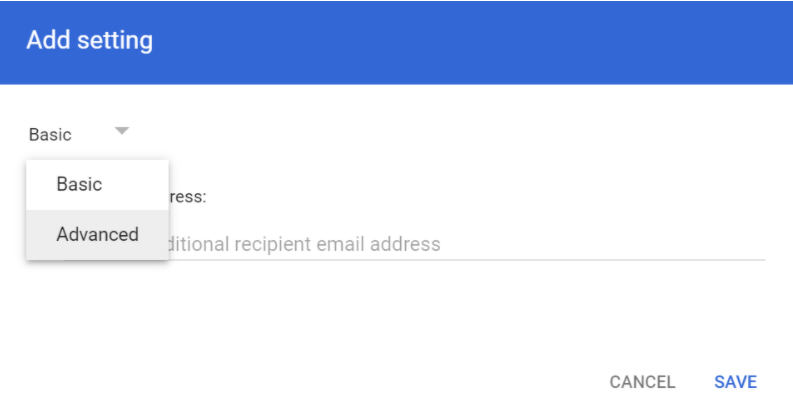
Select Add, then choose Advanced from the drop-down.
-
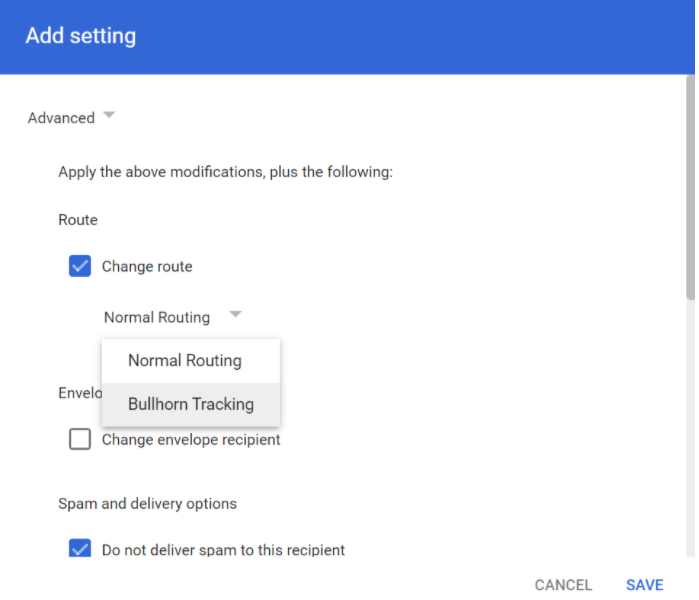
Under the Also Deliver to section, find the Change Route checkbox and enable it.
There are multiple Change Route checkboxes. Ensure you select the one nested under Also deliver to > Add More Recipients.
-
From the drop-down that appears, select the Bullhorn host you created above.
-
Check the boxes for Do not deliver spam to this recipient and Suppress bounces from this recipient.
-
Select Save.
-
Select Save again to save the routing rule.
Set Up Outbound Email Routing
-
After saving the inbound routing rule, click Add Another.

-
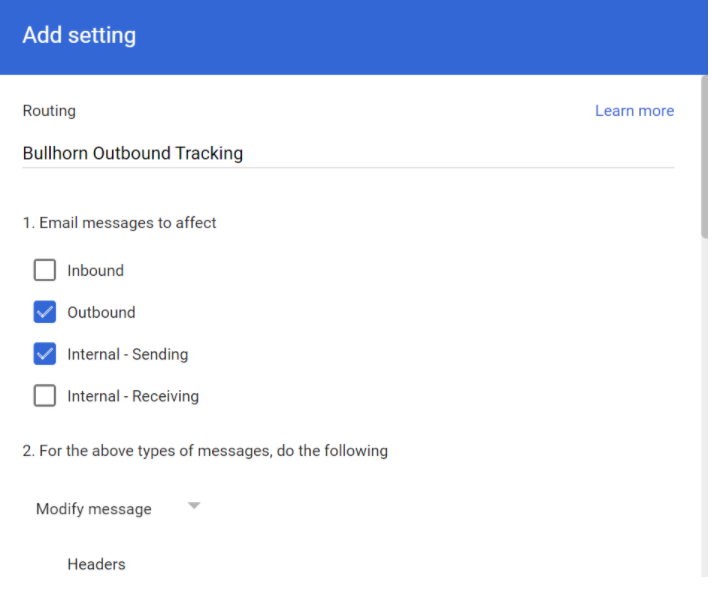
Enter a name for the rule, such as Bullhorn Outbound Tracking.
-
Under Email messages to affect, select the Outbound and Internal – Sending boxes only.
-
Scroll down to Also deliver to and check the box for Add more recipients.
-
Select Add, then choose Advanced from the drop-down.
-
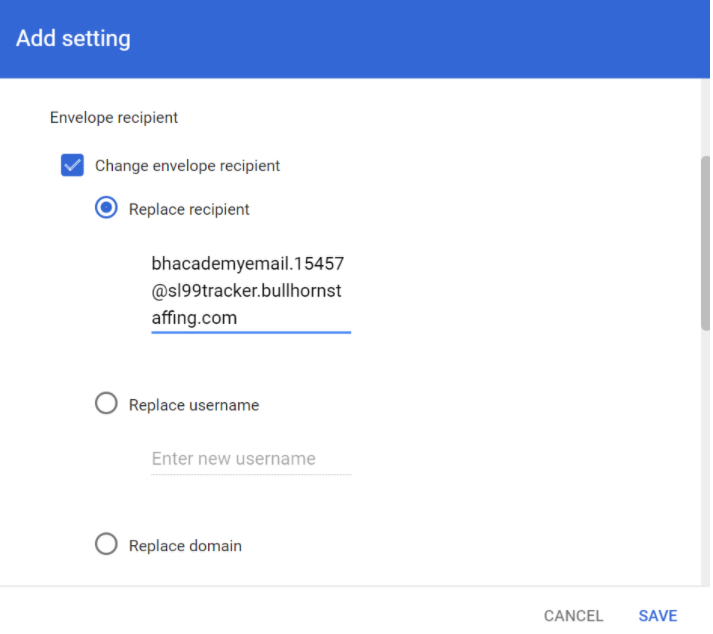
Under Envelope recipient, check the Change envelope recipient box.
-
Select Replace recipient and enter the full Bullhorn corporation tracker address in the field provided by Bullhorn Support.
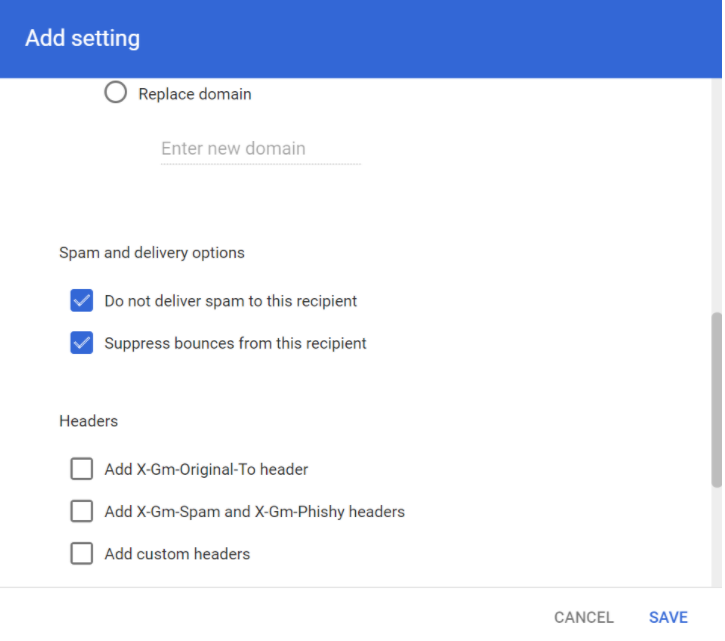
-
Ensure the Do not deliver spam to this recipient and Suppress bounces from this recipient boxes are checked.
-
Select Save.
Verifying and Troubleshooting Your Setup
Once you've completed the steps above, it may take up to an hour for emails to begin tracking into Bullhorn. Use these tips to verify that the integration is working and to troubleshoot common issues.
How to Test Email Tracking
Use an external email address (like a personal Gmail or Outlook account) to test the tracking. Do not use an internal email address (e.g., one from the same domain you are setting up).
-
Ensure at least one hour has passed since you completed the email tracking setup.
-
Create a test record in Bullhorn that has the external email address in the email field.
-
From the external email address, send an email to one of your Bullhorn users.
-
Have the Bullhorn user reply to the email.
-
Open the test record and navigate to Activity > Email to verify the exchange has tracked.
-
In the activity tab, make sure the Ownership drop-down is set to All to see all tracked emails.
-
If you still don't see the emails, verify the email routing steps again.
Troubleshooting Common Issues
Emails are not showing in Bullhorn:
-
Make sure you waited at least one hour after completing the integration setup.
-
Check if the routing rules were applied to the correct sub-organization.
-
Confirm the affected user(s) have inbound email tracking enabled on their Bullhorn user profile.
Some users' emails track, but others do not:
Compare the setup of a non-working user to one who is working properly. The user may need to be part of the sub-organization where the routing rules are enabled.
A user's sent emails are not syncing:
Ensure the user's primary email address in Bullhorn matches the email assigned to them within the domain.
I see an error message when trying to enable "Gmail Sent Items Sync":
This is a legacy setting that is no longer required. All email tracking is now managed by the inbound/outbound routing rules you configured in Google Admin.
I have the wrong host URL in Google Admin:
In your Google Admin Hosts settings, edit the existing host entry. Ensure the host name is the domain only (the part after the @) and is in all lowercase letters.
I have another issue, or the solutions above didn't resolve my issue:
Contact Bullhorn Support for further assistance.