Automation Branching
Branching is a feature of that allows you to take different automated actions on various list criteria, without having to build multiple automations.
Automation branching works like a funnel. You start with your main list of contacts, and from there they are filtered through the funnel and into the branches you create to segment the members of that main list into designated mini lists.
When to Use Branching
Branching is used for creating dynamic workflows that adapt based on pre-existing criteria. It works best when the information needed to determine a branch path is already fixed at the time a contact enters the branch step.
Effective Use of Branching:
Tailoring workflows based on static values, such as Category in a contact's ATS profile.
Streamlining processes by routing records into predefined branches based on known information.
When Not to Use Branching:
Branching is not effective for scenarios where decisions rely on future actions or events, such as survey responses or other time-based triggers. In such cases, separate automations are recommended for better accuracy and control.
How to Set Up Branching
In this example we'll be setting up branching to filter candidates by their Category, but the same steps will apply for any criteria you filter on.
- Begin building your automation as normal. For help building an automation, see Creating an Automation .
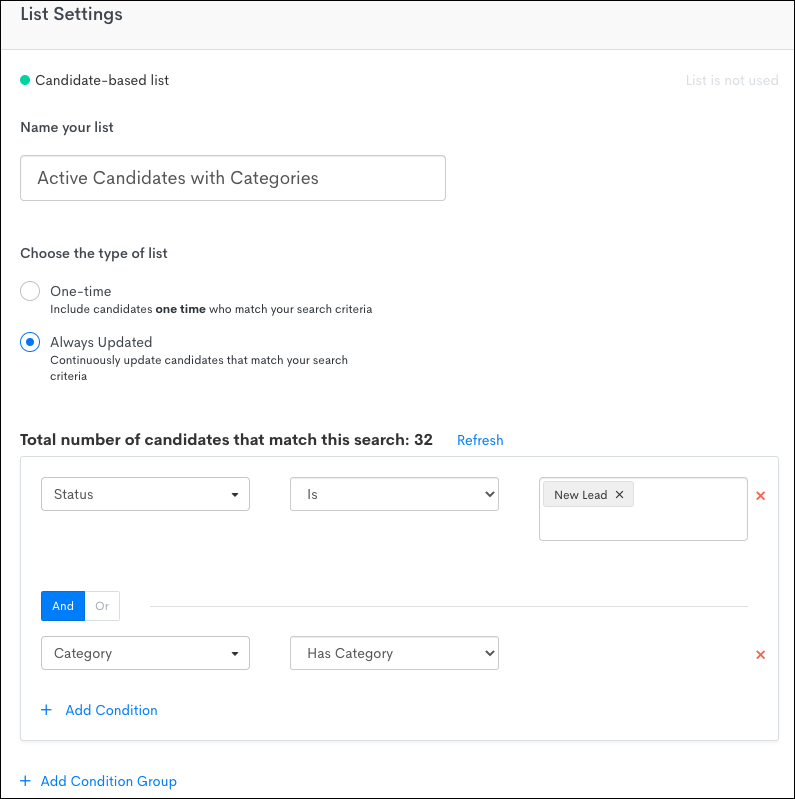
- Create your main list of contacts to funnel into branches. In this scenario, since we'll be branching candidates into three categories, we will add candidates that have any category and a Status of "New Lead".
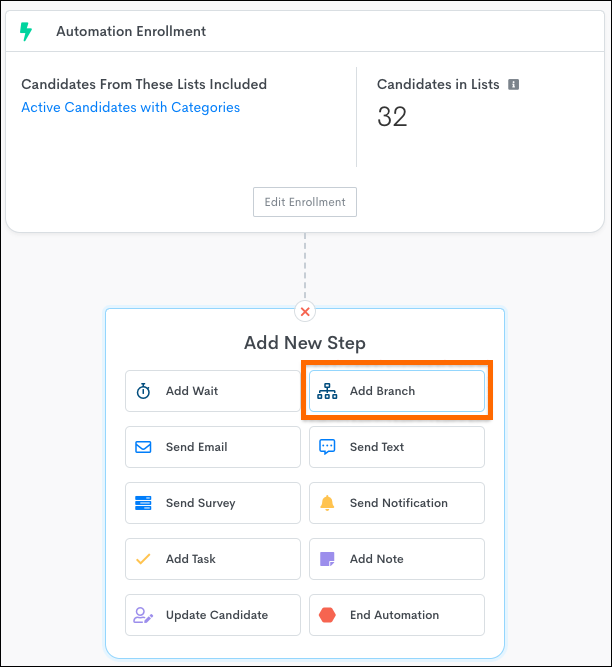
- Once you've saved your list and added it to the enrollment step of your automation, select the Add Branch step.
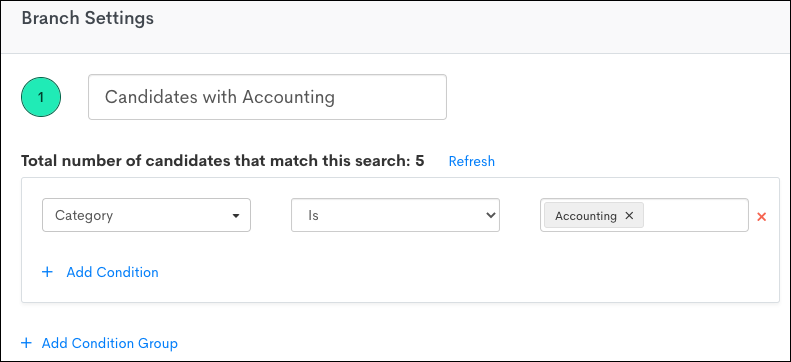
- Give your branch a name and select the criteria that will segment contacts from your main list into this branch. In this example, our first branch is for candidates that have a Category of Accounting:
- You can continue to add as many branches and sub-branches as you need by selecting Add Branch.
- When you add a new branch, the previous branch logic will be saved. Simply delete the previous logic and replace with your desired logic.

- When you add a new branch, the previous branch logic will be saved. Simply delete the previous logic and replace with your desired logic.
- Once you’ve added all of your branches, select Done. You will be left with something that looks like the below screenshot. The next step is to add the automation steps you want to take for each branch.
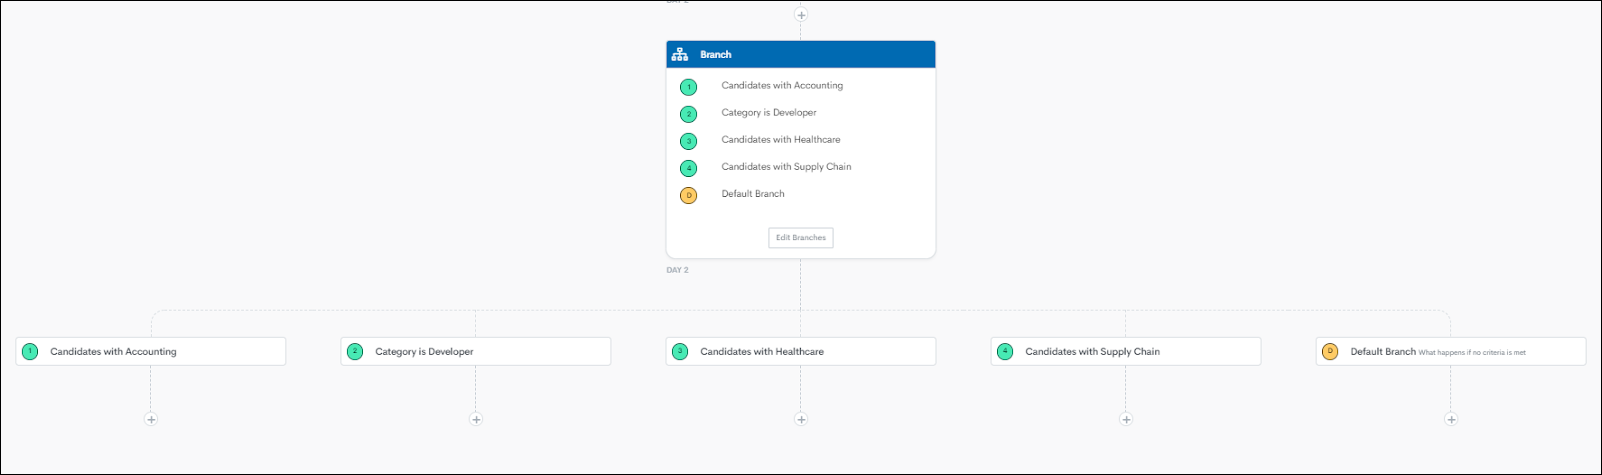
If a candidate, contact, or lead matches more than one branch, they will continue through the automation branch that they match first from left to right. In this example, a candidate with both the "Accounting" and "Supply Chain" Categories on their profile will go through the Accounting branch, as it is left of the Supply Chain branch.
Advanced Stats
As with other automation steps, you can access the Advanced Stats on a branch by hovering over the step, then selecting Options > Show Advanced Stats. Here you’ll be able to see how many contacts/candidates/leads have been filtered into each branch.
Default Branch
As well as the branches you add, also places a default branch. This is to ensure that if candidates, contacts, or leads match the main list, but don't fit the criteria for any of the branches, they will go into the default branch.
For example, in the scenario we set up above, there may be a candidate with a Status of "New Lead" but a different Category to the ones specified in your branches. You can choose to have a specific action happen for these candidates (see below), or nothing at all.

If you don't want anything to happen to the candidates, contacts, or leads that land in the default branch, simply add a 1-hour wait step and an end automation step. This will allow you to see who ended up in the default branch, as well as seeing who could have been removed if your ATS is updated within that hour.