How to Add and Manage an ATS User Account
As your team grows or changes, you might need to give a new recruiter, hiring manager, or teammate access to the ATS. This article shows you how to add an ATS user by assigning a new seat or license and includes guidance on related user account actions—such as resetting a password, updating login details, troubleshooting access issues, deactivating a former employee or transfer ownership of records from one user to another.
Adding user accounts is billable if the total number of active users is greater than what is outlined in your contract with Bullhorn. Please contact your Account Manager for more details about your contract.
Common User Account Actions in Bullhorn ATS
You might need to use or update user accounts in Bullhorn when:
- A new recruiter, hiring manager, or teammate needs ATS access
- You’re adding a seat or license to expand your team
- You need to update a user’s name, username, or email address
- Someone’s role is changing and they need new permissions or admin access
- A team member is leaving, and you need to disable or reassign their account
- A license needs to be freed up by removing an inactive user
- You need to reactivate a previously disabled account
-
A user is unable to log in to the system, reset their password, or access their account due to role or SSO issues
-
You need to create a house user account
Steps to Add an ATS User
The easiest way to add a user is to copy an existing user with a similar role (i.e., the same usertype, department, etc.), as there will then be fewer fields you have to complete.
Below, we will walk you through the process to ad a new user by copying an existing user.
Do not use the Unassigned user. The Unassigned user is for Bullhorn Support use only.
- Navigate to Menu > Admin > Users.
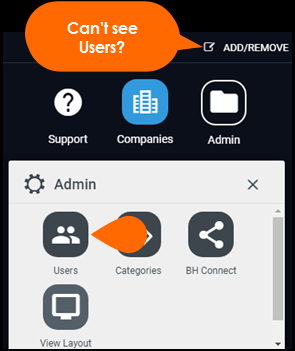
- Select the pencil icon next to the user you want to copy.
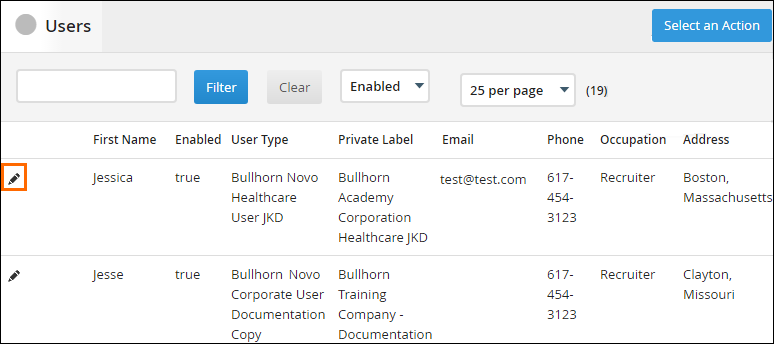
- Select Copy User at the top right of the screen.

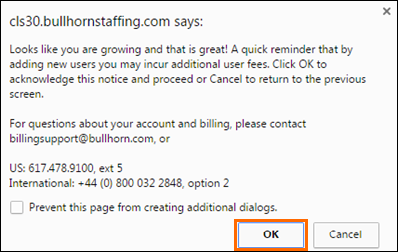
- Select OK to close the pop-up.
- Fill in the required information for your new user (see sections below).
- Click Save when finished.
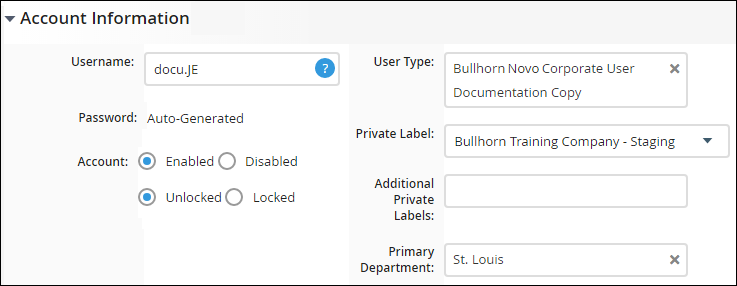
Account Information
Fill out the required Account Information:
- Username: Enter the desired username in lowercase characters. The username cannot be in use by any enabled or disabled Bullhorn user.
- User Type: Select the desired user type.
- Private Label: Select a primary private label for the user.
- Primary Department: Select a primary department for the user.
Contact Information
Expand the Contact Information section and fill out the desired fields:
- Reports To: Enter the Bullhorn user that the new user will report to (usually their direct manager)
- The Reports To field can only contain one internal user.
- The Reports To field can only contain one internal user.
Many of our standard reports are designed for managers to analyze and measure performance for employees who report to them. For these reports to work, on each user's account, you must select the name of the manager to whom they report. Note that the user's primary department must be the same as their manager's primary or secondary (additional) department.
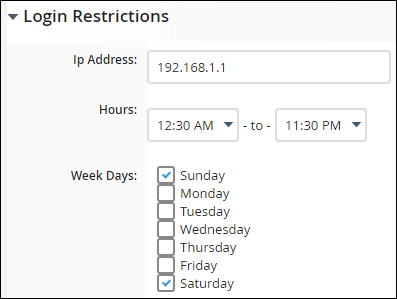
Login Restrictions
If desired, expand the Login Restrictions section and specify login restrictions for the user:
See Restricting User Login for more information.
Email Settings
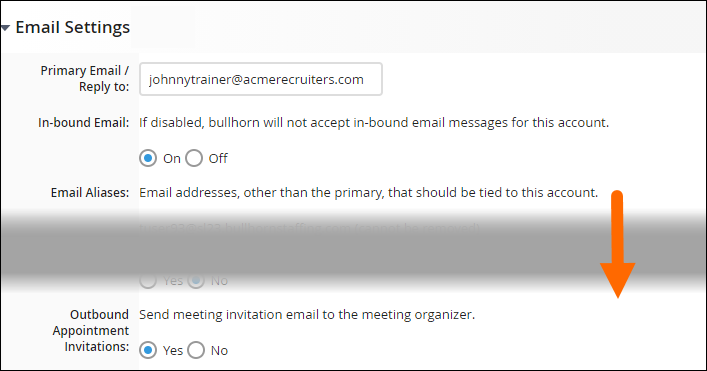
Expand the Email Settings section and fill out the desired fields:
- Primary Email / Reply to: Enter the user's primary email address with your company's domain.
- In-bound Email: Turn this on to enable email tracking for the user.
- Your company must have email integration enabled through Bullhorn for a user's emails to track.
- Email Aliases: Contact Bullhorn Support if you need to add domains owned by your company.
- Outbound Appointment Invitations: Turn this on so that meeting invitations created in Bullhorn are sent to the user's primary email address.
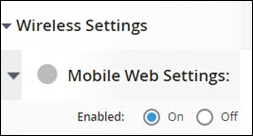
Wireless Settings
Expand the Wireless Settings section and fill out the desired fields:
- Mobile Web Settings: Turn this on to give the user access to Bullhorn via a mobile device.
Custom Fields
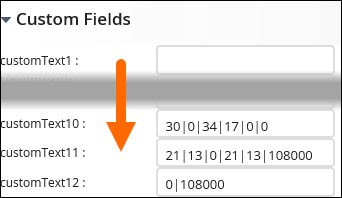
Expand the Email Settings section and fill out the desired fields, if required.
- Custom fields on this screen are used as per Defining the Target Goals for Users.
Creating a Password
- Under Account Information, enter a password for the new user.
As you type, Bullhorn shows a visual indicator of password strength. The password must meet the following requirements:
Must include letters, at least one number, and at least one special character (for example: ! @ # $)
Must be at least 8 characters and no more than 30 characters
Cannot include spaces, the user's username, or the words "Bullhorn" or "Password"
Cannot include plus (+) or forward slash (/) characters
- In the Retype new password field, enter the same password again to confirm.
- Select Save.
User Login
Once you provide your new user with their Bullhorn username and password, they can begin logging in using this link.
Troubleshooting Login Issues
If a user can't log into Bullhorn, try the following:
- Reset their password: Under Menu > Admin > Users > [select user] > Account Information. See Changing a User's Password for more information.
- Ensure their account is active: Deactivated or disabled users will not be able to log in
- Unlock their account: User accounts become locked after multiple failed login attempts, or if it has been over 90 days without a successful login. See Unlocking a User Account for steps.
- Check for Single Sign-On (SSO) issues: If your company uses SSO, make sure that you are signed in and there are no company-wide outages.
If the user still can’t access the system, verify that their username is correct and that their role hasn’t been changed or revoked.
Managing Existing User Accounts
In addition to adding new users, admins often need to manage existing user accounts. To update an existing user, go to >>and select the user to edit.
Here's what you can do:
-
Update user details: Update details such as name, username, or email.
-
Change a user’s type or department: You may want to change these if a user's role changes. For steps, see Changing a User's Departments or Changing a User's User Type.
-
Reset a password or unlock an account: If a user forgets their password and can’t sign in to Bullhorn, Admin users can reset it directly from the Users page. See Changing a User's Password
-
Temporarily disable a user account: There are many reasons you might want to disable a user account (e.g. for leave of absence). For steps, see How to Disable a User Account in Bullhorn
-
Deactivate/Disable users: To free up licenses, deactivate users who are no longer with the company. For steps, see How to Disable a User Account in Bullhorn
-
To check your available user licenses, contact Billing Support or refer to your Bullhorn contract.
If you're replacing a user account, you'll need to disable the previous user account and add the new one during the same work day to avoid being charged for both users in a month.
-
-
Reactivate disabled users: There are instances when you'll want to reactivate disabled users (e.g. when a user returns from leave).
-
Reassign user licences: You may need to replace one user with another (e.g. when one user is leaving and another is taking their place). For steps, see Replacing a Bullhorn User Account
-
Always deactivate the old user before reassigning a license to a new user to avoid billing issues.
-
-
Transfer ownership of records: There are cases when you'll want to transfer ownership of records from one user to another before deactivation (e.g. if somebody leaves or moves to another team). For steps, see Transferring Record Ownership Using the List View.
-
Resolve login issues: You want to Manage a user account to fix issues, including Single Sign-On (SSO) problems.
FAQ
What should I do if a user says they can't log in to Bullhorn?
A: Start by checking if their account is active, resetting their password, and confirming their login credentials. You can also review any login restrictions or SSO configurations tied to their user profile.
