Correlated Custom Fields
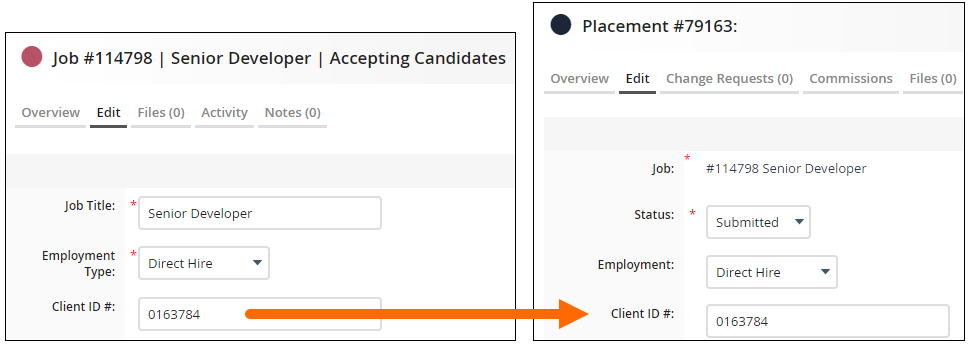
If you're trying to avoid reentering the same information across records, you can set up correlated custom fields that automatically carry data from a Job to its Placement.
You can only use correlated custom fields for passing information between Job records and Placement records.
Common Reasons to Use Correlated Custom Fields
-
"How can I set up a custom field so it automatically carries over from a Job to the related Placement?"
-
"How do I link fields between jobs and placements?"
-
"Can fields auto-populate in the Placement Edit tab when using Contract-to-Hire?"
-
"Can I make a commission role auto-fill from a specific Job field?"
-
"How can I pull information from the contact list to the Placement record for client communications?"
How Correlated Custom Fields Work
Use these fields to link Jobs and Placements so that data flows automatically in one direction. This is especially helpful when your team wants to maintain accurate records without repetitive manual entry.
Key Points
-
These fields only transfer data from Job records to Placement records, not to other record types.
-
The field must be populated on the Job before creating a Placement for the data to carry over.
-
Fields updated on the Job after a Placement is created will not sync.
Setting Up Correlated Custom Fields
Correlated custom fields let you automatically carry information across records, reducing duplicate data entry.
-
From your Bullhorn Menu, select Admin > Field Mappings.
-
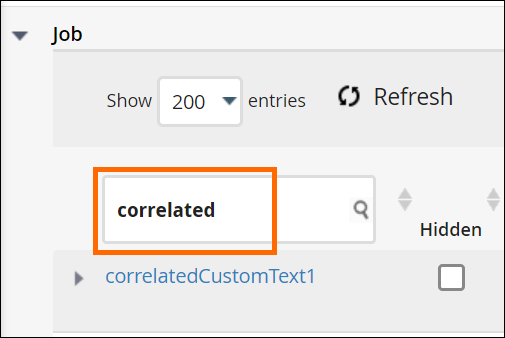
Expand Job.
-
Type "correlated" in the Field search column.
-
Select the desired correlated custom field.
-
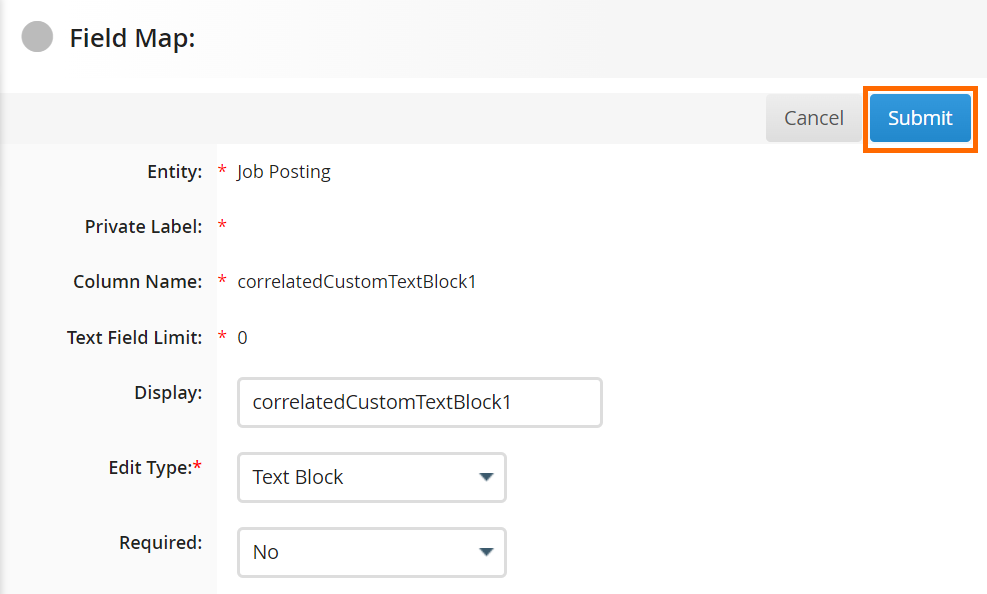
Fill out the details of the field as desired and select Submit.
-
After you click Submit, the same exact field will need to be set up in Field Mappings under Placement. Expand Placement and then follow steps 3-5
You must use the same correlated custom field number you chose in step 4. Ensure that everything is set up the exact same way it was on the Job entity in step 5.
-
If your company uses multiple Job and Placement tracks, repeat the above steps on each track.
FAQ
Why did my required field clear out?
If a placement or job field is not saving changes, and a required field clears or does not stay filled when saving, try the following troubleshooting steps.
Standard Fields:-
Go to Admin > Field Mappings > Placement or Job.
-
Locate the Hidden label and unhide the fields from the main placement or job track.
-
Click Save.
-
Log out and log back in to confirm the data now saves correctly.
Correlated fields must match on both the placement and the job track. To fix this:
-
Go to Admin > Field Mappings.
-
Open the Placement section, locate the Hidden label, and unhide the fields from the main placement track.
-
Open the Job section, locate the Hidden label, and unhide the fields from the main job track.
-
Click Save.
-
Log out and log back in to confirm the data now saves correctly.
Why isn’t data flowing from the job to the placement (e.g., pay rate or salary)?
This happens when the custom correlated fields on the Job and Placement are not configured with the same edit type. If the Placement field is set to accept only integers but the Job field stores the data as text, the values will not carry over.
To fix this, update the edit types of both fields so they are uniform. Once both the Job and Placement fields share the same edit type, the data will flow correctly.