Creating Multiple Job, Placement, or Opportunity Tracks
The Opportunity entity is available in Bullhorn Enterprise only.
Tracks let you configure different versions of the same entity (Job, Placement, or Opportunity) that display unique fields depending on the employment type (Job/Placement) or type (Opportunity). This allows you to tailor fields for Direct Hire, Contract, RFPs, and more, while keeping your data structured.
What Tracks Are and How They Work
Each entity can have multiple “tracks” (Track I, Track II, Track III, etc.).
Each track represents a variation of the same record type, showing different fields depending on the value selected in the employmentType or type fields.
-
Direct Hire Job: Show Salary, Bonus, Start Date
-
Contract Job: Show Bill Rate, Pay Rate, Contract Length
Users see different fields depending on the employment type selected when adding the record.
Best Practices When Using Tracks
Use each custom field for the same purpose across all tracks
If customText3 is used as “Bonus” in Job II, it must also represent “Bonus” in Job III, Job IV, Job V, etc.
Repurposing the same custom field for different meanings across tracks can cause data corruption or reporting errors.
Job and Placement tracks should match
Placement records pull many values from their associated Job records.
For clean data and workflows, Job II should match Placement II, Job III should match Placement III, and so on.
Opportunity tracks can vary
Opportunity types (RFI, RFP, Contract, Direct Hire, etc.) don’t have the same dependencies, so these tracks can represent a wider variety of workflows.
Checking Whether Tracks Are Already in Use
-
Expand Track II for the entity.
-
Look at employmentType (Job/Placement) or type (Opportunity).
-
If the field has a value, Track II is in use.
-
If it’s empty, also check Tracks III, IV, and V.
-
If all tracks are empty, no tracks are currently in use and Track I will act as the master.
-
-
Job tracks are standard and always available.
-
Placement tracks must be enabled by Bullhorn Support.
-
Opportunity tracks require Bullhorn Enterprise.
-
Fast Add Placements do NOT use Placement tracks — they use a simplified hard-coded layout.
Creating Multiple Job Tracks
Step 1: Set up the first Job track
-
Go to Admin > Field Mappings.
-
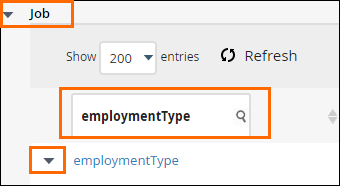
Expand the first Job track (Job).
-
This is the master list that controls available employment types.
-
-
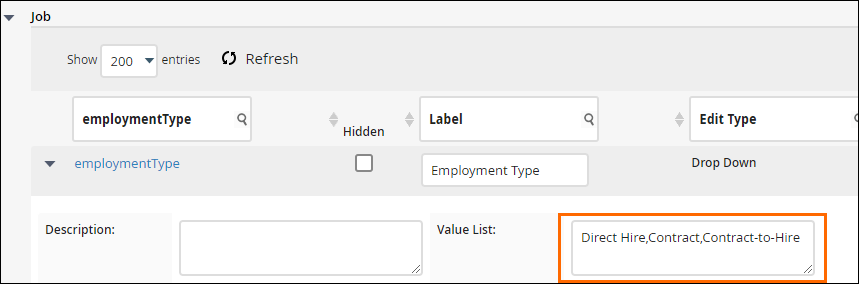
Filter for employmentType and open the field.
-
In Value List, enter all employment types your company uses. Separate these with commas, no spaces.
-
As a best practice, the order here should match the order of the subsequent tracks. Example:
-
Direct Hire → Job II
-
Contract → Job III
-
Contract-to-Hire → Job IV
-
-
-
In Job (Track I), unhide all fields you plan to use across any track. Track I is the master and controls visibility.
-
Click Save.
Step 2: Set up each additional Job track (Job II–V)
-
Expand Job II.
-
Filter for employmentType and open the field.
-
Enter the single employment type assigned to this track (example: "Direct Hire").

-
Hide or unhide the fields appropriate for that employment type.
-
Click Save.
-
Repeat for Job III, Job IV, Job V.
Creating Multiple Placement Tracks
Step 1: Set up the first Placement track
-
Go to Admin > Field Mappings.
-
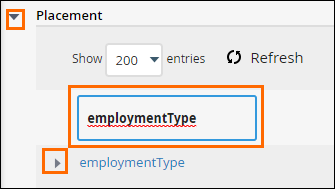
Expand the first Placement track (located between Note and Placement Change Request).
-
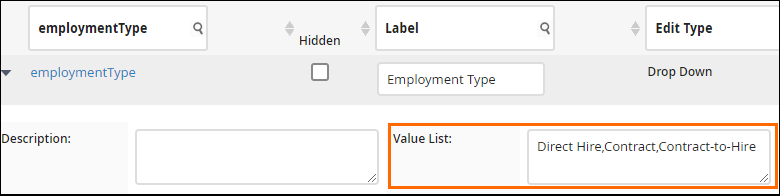
Filter for employmentType and open the field.
-
Enter the exact same employment types, in the same order, as your Job tracks.
-
In Placement (Track I), unhide all fields you plan to use across any placement track.
-
Click Save.
Step 2: Set up each additional Placement track (Placement II–V)
-
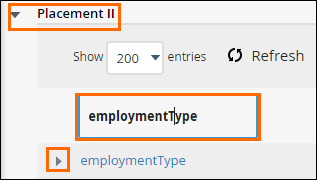
Expand Placement II.
-
Filter for employmentType and open the field.
-
Enter the single employment type assigned to this placement track.

-
Hide or unhide fields as needed.
-
Click Save.
-
Repeat for Placement III, Placement IV, Placement V.
Creating Multiple Opportunity Tracks
Step 1: Set up the first Opportunity Track
-
Go to Admin > Field Mappings.
-
Expand the first Opportunity track.
-
This is the master list that controls all Opportunity types.
-
-
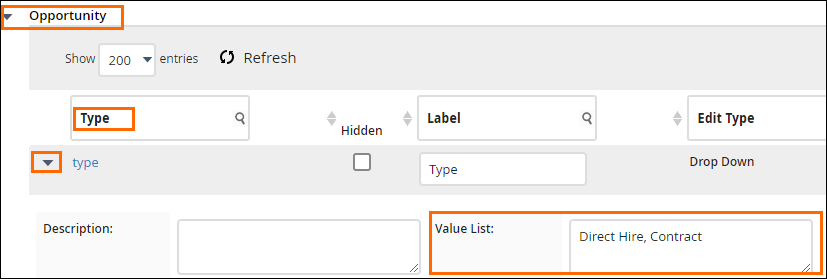
Filter for type and open the field.
-
Enter all Opportunity types your company uses (e.g. Direct Hire, Contract, RFI, RFP, etc.).
-
Keep the order aligned with Opportunity II–V. Example:
-
Direct Hire → Opportunity II
-
Contract → Opportunity III
-
RFI → Opportunity IV
-
RFP → Opportunity V
-
-
-
Unhide all fields you plan to use across any opportunity track.
-
Click Save.
Step 2: Set up each additional Opportunity track (Opportunity II–V):
-
Expand Opportunity II.
-
Filter for type and open the field.
-
Enter the single type for this track.
-
Hide or unhide fields as appropriate.
-
Click Save.
-
Repeat for Opportunity III, Opportunity IV, Opportunity V.