Understanding Bullhorn's Calendar Integration
| Editions Available: All Editions | Audience: |
Bullhorn’s calendar integration adds appointments and interviews created within Bullhorn to your third party calendar. In this article, learn everything you need to know about managing appointments. You can learn how to set up the integration, followed by an overview of how it works. Then, you can walk through the process of adding and editing appointments, and finally, see how to effectively manage them to keep everything running smoothly.
Pre-requisites
To use our calendar integration, your company must have your email integrated with Bullhorn.
How it Works
| Action | Outlook Calendar |
Google Calendar |
|---|---|---|
| Add / Edit a Bullhorn Appointment within Bullhorn | Add/update on your calendar |
Add/update on your calendar |
| Add an event within your third party calendar that is sent to a candidate’s or contact’s email address as recorded in Bullhorn | Creates Bullhorn appointment automatically |
Does not create a Bullhorn appointment |
| Update an event from within your calendar | Updates the Bullhorn appointment |
Does not update the Bullhorn appointment |
Appointments are calendar invitations that are sent to your email. Depending on your email settings, you may be required to manually accept these invitations to add them to your calendar. Check with your email provider to see how you can automatically add these invitations to your calendar if you don't want to have to accept them for them to appear on your calendar.
Do not forward the invitation to additional attendees from your email inbox. If you require additional attendees for an appointment/interview, see Scheduling Appointment with a Candidate or Contact.
Creating an Appointment
- Open the desired record.
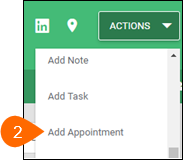
- From the Actions drop down, select Add Appointment.
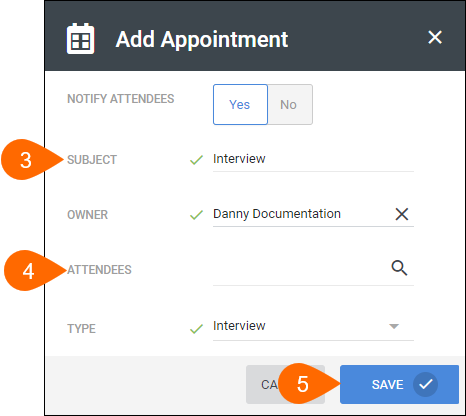
- Give the appointment a Subject.
- Add any Attendees.Note: Attendees are the candidate, contact, or colleague you'd like to invite to the appointment.
- Fill out remaining desired fields and Save.
- Type indicates the type of appointment and may impact reporting on your appointments so ensure you use the correct Type.
- Reference applicable Contact, Candidate, Job, Lead, or Opportunity so that the appointment will appear on those records.
Editing Appointments
If you need to edit anything on an appointment, such as adding more attendees or updating the date of the appointment, follow the steps below.
- Open the desired record.
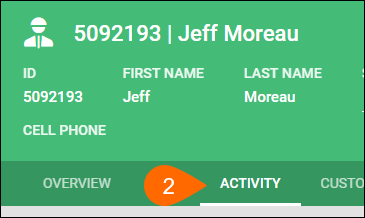
- Select the Activity tab.
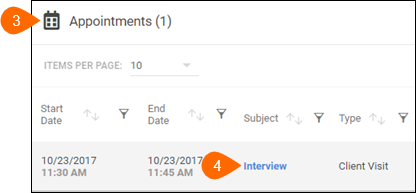
- Expand the Appointments section.
- Select the subject of the desired appointment.
- Select the Edit tab.
- Make any changes, then select Save.
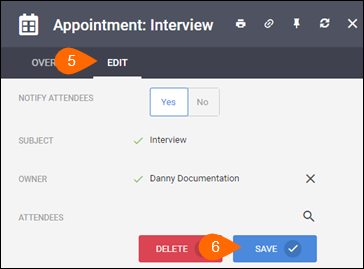
Adding new attendees or making any other changes will send an updated invite to all attendees. If you don’t want to send an update, toggle Notify Attendees.
Managing Appointments
You can view these appointments from within Bullhorn if you have access to Planner. The Planner is an aggregate of the Appointments section of the Activity tab found on all records. It will show you any appointments created within Bullhorn.
