Radio Fields
Overview
Radio boxes are used when a user may only select a single option from a list. This article highlights the steps for creating and placing radio buttons.
Steps
- Navigate to the Onboarding tab.

- Select the Documents tab.

-
Select the document you will be editing.

- If you need to upload a new document, see Uploading a New Onboarding Document.
- If you need to upload a new document, see Uploading a New Onboarding Document.
- From the field bank on the left, select Add New.

- Drag Add Radio Button from the field bank to the desired location on the document.
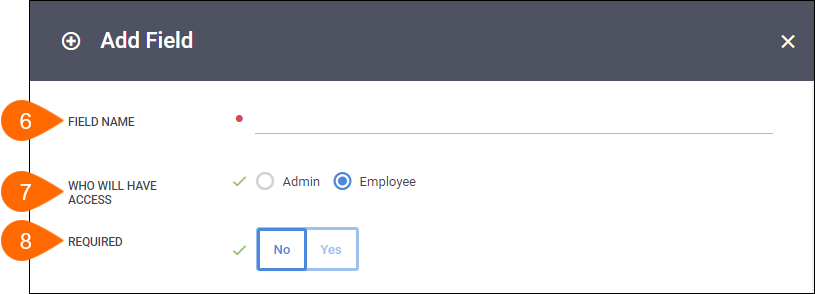
- The Add Field window will open so you can adjust the field settings.
- Enter in a name for the field.
- Choose who will complete the field.
- Select if the field is required to be completed.

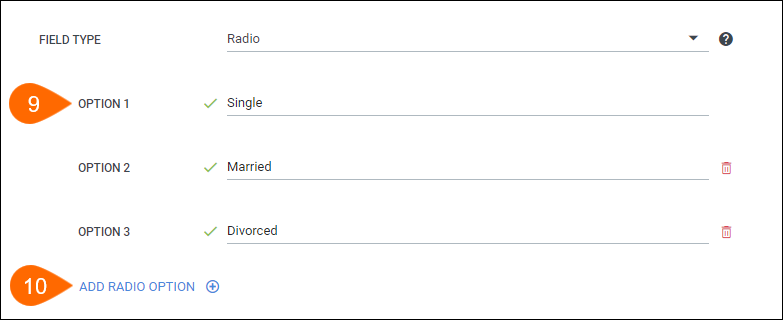
- In the Option # field, enter in a value that will appear in the dropdown list.
- Select Add Radio Option to add another option field.

- Repeat steps 9 & 10 for each option to include in the dropdown.
- Select Save to confirm your changes.

- On the Document Builder, the options that you created will all appear on the page.
Hold next to the field name and drag each radio button to the appropriate spot.
Next Steps
The following articles provide additional information on customizing how your fields will display.
Was this helpful?
