Tempo Installation Guide
Overview
Follow these steps to complete the installation of your Tempo.
Before you Begin
What's Included in the Box?
- Tempo unit
- Tempo mounting bracket with lock
- Drywall anchors x4
- Tempo USB Hub with Ethernet Adapter (ships pre-mounted to the rear of the bracket)
- Tempo power cable
- Wall mount template
Optional Hardware
- Ethernet cable
Your Tempo unit, adapters, cables, and bracket may vary in appearance from the equipment pictured.
Steps
Mounting Instructions
Verify the wall type and ensure you have the appropriate anchors and drill bits before installing.
- Mark the anchor holes using the included wall mount template. Make sure they are level before proceeding.
- Install anchors.
- Hang the bracket.
Powering On Tempo
- Connect your power adapter to a wall outlet.
- Open the lock on the mounting bracket. The code is 1-7-9
- Look at the back of your tablet to determine if it is a Dell, HP, or WinBook. See below for help identifying your tablet.
- Next, confirm that all cables are connected.

Please do not rearrange cables or disconnect from the USB Hub in the rear of the mounting bracket.
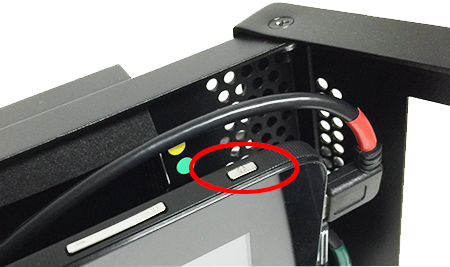
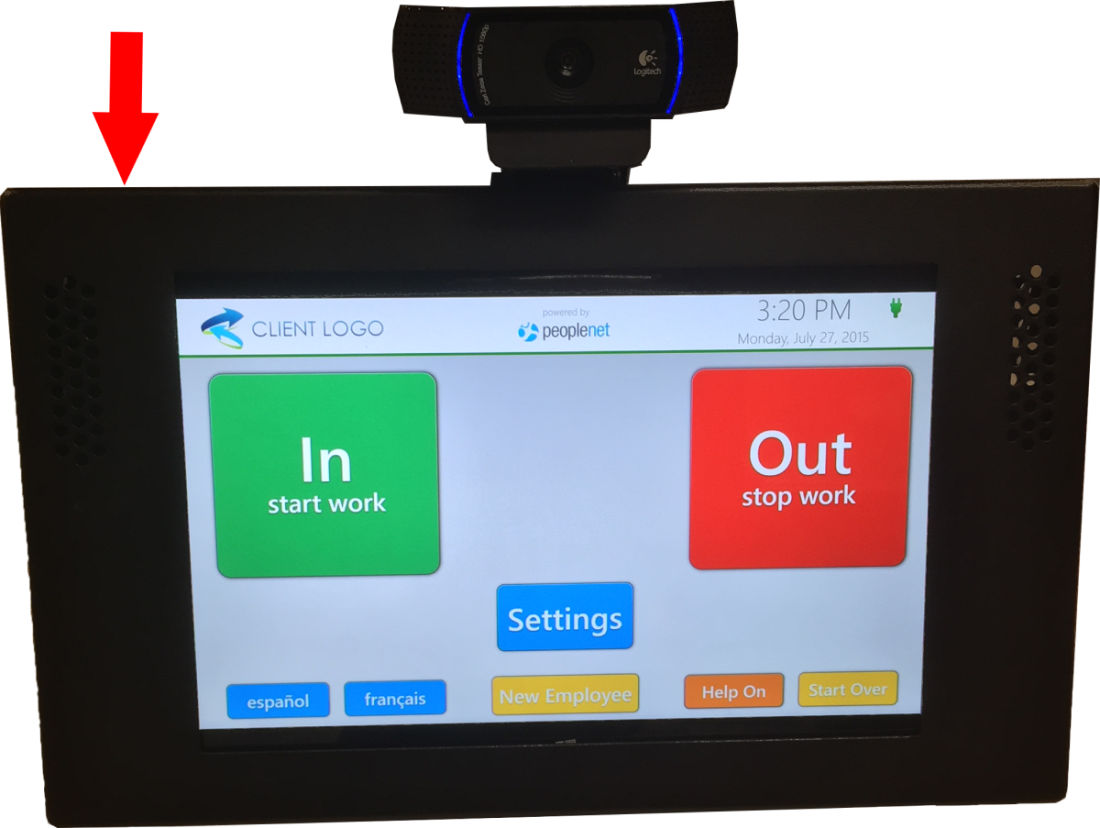
- Press and hold the power button on the upper right. Release after three seconds.
What does the power button look like?
- When you see the device power up, close the bracket and secure the lock.
- The Tempo application will automatically launch when the device is powered on.
Dell Tablet
-
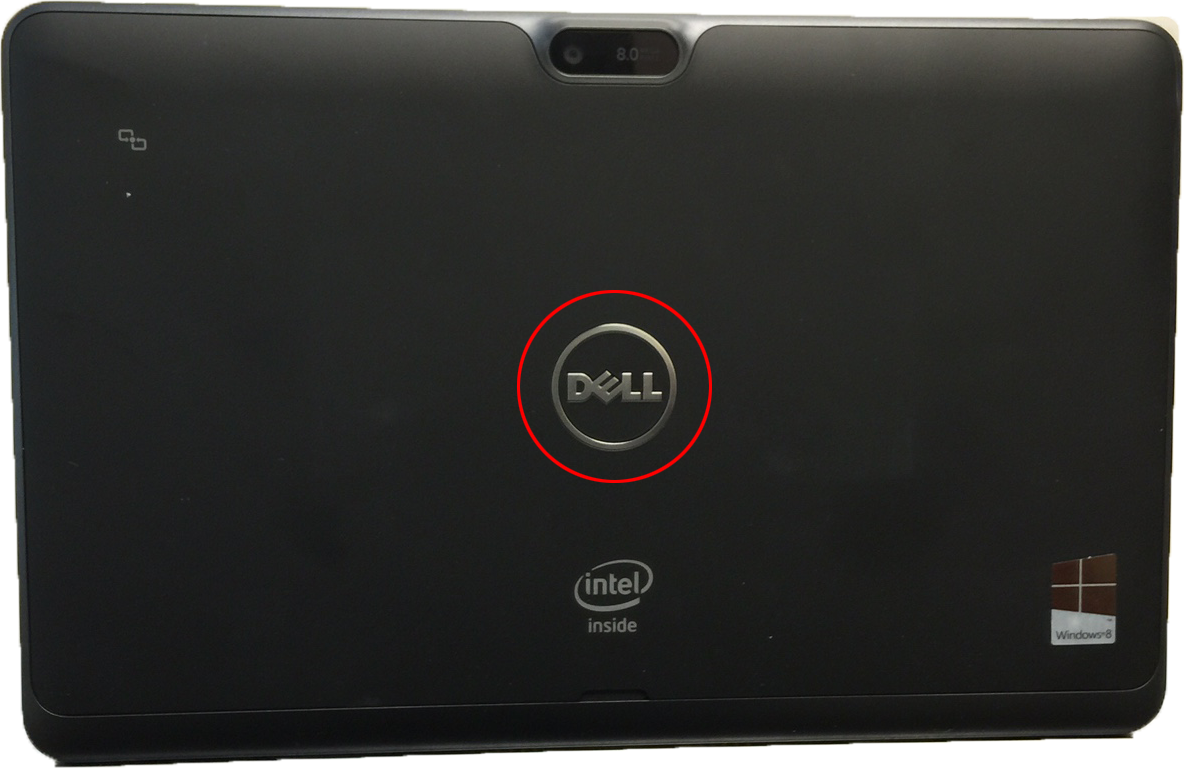
Dell devices are quickly recognized by the Dell insignia on the back side of the hardware.
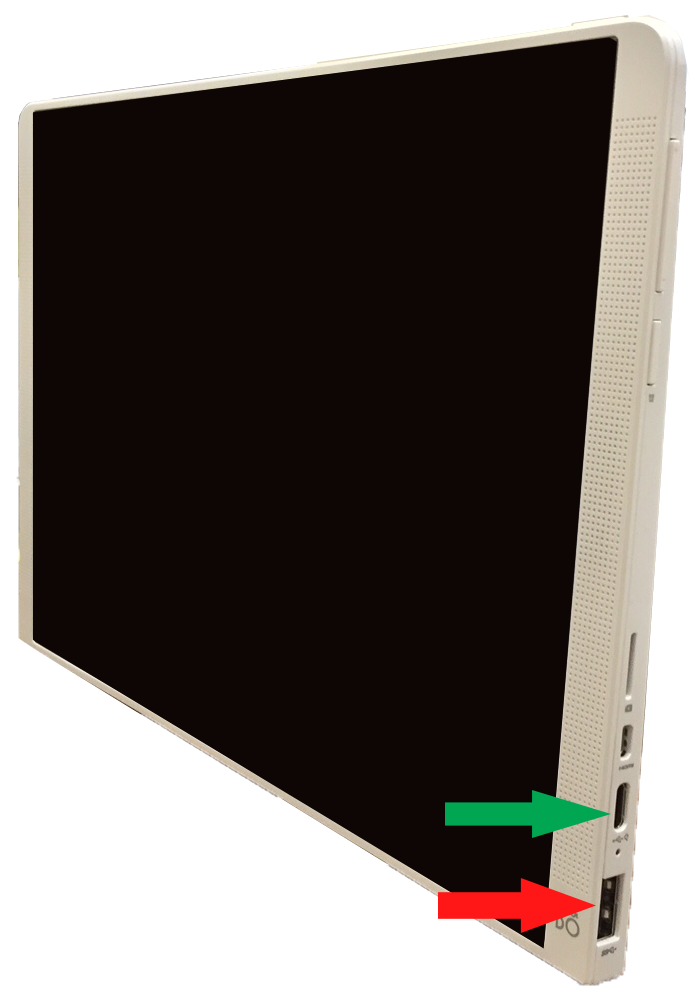
Your Dell hardware allows for connection of three cables. On most units, the correct connection ports are indicated with stickers.
- 3.5mm audio port: This is used to connect the Tempo Audio Help speaker to the tablet. On most units, this will be marked as the YELLOWcable. Match the YELLOW cable and sticker.
- Micro USB port: This is used to provide a constant stream of power to the device. This is the GREENcable as marked on most units. Match the GREEN cable and sticker.
- USB port: This is used to connect the tablet to the Tempo Ethernet adapter and Facial Recognition camera. Even if Facial Recognition is not enabled, please ensure that this cable is plugged in at all times. This cable will be marked on most units as the RED cable. Match the RED cable with the RED sticker.

This is the front of the Dell tablet.

This is the left edge of the Dell tablet.
HP Tablet
-
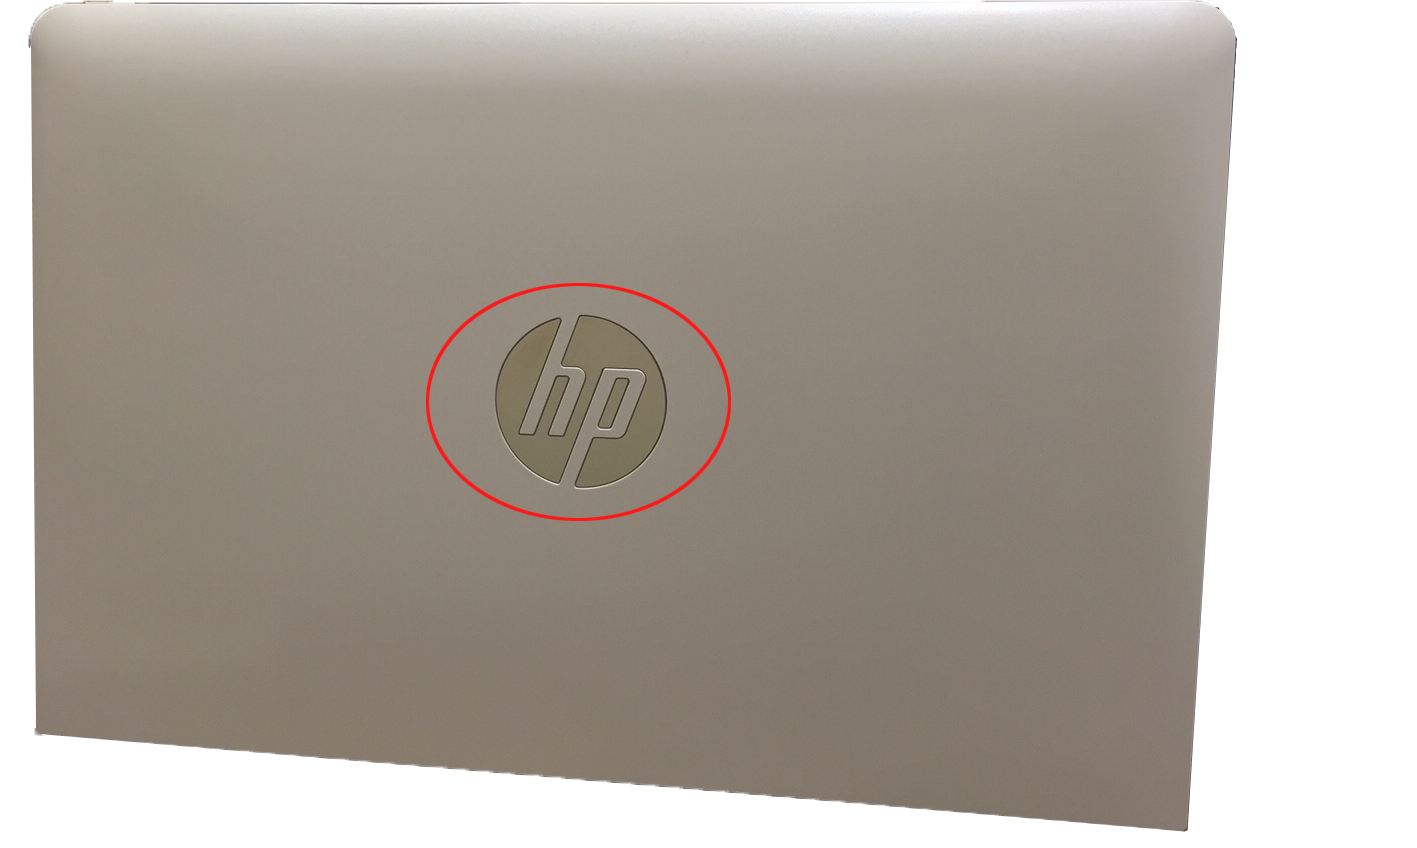
HP devices are quickly recognized by the HP logo on the rear of the hardware.
This is the rear of the HP tablet.
Your HP hardware allows for connection of three cables.
- Power port: This is used to provide a constant stream of power to the device. This is the GREENcable as marked on most units. Match the GREEN cable and sticker.
- USB port: This is used to connect the tablet to the Tempo Ethernet adapter and Facial Recognition camera. Even if Facial Recognition is not enabled, please ensure that this cable is plugged in at all times. This cable will be marked on most units as the RED cable. Match the RED cable with the RED sticker.
- 3.5mm audio port: This is used to connect the Tempo Audio Help speaker to the tablet. This cable is optional. Some devices will make use of the HP tablet's built in speakers. On most units, this will be marked as the YELLOWcable. Match the YELLOW cable and sticker.
This is the right edge of the front of the HP tablet.
Winbook Tablet
-
If your device is a Winbook, the back of the hardware will display a Winbook logo. It may look similar to the device pictured below.

Winbook allows for the connection of three cables. On most units, the correct connection ports are indicated with stickers.
- USB port: This is used to connect the tablet to the Tempo Ethernet adapter and Facial Recognition camera. Even if Facial Recognition is not enabled, please ensure that this cable is plugged in at all times. This cable will be marked on most units as the RED cable. Match the RED cable with the RED sticker.
- 3.5mm audio port: This is used to connect the Tempo Audio Help speaker to the tablet. On most units, this will be marked as the YELLOWcable. Match the YELLOW cable and sticker.
- Micro USB port: This is used to provide a constant stream of power to the device. This is the GREENcable as marked on most units. Match the GREEN cable and sticker.

This is the front of the Winbook tablet.

This is the right edge of the Winbook tablet.
Turn on Audio Help Speaker
Tempo is equipped with a single external speaker for Audio Help. Prior to shipment, we turn off the speaker to preserve battery life. When you receive your Tempo, please turn on the speaker to ensure that Audio Help can be accessed.
Some HP tablets may not use this external speaker. Those tablets will use the built in audio speakers that power up whenever the device is turned on.
When looking at the face of your Tempo unit, the speaker is mounted on the back side of the upper left of the wall bracket.
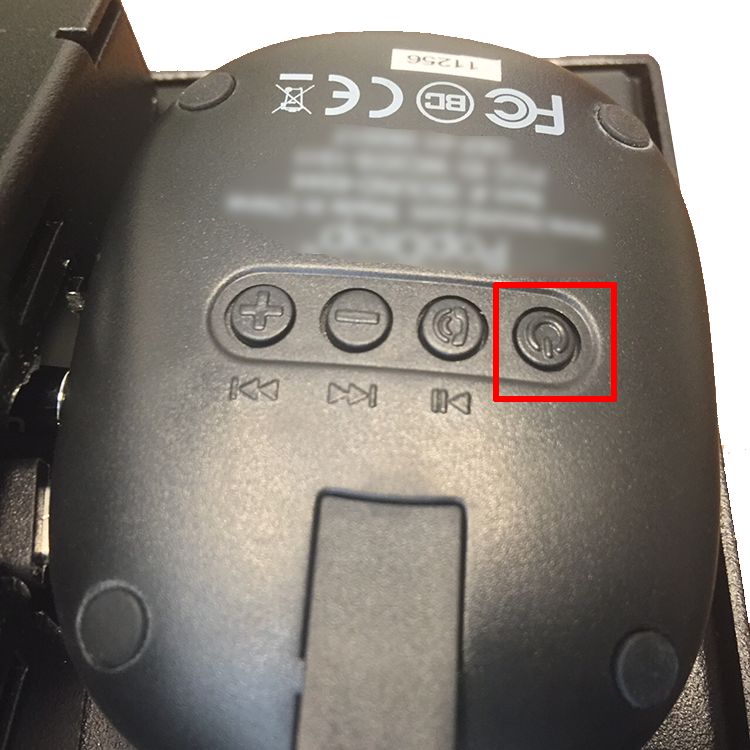
To turn on the Audio Help Speaker, first turn the mounting bracket so that you can inspect the rear. When looking at the rear of the bracket, the speaker will be at the upper right.
Firmly press and hold the power button (on the right) for 3 seconds to turn on the speaker. After three seconds, release the power button.
You will not hear any confirmation tones after turning on the speaker. If you hear a tone sound when pressing the power button, this indicates that the speaker is powered off and no audio will play. Wait a moment, then press and hold the power button again for 3 seconds.
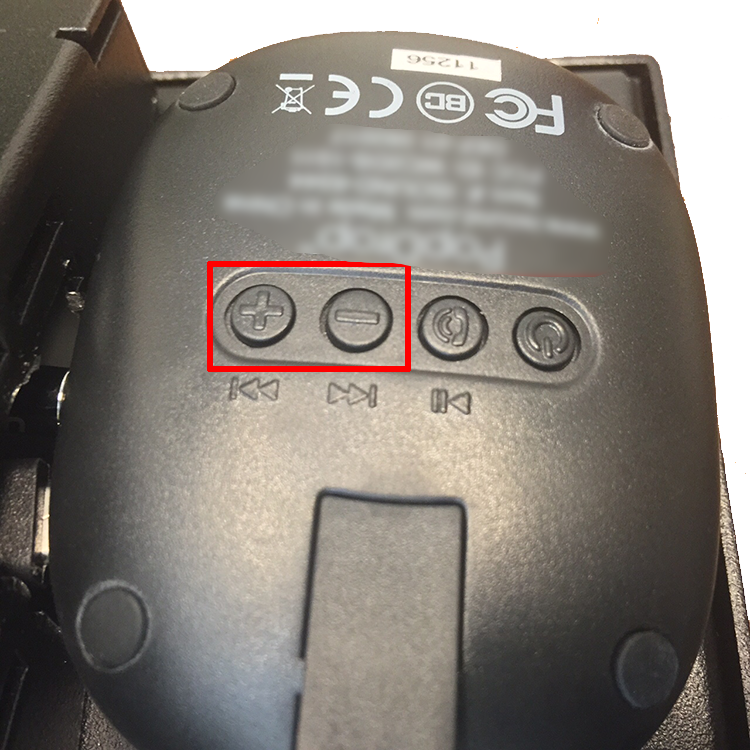
After turning on the Audio Help Speaker, touch the Help On button on the display to confirm that audio can be heard. You may adjust the volume using the + button (on the left) to increase volume or the - button (second from the left) to decrease volume.
Mounting Bracket Lock
- Use the code 179 to open the Mounting Bracket Lock.
- To secure the lock, turn the logo face down and snap it into place on the left of the bracket.
- When you secure the lock, the logo should hang facing forward.
Connect to Network
Now that the device is powered on, you must connect the Tempo to a network. Tempo must be connected to a network in order to send punches and download clock, employee, and department information.