Add Units
Overview
Units are used to track work related items outside of worked time. Units will vary by configuration and need. The examples shown here may be different from what you may encounter in your own account.
Steps
- Click on an employee’s name from the employee list screen of the Time Management Console to go to a time card.
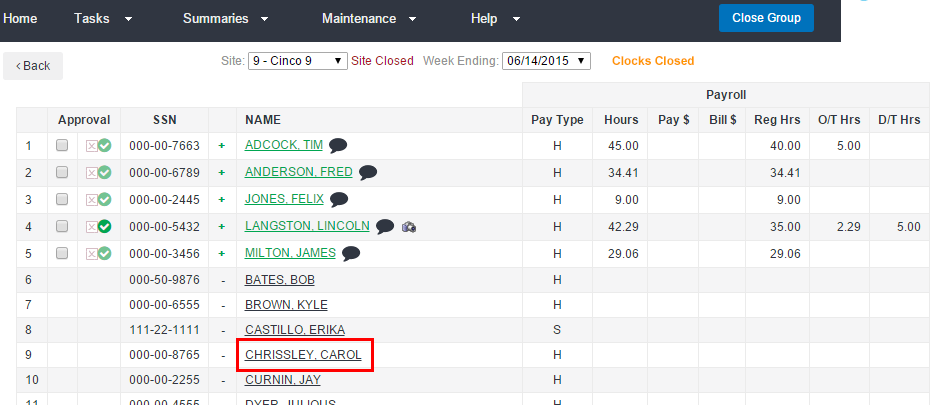
- To edit time details for an employee from the time card screen, click New Transaction.
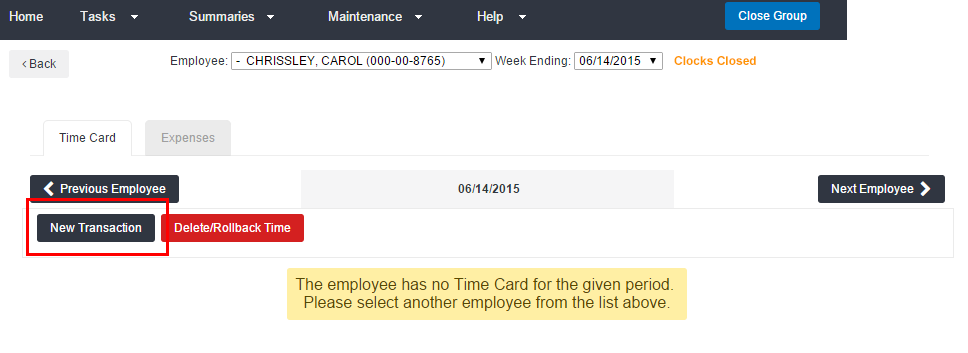
- From the New Transaction screen, click Add Units.
- Select the day from the Date drop-down.
- Select the appropriate assignment from the Assignment drop-down.
- Select the desired Units category from the Pay Code menu.
- Enter the Amount of Units.
- If needed, you can also specify the Shift or Shift Class with the Sft and Cl menus.
- Add any necessary comments.
- This is recommended for audit purposes.
- Click Submit to submit the entry.
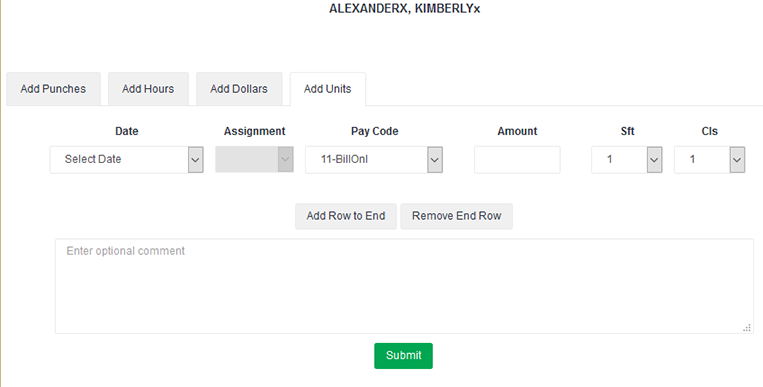
If entering multiple days, use Add Row to End to add a row for each day first, then follow steps 3-7 to quickly enter units for the week versus submitting one day at a time.
The added Units are represented as an adjustment on the right of the time card. Your initials will show as the source (Src) of the change.
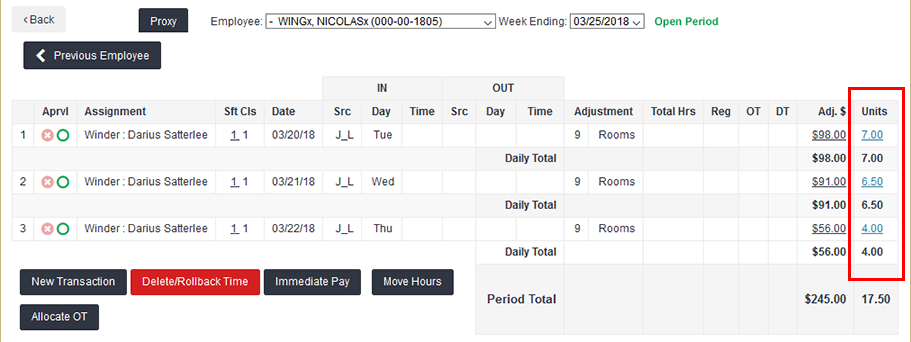
If Units have an associated dollar amount, you'll see updated dollar adjustments as well.
Was this helpful?