Manage Overtime/Holiday Schedule
Overview
This article contains the steps to create or update your Overtime and Holiday Schedule.
Steps
These steps will take you to the screen where you can either create new overtime day or editing an existing one.
- Select a group or branch.
- From the top menu select MAINTENANCE > Administration.
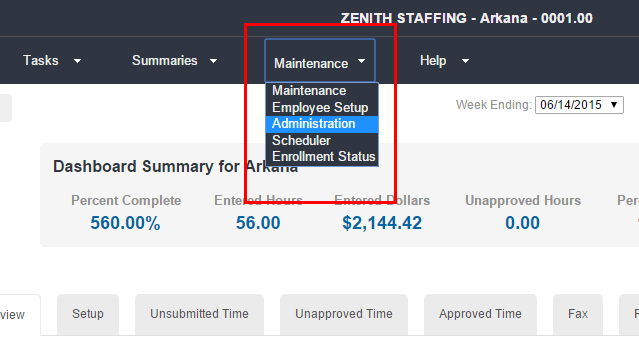
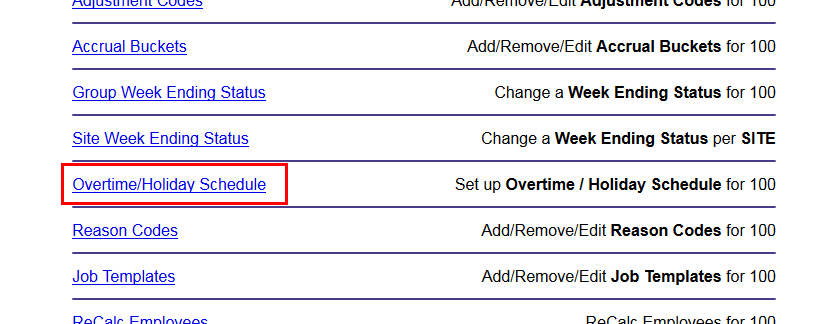
- Select the Overtime/Holiday Schedule.
New Overtime Day
- Select New Overtime Day.

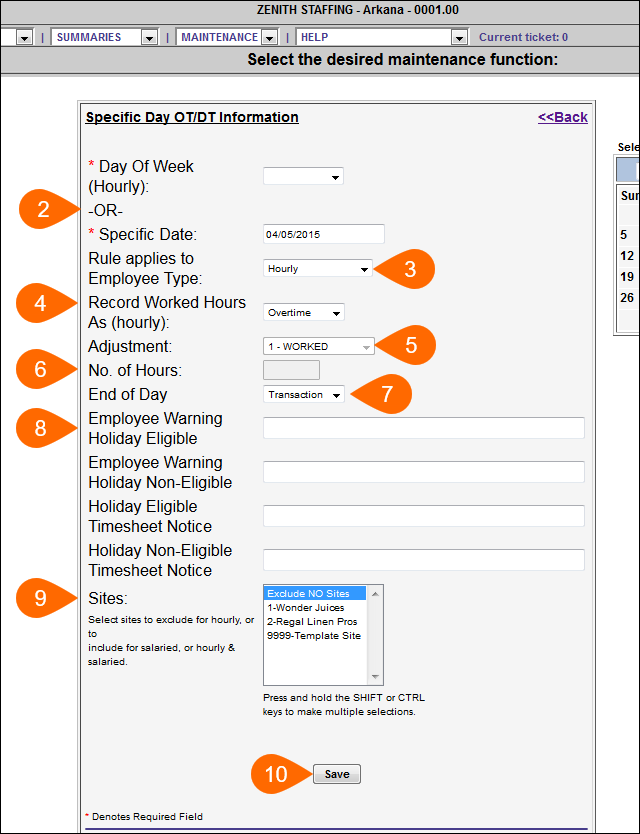
- Select a day of the week or a specific date for the overtime/ double time to apply:
- Select Day of Week to create a recurring weekly overtime day. This will mean that anyone working on the selected day will receive OT/DT for hours worked. This is commonly used if employees working on a particular weekday (like Sunday) should receive overtime or double time.
- Select a specific date to create a one-time overtime day. This configuration will not repeat and will only apply special pay for the specific date entered. Enter the date as MM/DD/YYYY.

You may select a Specific Date from the calendar on the right or enter a date in the field in a MM/DD/YYYY format.
- Select the Employee Type to which the special day applies:
- Hourly - only employees classified as Hourly in will receive the OT/DT if time is recorded on that day.
- Salaried - only employees listed as Salary in will be credited the total hours outlined in Step 5.
- Hourly & Salaried - employees listed as either Hourly or Salary will receive OT/DT. If time is recorded on that day by an Hourly employee, it will be considered OT/DT. Salary employees will receive a total adjustment of hours specified in Step 5.
- Temp - Only employees listed as Temp in will receive OT/DT for time recorded on that day.
- Record Worked Hours As (hourly) - Hours may be recorded as either Regular, Overtime, or Double Time. This setting only applies to Hourly or Temp type employees.
- Adjustment - a drop down menu that allows you to determine which adjustment code you want the hours worked on the overtime day to be reported as. For example, you may choose to classify the hours worked as Worked, Holiday, PTO or other. See Managing Adjustment Codes for more information on Adjustment Codes.
- No. of Hours - defines the total number of hours that should be applied to time cards for the day. This is only applicable to time applied automatically to salary type employees. If any combination of Hourly or Temp employee type is selected in Step 2, this option will not be available.
- End of Day - determines what is considered the end of day for time recorded on the overtime day:
- Transaction- if a shift starts on the overtime day and extends into the following day, ALL of the time recorded will be calculated as OT/DT.
- Midnight- if a shift start on the overtime day and extends into the following day, only time recorded up to midnight will be calculated as OT/DT. Time recorded after midnight will be calculated as default hours.
- Employee Warning and Notices - Allows customization of messages displayed to employees entering time online.
- Employee Warning Holiday Eligible - the message shown during time submit for employees with assignments classified as Holiday eligible.
- Employee Warning Holiday Non-Eligible - the message shown during time submit for employees with assignments classified as Holiday non-eligible.
- Holiday Eligible Timesheet Notice - the persistent message shown to employees in a week with a Holiday eligible assignment.
- Holiday Non-Eligible Timesheet Notice - the persistent message displayed for employees in a week with a Holiday non-eligible assignment.

All Holiday Warnings and Notice require additional configuration and may not be compatible with all agency set-ups.
- Sites - allows an administrator to select any specific sites to exclude for the overtime holiday. To make multiple selections press and hold the CTRL on your keyboard. By default, all available sites are included.
- Review the information entered. Click Save creates the new overtime day.
Edit Overtime Day
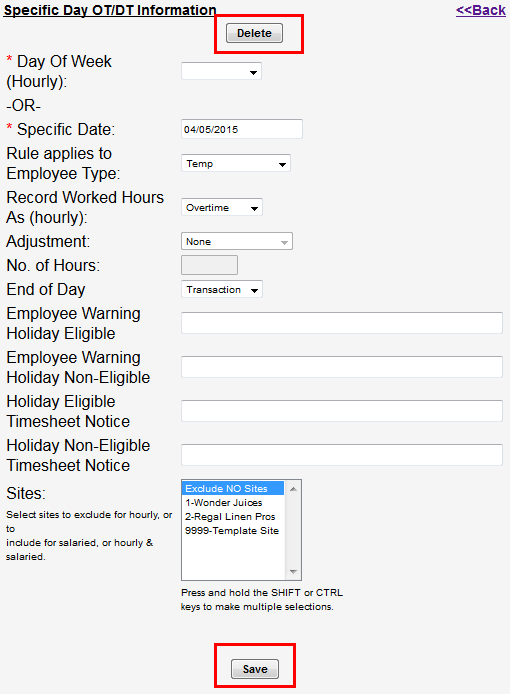
- To edit or delete a day listed, select the day by clicking the link.
- Make any changes needed to the overtime day and click Save to update.
- To delete, click Delete.
Was this helpful?