Override Overtime
Overview
If you need to change hours from one classification (Regular, Overtime, Double Time) to another for an employee for a period, use the Override OT feature.
For more information on adjusting the distribution of overtime hours between departments, see Allocate OT.
Steps
- Select Override OT on the time card you want to adjust.
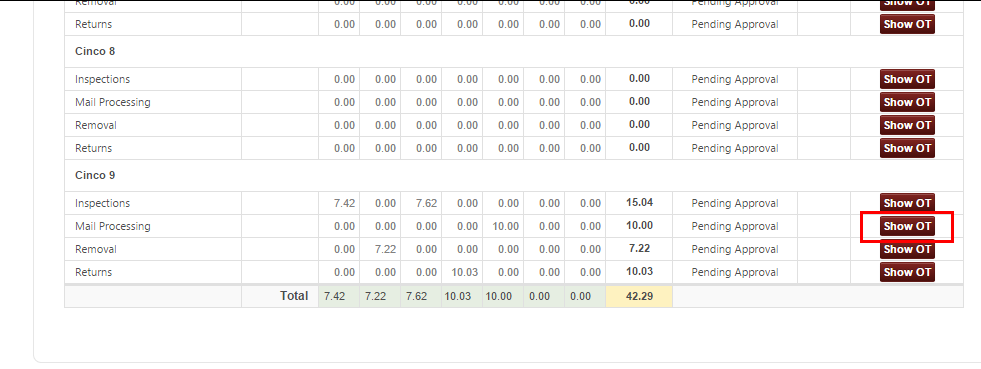
- In the window that appears, you will see a summary of the hours worked for the period sorted by site and department.
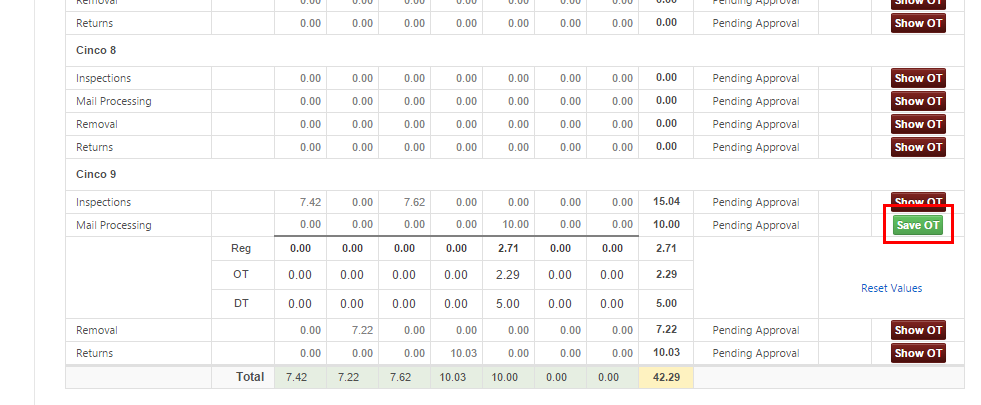
- To begin manually adjusting the OT allocations, select Show OT.
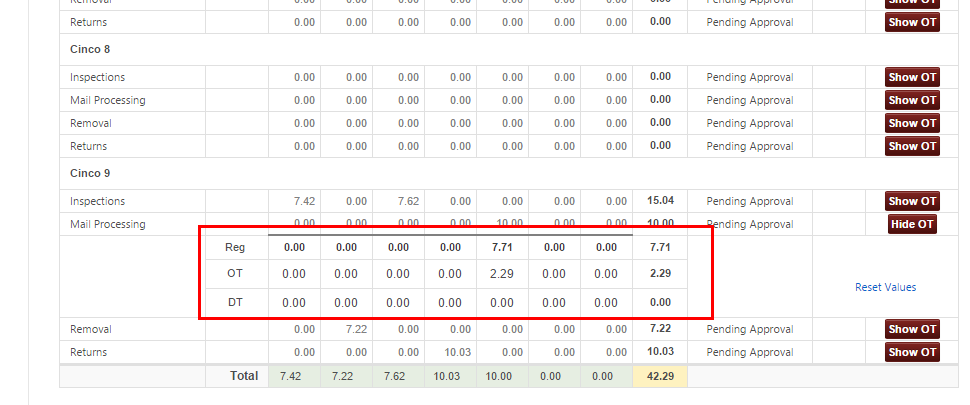
- The OT allocation table will expand for the site selected.
- Notice that the Regular hours are displayed at the top of the table.
- If you want to close the table, select
Hide OT on the right.
- You can begin entering the correct OT or DT values for each day by clicking into a cell and entering the correct number of hours.
- Notice that the Regular hours will adjust automatically based on what is entered in the OT and DT fields.
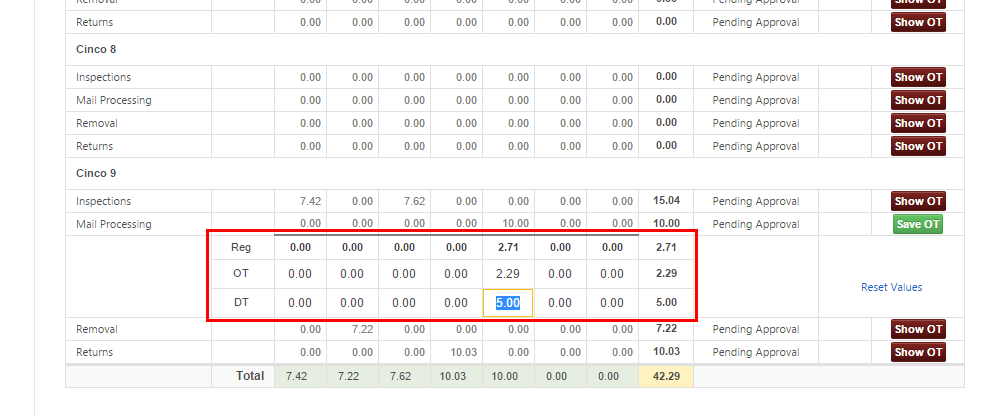
- When you're done adjusting any allocations, select Save OT and close the window to return to the time card screen.
-
If you want to reset all allocations to their original values, select Reset Values.
If there is only one site and department assigned to the employee you select, you will only see one site and department. If there are multiple sites and departments, you will see additional options on this screen.
If you adjust OT/DT allocations where breaks are deducted automatically, enter the total hours worked before any deductions. In other words, if a one hour break is deducted after eight hours, but you need to allocate all worked hours for the day to OT, enter eight hours in the OT field for that day.
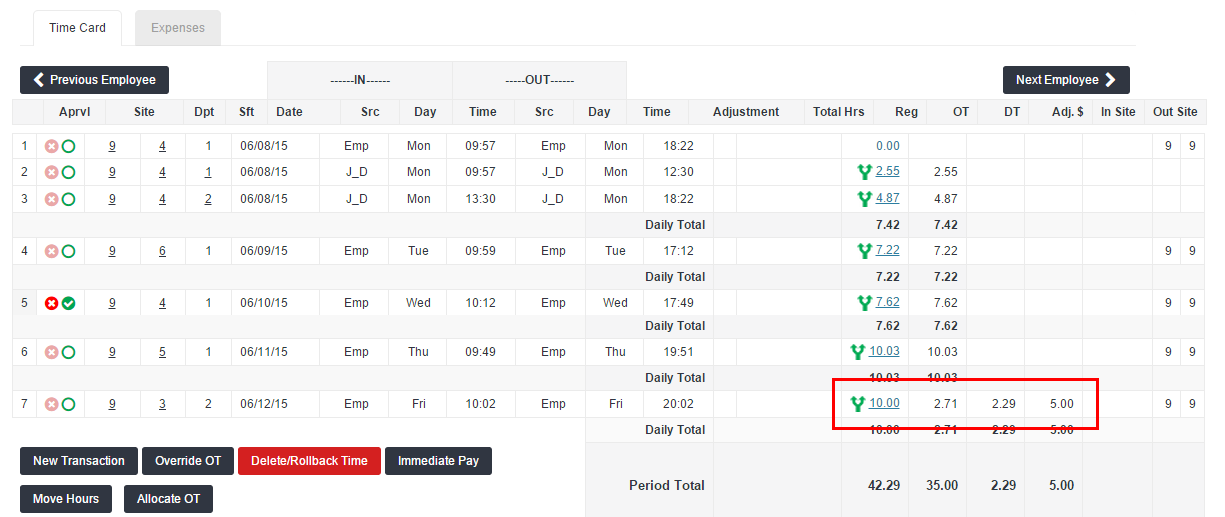
When you return to the time card screen, you will notice that the Reg, OT, and DT calculations have been adjusted to the values entered. Any time card with OT adjustments will look similar to the one displayed below.