Displaying a Chosen Date Range on a Report
If you have a report that runs using a dynamic date range, you can automatically display that range on your report so your users can be confident precisely what date range is covered by the report.

Before you begin, ensure you are working from a report that uses parameters for your date ranges, such as the Creating a Recruiter Activity Report
Adding the Block
A block holds the date range information so it aligns with the report contents properly. Follow these steps to add a block:
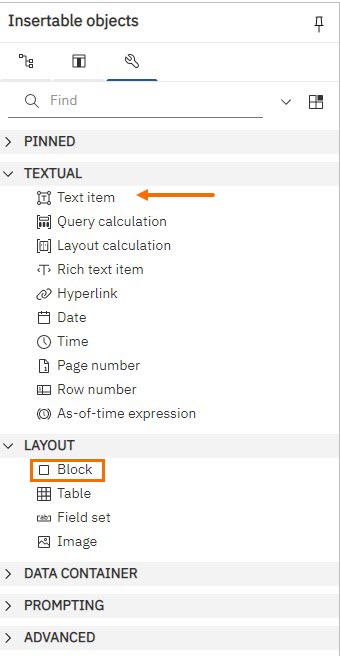
- Locate the Insertable Objects panel on the left side of your screen.
- Drag a Block to the desired location on your report.
- Drag a Text Item into the block.
Defining the Start of the Range
Next we will tell where to pull the beginning of the range from.
- Type “From” in the field and click OK.
- The date will begin immediately after the text you type. Include at least one space so your result would be similar to 'From January 1, 2023' versus 'FromJanuary 1, 2023'.
- Drag another Text Item to the right of the first.
- Type "date" into it and click OK.
- The word "date" is a placeholder for the starting date and will not display in the end result.
- Highlight date by clicking it once.
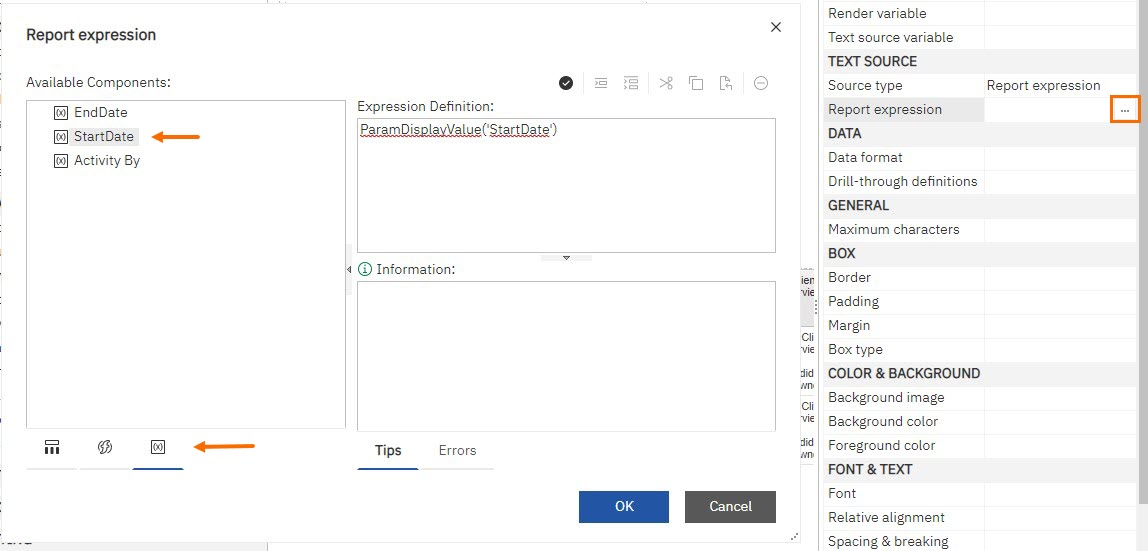
- In the Properties panel on the right, scroll down to Text Source. Select the Source Type and choose Report Expression.
- Select Report Expression and click on the three dots.
- Select the parameter for the start date in the pop up window and click OK.
Defining the End of the Range
Next we will tell where to pull the end of the range from.
- Drag another Text Item to the right of the last text item in your report.
- Type “To“ and click OK.
- Add spaces before and after this word so that your information doesn't run together
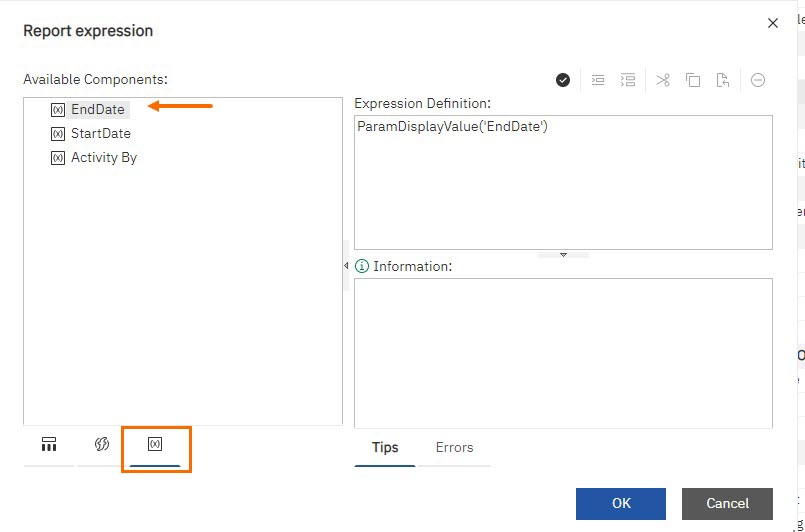
- Repeat steps two through seven, except choose the parameter for the end date.
You’ve now added a block at the top of your report that shows what dates your report includes. Save and Run the Report to ensure your dates display correctly.